Since the lilacs are in bloom, I decided to preserve some of them and make lilac infused vinegar. As long as they are grown where chemicals haven’t been sprayed, lilacs blossoms are edible. The flavor is floral, with a touch of spice.
I use the lilac vinegar in salad dressings, marinades and in pickling. I like to add a splash to soups or chili, to brighten them up. I also use lilac vinegar as a base for lilac jelly.
To make lilac vinegar, just place clean lilac blossoms in a jar and cover with red wine vinegar.* Put a lid on the jar and store in a cupboard for 10 days or longer. Ideally, you want at least one cup of blossoms for every 2 cups of vinegar- to get enough lilac flavor into the vinegar. A one to one ratio- one cup blossoms, one cup vinegar, will give you an even more flavorful vinegar in the end.
When ready to use, strain out the blossoms and discard them. Pour the vinegar through a coffee filter to get out any remaining plant material. You can transfer the lilac vinegar to a decorative bottle. It can be stored at room temperature but will hold its color longer if kept cool, even refrigerated.
* always use vinegar that is 5% acidity. You can use white wine vinegar, cider vinegar or whatever vinegar you like.
Lilac Salad
4-6 cups mixed salad greens, washed and spun dry
Olive oil
Lilac vinegar
Salt and pepper to taste
Edible flowers, optional
Place greens in a salad bowl. Drizzle with a little olive oil and toss until leaves look glossy. Drizzle with a little lilac vinegar and toss. Season with salt and pepper and toss again. Add flowers, if desired and place in serving bowls.
With Cinco de Mayo coming up, I thought it was time to re-post the recipes for homemade tortillas.
If you never made tortillas because you thought they were too hard to make, I hope I can change your mind. Tortillas are pretty easy to make. They only have a few ingredients- although you can get creative and add more stuff. The dough is simple enough. Once made, you just need to roll it out into circles. Heck, you only need to roll them into something resembling a circle. They will taste the same, even if they aren’t perfectly round.
Cooking involves a hot skillet and 30 seconds per side. The flavor and texture are so much fresher than most of what you can buy. Certainly fresher than what is at the local grocery store.
While it is easier if you have a tortilla press, I roll mine out by hand all the time. You could also use a pasta machine for rolling- although that will limit their width.
There is a little fat in most recipes- traditionally lard- but you have wiggle room here, too. I used coconut oil and was very happy with the taste and texture. So here are three recipes for tortillas- corn, wheat and whole wheat.
Corn Tortillas
1 3/4 cups masa harina ( corn flour) it is finer than cornmeal and will give you a nicer end product 1 1/8 cups hot water
In a medium bowl, mix together masa harina and hot water until thoroughly combined. Turn dough onto a clean surface and knead until pliable and smooth. If dough is too sticky, add more masa harina; if it begins to dry out, sprinkle with water. Cover dough tightly with plastic wrap and allow to stand for 30 minutes. Preheat a cast iron skillet or griddle to medium-high. Divide dough into 15 equal-size balls. Using a tortilla press, a rolling pin, or your hands, press each ball of dough flat between two sheets of plastic wrap. Immediately place tortilla in preheated pan and allow to cook for approximately 30 seconds, or until browned and slightly puffy. Turn tortilla over to brown on second side for approximately 30 seconds more, then transfer to a plate. Repeat process with each ball of dough. Keep tortillas covered with a towel to stay warm and moist until ready to serve.
Note: I often add a little salt to the dough. It is optional, but it does add a nice flavor. 1 teaspoon per batch seems about right.
Whole Wheat Flour Tortillas
1 cup all-purpose flour 4 cups whole wheat bread flour 1/2 cup fat, you could use lard, shortening or coconut oil – something solid at room temp- not oil 2 tablespoons salt 1 1/2 cups boiling water flour for rolling
In a large bowl, stir together 1- cup all-purpose flour, whole wheat flour and salt. Rub in the fat by hand until the mixture is the texture of oatmeal. Make a well in the center, and pour in the boiling water. Mix with a fork until all of the water is evenly incorporated. Sprinkle with a bit of additional flour, and knead until the dough does not stick to your fingers. The dough should be smooth. Make balls the size of golf balls, about 2 oz. each. Place them on a tray, and cover with a cloth. Let stand for at least 1 hour, or up to 8 hours. Heat a griddle or large frying pan over high heat. On a lightly floured surface, roll out a tortilla to preferred thinness. Fry one at a time. Place on the griddle for 10 seconds, as soon as you see a bubble on the top, flip the tortilla over. Let it cook for about 30 seconds, then flip and cook the other side for another 30 seconds. Roll out the next tortilla while you wait for that one to cook. Tortillas can be refrigerated or frozen. Makes 18.
Flour Tortillas
2 c. flour 1/4 c. fat, you could use lard, shortening or coconut oil – any fat solid at room temp- not oil 1 t. salt 2/3 c. warm water
Combine flour and fat by cutting in to resemble coarse crumbs. Dissolve salt in water and stir into flour mixture. Form into a ball and knead on a lightly floured surface 2-3 minutes or until it is smooth. Divide dough into 12 equal pieces and wrap each in plastic wrap. Allow dough to rest 30 – 60 minutes. On lightly floured surface roll out a piece of dough into a 7-inch circle. Cook dough on griddle or in a skillet over medium high heat until puffy and golden on both sides, 1-2 minutes. Wrap in a kitchen towel and repeat process with remaining dough, stacking and wrapping as you go. Makes 12.
This time of year, I always get requests about how to make candied violets. I thought I would share the recipe again.
Since my yard is full of violets right now, I decided to candy some today. It’s an easy way to enjoy these delicate flowers throughout the year.
I use them to decorate baked goods. Lovely on a cake, they also add a sweet touch to cupcakes.
Candied Violets
Powdered egg whites (see note) Water Superfine sugar (see note) Fresh violet flowers, rinsed and drained on paper toweling- Not African violets
Following package directions reconstitute egg whites to the equivalent of one or two egg whites. You can dilute them a little to make them easier to brush on. Place sugar in a shallow bowl. With a food-grade fine brush coat a violet with the egg white and press into the sugar. Place on wax paper and repeat with remaining flowers. Allow to dry for about a week. Store in a container with a tight fitting lid in a cool place. I like to store them in the freezer.
Note: By using powdered egg whites, you remove the risk of salmonella from using raw eggs whites. Powdered egg whites can be found in some grocery stores and in cake decorating and candy making shops. Meringue powder can also be used.
Superfine sugar, egg whites and violetsFreshly dipped violetLet violets dry about a week before storingLemon cake with candied violets
I am always interested in new and different ways to use my edible flowers. A few years ago, I started making jelly with my violets. I started by making violet-infused vinegar from some of the violets. I like the vinegar for dressing salads.
I decided to use some of the violet vinegar as a base for the jelly. It worked out great. The end product had a sweet taste of violets, but the vinegar added a tartness I really liked. It also came out a stunning pink color.
Since the violets are steeped in vinegar- you can harvest over several weeks- just keep adding blossoms to the vinegar. If you don’t have a lot of blossoms at once, you can harvest a few at a time over a longer period of time. The violets in vinegar will keep, so you don’t have to make the jelly right away.
I like to have equal parts flowers and vinegar for a nice strong floral flavor, but you can get by with fewer blossoms if you need.
Start with a clean jar, and put your violets in it. Pour vinegar over to cover. White vinegar or white wine vinegar can be used. Heck you could probably use red wine vinegar, too. Cider vinegar might affect the color. You can continue to add flowers to the jar as you pick them. I picked 4 cups of violets and put them in a quart mason jar. I added vinegar to fill the jar, closed it up and let the flavors blend for a week. I could have let it sit longer if I was too busy to get to it. If you are in a hurry and want to make the jelly right away just heat up the vinegar and steep the flowers.
After a week, I strained it out then poured the mixture through a coffee filter to get it really clear. I ended up with 3 1/2 cups of violet “vinegar” to use for my violet jelly. I had a basic idea of how much sugar I would need so I went from there. It worked out great and jelled perfectly.
Violet Jelly
3 1/2 cups violet vinegar*
1/2 c. lemon juice
1 box powdered pectin (1 3/4 oz.)
5 c. sugar
Wash and prep jars and get water bath heating up. Place violet vinegar in pan and add lemon juice and pectin. Bring mixture to a rolling boil over high heat. Add sugar and return to the boil. Stir often. Once mixture gets to a full rolling boil, boil 1 minute. Remove jelly from heat and skim off any foam. Ladle hot liquid into jars leaving 1/4 inch headspace. Wipe rims and adjust lids. Process in a boiling water bath for 10 minutes for 4 oz. and 8 oz. jars. Remove jars to cooling rack and check seals once they have cooled down. Yield: about 7 half pint jars or 13-14 (4 oz.) jars.
*For 3 1/2 cups of violet vinegar you will need 3-4 cups of blossoms and 3 1/2 cups of vinegar.
I love sweet potato pie. I am always surprised when someone tells me they have never had it. Maybe it is a north/south thing? I have made it for friends several times, and there is always someone who says they never had a sweet potato pie before. Once they taste it, they love it. We made this in class last night and several students said they had never had it before.
I used to work with a wonderful woman named Hazel Pruitt. She grew up in Alabama and taught me so much about southern cooking. I first made collard greens with Hazel. She also taught me how to make sweet potato pie. This is her recipe and I want to share it with you. I think of her every time I make it.
I used a family recipe for the crust, but use whatever crust you like. The recipe makes two crusts, so you can l use the other half of the dough for another pie or freeze for later
.
Hazel’s Sweet Potato Pie
½ c. sugar
1 t. cinnamon
½ t. allspice
½ t. salt
¼ t. cloves
1 ½ c. cooked, mashed sweet potato, about 1 very large sweet potato
2 eggs, beaten
1 c. milk or half and half
2 T. melted butter or 2 T. olive oil
1 (9-inch) unbaked pie crust
Combine sugar with seasonings. Stir in remaining ingredients and combine until smooth. Pour into pie crust and bake in a preheated 400 degree oven for 40 minutes, or until filling is set.
Flaky Pie Crust
2 c. flour
1 t. salt
3/4 c. shortening or butter, chilled
1 T. cider vinegar
4-5 T. cold water
Combine flour and salt and cut in shortening or butter. Toss in vinegar and water 1 tablespoon at a time until dough holds together. Use a fork to toss the ingredients together and as soon as the mixture holds together stop adding water. Makes 2. Chill well before using.
The curious name for this recipe comes from my own curiosity. I wondered just how many blossoms I would need to get about a cup and a half of petals. I decided to make muffins with some of the dandelions blooming in my yard. I have a lot of dandelions, and I wanted to use a really decent amount in my muffins. I started counting as I trimmed them and stopped when I had a cup and a half. It turned out to be 100 flowers. So now, if you want to make this recipe, you will know when you can stop picking!!!
If you can’t beat them, eat them. I actually am a big fan of dandelions. I have organized dandelion cook-offs and edited a dandelion cookbook. I eat the leaves, and a tea made from the roasted roots. The flowers are a wonderful ingredient in cooking, too. They are used to make dandelion wine and I enjoy adding them to fritters, pancakes and other baked goods. So here is my recipe for dandelion muffins. They are pretty tasty, tender, light and not too sweet.
100 Flower Dandelion Muffins
2 c. flour
1 T. baking powder
½ t. salt
1 egg, beaten
1½ c. half and half
1/3 c. honey
¼ c. melted butter
1 t. vanilla
1 t. orange zest
1 ½ c. dandelion petals*
Preheat oven to 375 degrees. Line 12 muffin cups with paper liners or grease them, set aside. In medium bowl, combine flour with baking powder and salt and set aside. In another bowl, combine egg with half and half, honey, butter, vanilla and orange zest. Beat by hand until well mixed. Stir in dandelion blossoms, then stir in flour mixture. Do not over mix. Stir just until flour is mixed in. Spoon batter into prepared pans, filling them about ¾ full. Bake for 20 minutes or until lightly browned on top. Great served warm with butter and honey. Makes 12.
* To prepare the dandelion blossoms you want to trim of the tough base and just use the petals in the recipe. Some of the green sepals will get mixed in, and that is OK. Measure the petals after trimming. I picked 100 flowers and ended up with about 1½ cups of petals.
It’s funny when you think about it. People spend tons of money to eradicate dandelions from their lawns, but will go to an upscale restaurant and pay good money for a salad with mixed greens including dandelions. Dandelions were not always considered a weed. In fact, immigrants brought the seeds to America as a vegetable.
While the greens can be bitter, they can also be tamed when paired with certain ingredients. Combining dandelions with tomatoes, vinegar, cheese or other dairy products, and bread or cereal products will make them less bitter when eaten.
Dandelions are packed with nutrients, and if you don’t spray your yard with herbicides, you can likely find them under your own feet. Free, tasty and nutritious. Sounds like a win all around.
The plant is pretty much edible from top to bottom. The leaves for salads, soups and other dishes. The flowers are used for wine, jelly and the “burger” recipe at the bottom of this page. I recently baked dandelion flowers into muffins. The roots are roasted and used as a substitute for coffee. If you haven’t eaten dandelions before my only question is, what are you waiting for?
A classic dish using dandelions is dandelion gravy. Some versions use bacon, others not. This one uses bacon, sour cream and is served with boiled potatoes.
Dandelion Gravy
Dandelion Gravy
4 strips bacon 3 T. flour 1 c. water 1 lb. dandelion greens, washed and chopped ½ c. sour cream 1 T. sugar 1 T. vinegar Salt and pepper to taste Hot boiled or baked potatoes Fresh chopped parsley, optional
Chop bacon and cook in skillet until crisp. Leave bacon in the pan. Remove all but 3 tablespoons of the bacon fat and stir in the flour until smooth. Add water and dandelion greens and cook over medium heat until greens are tender- about 5- 10 minutes. Add more water if mixture is too thick. Turn off heat. Combine sour cream with sugar and vinegar and stir into dandelion mixture. Adjust seasonings. Spoon gravy over potatoes. Serves 4.
Note: If you want leave out the bacon instead add 3 tablespoons of oil to skillet along with the flour.
The next 2 recipes come from Dr. Peter Gail, my mentor and dearly loved friend. I will always remember Peter when I cook with dandelions.
Dandelion Pita Pizza
Pita bread, toasted English muffin, or toasted bread Spaghetti or pizza sauce Fresh dandelion greens of any age, chopped fine Grated cheese (any kind) Cover bread with sauce, add chopped greens, top with cheese, and toast in oven until cheese melts. For a more sophisticated treat, chopped dandelion greens may be sauteed in olive oil with onions, mushrooms and several cloves of crushed garlic, and then spread on the pizza and topped with cheese.
Dandy Burgers
1 cup dandelion flowers, green removed ½ cup flour, any kind 1/4 cup onions, chopped fine ½ tsp salt ½ tsp garlic powder 1/4 tsp thyme 1/4 tsp basil 1/4 tsp rosemary 1/8 tsp pepper enough milk to make thick batter. Peel dandelion flowers and put in 4 quart mixing bowl. Add onions and mix together. Blend flour and seasonings together, add to the flowers and onions, and blend thoroughly. Add milk slowly, blending it in until you have a thick batter. Heat olive oil in frying pan to cover bottom. Form batter into golf-ball-sized balls. Place in oil, and squash down flat to make a 2″ diameter patty. Fry till brown on both sides. Remove and serve on small rolls as you would hamburger sliders.
This post is dedicated in loving memory of Dr. Peter Gail
When I want a special breakfast, I make waffles. No one ever complains when you make waffles for breakfast. Or if you make waffles for lunch or dinner, for that matter. The response is even better when you make Belgian waffles. At least that has been my experience. My theory is, that because Belgian waffles are bigger, people love them even more.
These waffles are light and rich at the same time.
Belgian waffles can be used as a dessert, too. For dessert, just top them with ice cream, chocolate sauce or whipped cream – or all three.
You can even freeze any extras. Oh, who are we kidding? There aren’t going to be leftovers. But if there were, you could freeze them.
Cinnamon-Vanilla Belgian Waffles
2 c. all-purpose flour 3/4 cup sugar 3-1/2 teaspoons baking powder 2 t. cinnamon 2 eggs, separated 1-1/2 cups half and half- or milk 1 cup butter, melted 2 t. vanilla extract
Sliced fresh strawberries, powdered sugar or syrup
In a bowl, combine dry ingredients. In another bowl, lightly beat egg yolks. Add milk, butter and vanilla; mix well. Stir into dry ingredients just until combined. Beat egg whites until stiff peaks form; fold into batter. Bake in a preheated waffle iron according to manufacturer’s directions until golden brown. Serve with strawberries, powdered sugar or syrup. Yield: 10 waffles (about)
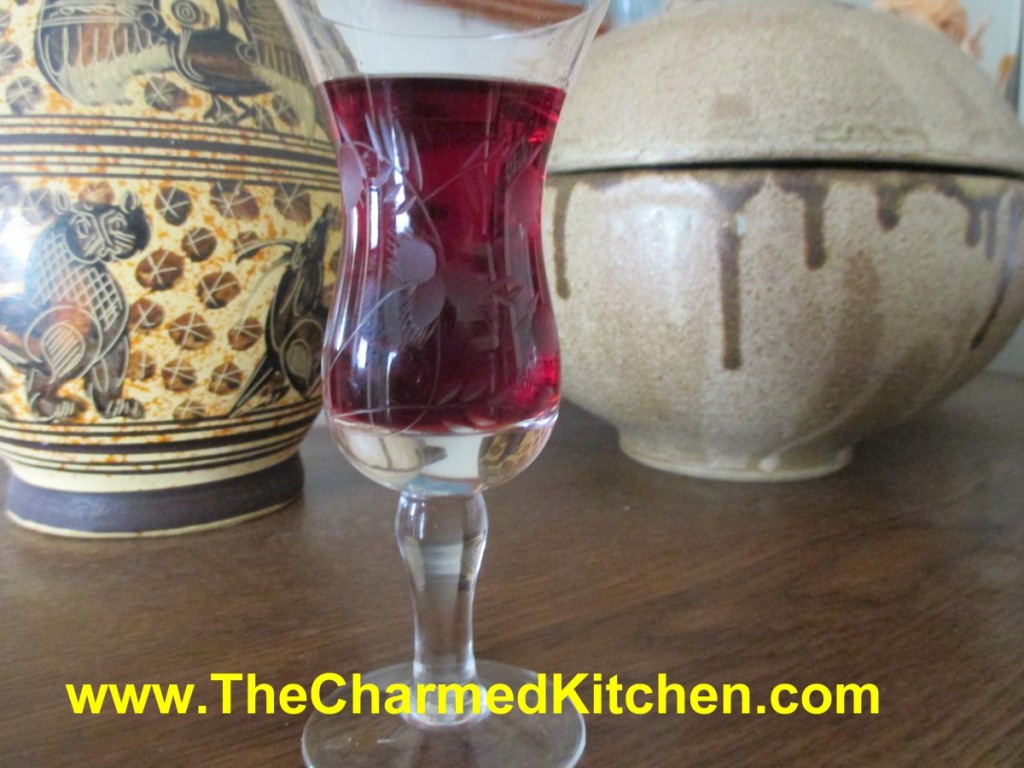
I have received requests for directions on how to make violet liqueur. Violet liqueur is, in its most basic sense, a combination of violets and vodka, steeped together for several weeks, then strained and filtered. Once strained, the mixture is sweetened to taste with simple syrup. You can use other alcohols, if you like. Brandy perhaps.
Violet liqueur can just be sipped and enjoyed as is, but it is often used as an ingredient in cocktails.
I have made violet liqueur with the violets that grow in my yard. They are mostly white, with a small amount of purple color. The liqueur tastes great, but doesn’t have a lot of color. It comes out a light golden color. That is fine with me.
For this batch, I am using purple violets I got from a friend’s garden. The color will end up a light purple color. To make the color of your liqueur more purple, you can add a few raspberries or blackberries to the mix.
We need to talk about sweetening, too. A simple syrup is added to suit your taste. The recipe for simple syrup is at the end of this post. How sweet you make your liqueur determines whether it is a liqueur, or creme de violette. Lightly sweetened and it is violet liqueur. Double the amount of simple syrup and it is creme de violette. Strictly your choice and preference.
If you prefer to leave your violet mixture unsweetened, it is a violet eau du vie, which translates to violet water of life.
I use 1/2 cup of simple syrup for each cup of liqueur. Equal amounts of liqueur and syrup creates the creme de violette.
Violet Liqueur
1- 1 1/2 c. violet flowers, rinsed and drained
1 c. vodka
1″ piece vanilla bean, optional
a few fresh raspberries or blackberries, optional
1/2 c. simple syrup recipe follows
Combine violet flowers and vodka in a jar with vanilla bean and berries, if using. Screw on the lid and place the jar in a cool, dark place for at least 3 weeks for the flavors to combine. You can add more violets as you harvest them, if you don’t have enough at first. After a few weeks, strain out the flowers and other ingredients and discard them. Filter vodka mixture through coffee filters or several layers of cheesecloth to get it really clear. Sweeten to taste. Return to jar, seal and allow flavors to mellow another week. Enjoy!!
Simple Syrup
Simple syrup is made from 1 cup of sugar and ½ cup of water. Bring to a boil, then cool. You will have 1 cup of syrup. You can sweeten with honey, if you prefer. Watch when you substitute honey for sugar, as it is sweeter and stronger flavored. Add a small amount, let it sit for a day or so- and give it a taste. You can always add more sweetener later.
This cabbage dish is great served with pierogi, roast chicken or pork chops. Sometimes I just serve it over noodles. If you cut the cabbage into small pieces, you can also use it as a filling for pierogi. We made it in class last night and everyone loved it.
The recipe calls for using a paste-type soup base for flavoring. This was a little change from how my Mom made it, but it was hard to explain what she really did. Using the soup base was a way anyone could make this cabbage dish. Every time my mom roasted a chicken or maybe a pork roast, she would save all the drippings from the pan. She’d strain them and chill it to remove the fat. She would take the drippings and pop them in a container in the freezer. Once she had a “nice amount”, she would use it to flavor the cabbage. You can see why we used the alternative soup base directions. You could also use chicken or vegetable stock, in place of the water for more flavor.
Here is the recipe. Hope you enjoy it as much as I do.
Sweet and Sour Cabbage
3 lbs. sliced cabbage, about a 3 ½ lb. head or 3 lbs. Cole slaw mix
1 onion, sliced
1 T. oil, butter, margarine or even bacon fat
3 c. water
1 T. paste type soup base or to taste
½ t. thyme
1 t. dillweed
1 t. marjoram
1 T. soy sauce
1 T. Worcestershire sauce
¼ c. balsamic vinegar
2 T. sugar
½ c. catsup
1 c. water
¼ c. flour
Sauté onion in oil until wilted. Bring water to boil in large pot.
Add soup base and add cabbage. Stir in onions and remaining ingredients,
except for the 1 cup of water and flour and cook, uncovered until
cabbage is tender. This can take from 15-25 minutes, depending on the
age of the cabbage and the size of the pieces. In jar with a tight-
fitting lid combine remaining water and flour and shake until smooth.
Add to cabbage mixture and cook, stirring until thickened, about 2
minutes. Adjust seasonings. This dish is great served alone, or with
pork or chicken dishes or with potatoes.