Lemon Tart
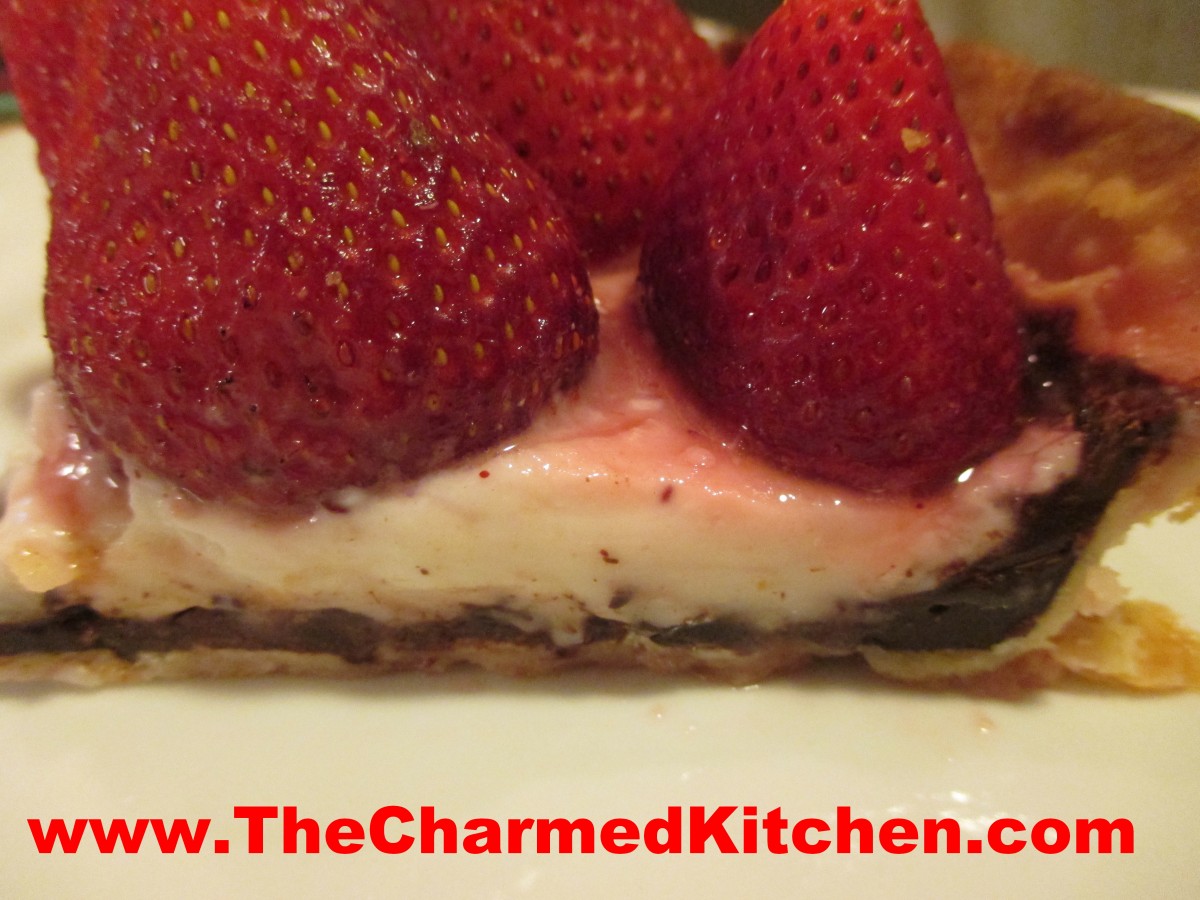
I wasn’t sure what to call this dessert. It started out as one thing, but sort of ended up somewhere else. I finally decided to just call it a tart. I’ll explain.
I was leaning towards making a cheesecake. I needed to make dessert for a dinner. Everybody loves cheesecake, right? I already had cookie crumbs, I could use for the crust. Then, I discovered I only had one box of cream cheese. Not enough for a cheesecake.
While searching my fridge for cream cheese, I found a couple of lemons.
I suppose I could have made a lemon pie, but I decided to just make something up with what I had, including the cream cheese. What I ended up with is a sweet/tart lemon dessert. Really nice, actually.
Before I get to the actual recipe, let me talk about the lemons, and including fresh lemon juice in recipe directions.
Recipes will often list the “juice of a lemon” in the ingredients. There is about the same amount of lemon juice in all lemons, so that a little difference, one way or the other, is no big deal. The amount is anywhere from 2-3 tablespoons of juice in a lemon. You might get 4 tablespoons, if the lemon is really big. I have used that phrase in recipes myself.
Sometimes, however, you have to recognize when you have lemons that aren’t “average”.
The two lemons I had on hand were big, really big. When I juiced them, I ended up with 2/3 of a cup of lemon juice. So, in this recipe I used the actual measurement of the juice, rather than saying, “the juice of 2 lemons.” Three or four average sized lemons should give you 2/3 cup of juice.
So here is the recipe for my lemon tart, the happy end result of using what I had, and making it work.
Lemon Tart
Crust:
1½ c. crushed vanilla cookies
4 T. melted butter
Filling:
1 (8oz.) container cream cheese, softened
½ c. sugar
2/3 c. lemon juice
Zest of two lemons
3 eggs
¼ c. cornstarch
Combine crust ingredients in medium bowl. Press crumb mixture into a 9 –inch springform or tart pan. Bake in a preheated 350-degree oven for 10 minutes. While the crust is baking, make the filling. In mixing bowl combine the cream cheese with the sugar and beat until fluffy. Add the lemon juice and zest and beat well. Add the eggs and cornstarch and beat until smooth. Pour filling over the baked crust and return to oven. Bake for 35 minutes, or until golden on top. Center will be soft, but firms as the tart cools. Cool, then refrigerate until ready to serve. You can dust with powdered sugar, if you like.
Christmas Tree Coffee Cake
This Christmas “tree” has become a tradition around here. I make one as a gift for a dear friend every year. If you are looking for something to serve for Christmas morning, or even as a dessert option, I suggest you make this coffee cake. The recipe actually makes 2 “trees,” so you can have one to give- and one to keep. Or perhaps, one for Christmas Eve and one for Christmas Day.
The dough is prepared, then chilled before rolling. You can do that a day, or even two days, ahead of time. The rolls are filled with a pineapple and cream cheese mixture and are very tasty.
The rolls are arranged in a tree pattern before baking. Then, after baking, the “tree” is topped with a light glaze and gently sprinkled with red and green sugars. So pretty, and not that hard to make.
Here is the recipe.
Christmas Tree Coffee Cake
Dough:
4-4 1/2 c. bread flour
1/2 c. sugar
1 1/2 t. salt
2 packages active dry yeast
3/4 c. milk
1/2 c. water
1/2 c. butter
1 egg
Filling:
1 lb. Cream cheese, softened
1/2 c. sugar
1/4 t. nutmeg
dash salt
1/4 t. vanilla
1 (20 oz.) can pineapple in its own juice drained and squeezed dry
Topping:
11 Maraschino cherries, halved
2 c. powdered sugar
3 T. milk
red and green sugars
For dough in large mixing bowl combine 2 cups of the flour with the sugar, salt and yeast. Heat together the milk, water and butter until very warm. Add to flour mixture and beat 2 minutes. Add egg and 1 more cup of flour and beat 2 more minutes. Stir in enough of the remaining dough to make a stiff batter, about 1 cup. Cover bowl tightly with foil or plastic wrap and refrigerate for at least 2 hours or up to 3 days before using. For filling combine all ingredients for the filling except the pineapple and beat until smooth. Stir in pineapple and set aside until ready to use. Remove dough from fridge cut in half. Roll out one piece on lightly floured surface into a 10×11- inch rectangle. Spread with half the filling, leaving an inch at the end of 11-inch side. Roll up from eleven- inch side. Use thread or dental floss to cut through dough in 1-inch pieces by placing thread under roll and crossing ends. Pull outward and thread should cut through dough. If you aren’t having any luck you can always use a knife, but they tend to flatten the rolls. On a greased baking sheet arrange the slices (you should have 11) into a tree shape. Start with one on the top and then a row of 2 below then 3 and then 4. The last roll will serve as the trunk. Cover dough with plastic wrap and set in a warm place to rise. Repeat with the remaining dough and filling. When dough is risen, about 1-2 hours bake in a 375- degree oven for 15 minutes then cover edges with foil to prevent over browning and return to oven for 10 minutes more. Cool on wire rack. Place half a cherry in the middle of each roll. Make a glaze with powdered sugar and milk and drizzle over. Sprinkle with the sugars. Makes 2 trees, 11 rolls each. Can be frozen up to a month ahead . defrost in a 350 -degree oven for 10 minutes and apply toppings.
Mom’s Pumpkin Squares
This recipe has been part of our family for years now. My mom made them for Thanksgiving every year- and I continue that tradition. Like my mom, I use fresh (or frozen) cooked pumpkin or winter squash. My mom didn’t care much for the taste of canned pumpkin. She would cut up the Halloween pumpkin, cook it, puree it and freeze it- so she could make pumpkin squares anytime she wanted.
The original recipe came from Bisquick, but it had 2 cups of sugar in it. My Mother’s sensibilities kicked in and she cut the sugar down to one cup. Great move on her part. The cake is still plenty sweet with less sugar.
It mixes and bakes up in no time. I normally top it with cream cheese frosting, but it would be good with a simple powdered sugar glaze, a buttercream frosting, or even just a dusting of powdered sugar mixed with a little cinnamon. The texture is moist and tender and I think you’ll enjoy it as much as I do.
Pumpkin Squares
1 c. sugar
½ c. oil
16 oz. cooked pumpkin, canned, fresh (preferred) or frozen
4 eggs, beaten
2 c. biscuit mix (homemade or Bisquick or Jiffy Mix)
2 t. cinnamon
½ c. raisins, optional
Grease a jelly roll pan and set aside. Preheat oven to 350 degrees. Beat first 4 ingredients for 1 minute. Stir in mix, cinnamon and raisins. Pour in prepared pan and bake 25-30 minutes. Test for doneness with a toothpick. Cool and frost. Frosted cake must be kept refrigerated between servings.
Frosting:
8 oz. cream cheese
2/3 c. butter
2 T. milk
2 t. vanilla
3 c. powdered sugar, or more
Beat together until smooth.
Apple Cider Sorbet
I’ve had my share of warm apple cider, but I never froze it before. This sorbet is such a nice dessert option. Light and naturally sweet, it is the perfect finish for any meal.
The cider is boiled down, to concentrate the sweetness. Then fresh apples are added and pureed. The mixture gets frozen, then pureed one more time- to really smooth out the texture. Cinnamon sticks impart their flavor when boiled in the cider. You could certainly used ground cinnamon, if you don’t have cinnamon sticks. Feel free to add other spices, too, like allspice, cloves or ginger.
Over the years, I have made all sorts of sorbets. I love the light, creamy texture. I am not sure why I never tried to make an apple sorbet before. I am so glad I finally did. So many holiday meals are heavy. This is a nice, lighter option for dessert. It is also a nice dairy-free option, for those who can’t have ice cream.
Apple Cider Sorbet
6 c. apple cider
2 (4-inch) cinnamon sticks
3 apples, peeled, cored and diced
In saucepan place cider and cinnamon sticks. Cook over medium high heat, uncovered, until cider has cooked down to 2 cups. Remove cinnamon sticks and discard them. Cool cider and combine in food processor with the apples. Puree until smooth. Transfer mixture to a container with a lid. Freeze until solid. Remove from freezer and allow to soften for a few minutes. Break into chunks and puree in processor, until smooth and creamy in texture. You can serve it right away, or return to freezer to enjoy later. Makes 1 quart of sorbet.
Sweet Potato Pound Cake
I made this cake for a cooking class the other day. Everyone loved it. No surprises there, it is a wonderful cake. A nice dessert for Thanksgiving, too.
If the only way you enjoy sweet potatoes is as a side at the holidays, or in pie, it is time to expand your thinking about them. In this recipe, the mashed sweet potatoes add both sweetness and moistness to the finished cake. Great plain, or with a dollop of whipped cream and some fresh berries.
This cake makes a lovely dessert or a nice addition to a brunch menu. Also a nice way to use up leftover mashed sweet potatoes, if you find yourself with leftovers.
I mentioned this recipe to a friend and she was very interested. I will be seeing her over the weekend and think I will make this for our dinner together.
Sweet Potato Pound Cake
1 1/2 c. cake flour*
1/2 t. each baking soda, salt, cinnamon and nutmeg
1/2 c. unsalted butter, room temperature
1/2 c. sour cream, room temperature
1 1/3 c. sugar
3 eggs, room temperature
1/2 c. mashed sweet potato
1 t. vanilla
Preheat oven to 300 degrees. Lightly oil an 8×4-inch loaf pan. Mix flour with next 4 ingredients and set aside. In large mixing bowl beat together butter and sour cream. Beat in sugar and then beat in eggs 1 at a time, beating well after each addition. Stir in mashed sweet potato and vanilla. Stir in dry ingredients and pour batter into prepared pan. Bake until tester comes out clean, about 1 hour and 15 minutes. Cool in pan 30 minutes before loosening cake sides from pan and removing. After cake has cooled wrap in foil and store at room temperature. Serves 8.
* If you don’t have cake flour you can make your own. Simply measure out a cup of all purpose flour and remove 2 tablespoons of the flour. That is now the same as a cup of cake flour OR remove the 2 tablespoons of flour and replace them with 2 tablespoons of cornstarch and sift together to combine. I do the flour/cornstarch mix and keep a batch on hand for when I need it in baking.
Pumpkin Chiffon
I fondly remember when my Mom used to make this dessert. I think of her whenever I make it. From a technical cooking standpoint, it’s not really a chiffon, but that is what my Mom called it, so I will leave it as Pumpkin Chiffon.
It’s more like a pumpkin pie, without the crust. Super easy to make and quite tasty. I bake it in a casserole dish but you could also make it in individual ramekins. This recipe is always a big hit when I make it for friends.
You could use canned or fresh cooked pumpkin or winter squash, like butternut or Hubbard. I always cook up and freeze pumpkin and squash for later use, so frozen would work, too. Because there is no crust, it is also gluten-free. I sometimes serve it with gingersnaps and whipped cream. It is a lovely Fall dessert.
Mom’s Pumpkin Chiffon
½ c. applesauce
1 c. cooked or canned pumpkin or squash
¾ c. brown sugar
1 t. cinnamon
½ t. salt
½ t. nutmeg
1/8 t. cloves
4 eggs, well beaten
1 c. half and half or evaporated milk
Stir together first seven ingredients. Beat in eggs and stir in milk. Place mixture in 1 ½ quart casserole and bake in a 350-degree oven for 1 hour and 15 minutes. Serve alone or with cookies. Serves 6-8.
Spiced Applesauce Cake
I wish I remembered where this recipe came from. I have a piece of flowered stationery, a little crinkled around the edges, creased from being folded many times, with the recipe written on it. It is not my handwriting. I would love to credit the source of this wonderful recipe.
As a kid, I loved eating applesauce, right out of the jar. I still do. I admit to being spoiled these days, because I make, and can, my own sauce.
You don’t have to limit yourself to just eating applesauce as is. You can bake with it, too. This cake is one way to enjoy applesauce, homemade or store bought. I used butter in the recipe, but if you used coconut oil instead, the recipe would be vegan. The spices work so well together. Simple and full of flavor.
Before someone asks, there is not a mistake, there are no eggs in the recipe.
Spiced Applesauce Cake
2 c. unsweetened applesauce
½ c. butter
2 c. sugar
3 c. flour
1 T. baking soda
½ t. salt
1 t. each cinnamon, allspice and nutmeg
¼ t. cloves
1 c. raisins or chopped nuts
Heat together applesauce and butter until butter melts. Cool down a bit. Preheat oven 375 and grease 9×13-inch pan. Stir all ingredients together bake 30 minutes. Cool in pan.
Pear Cobbler
Cobbler is one of my favorite desserts for this time of year. I really enjoy making this pear cobbler for family and friends. Like apples, pears always remind me of Fall.
While cobblers can be made with any number of different fruits, I love using pears. It is one of the simplest desserts you can make from scratch, and one of my favorites, for sure.
In the time it takes to preheat the oven, you can have it ready to bake. This recipe calls for baking mix, like Bisquick. I make my own- recipes follows, but use what you like.
The cobbler is fine served plain, or with a dollop of whipped cream or ice cream. It can also be served cold, but I prefer to serve it warm.
If you prefer, you can also make the cobbler with a combination of pears and apples.
Classic Pear Cobbler
4 c. peeled and sliced pears
½ c. sugar
1 T. plus 2/3 c. baking mix (Like Bisquick or Jiffy Mix or even homemade)- recipe follows
1-2 t. cinnamon
2 T. packed brown sugar
¼ c. butter
2 T. milk
In 1-quart shallow casserole, combine fruit, sugar, 1 tablespoon of the biscuit mix and cinnamon. In medium bowl combine remaining biscuit mix with sugar. Cut in butter to resemble coarse crumbs. Stir in milk to make a soft dough. Drop by spoonfuls over fruit mixture. Bake in a preheated 400-degree oven for 30 minutes, or until toothpick inserted into dough comes out clean. Let stand 5 minutes. Serves 4-6.
Baking/ Biscuit Mix
8 cups sifted, all-purpose flour
1 c. powdered milk
1 c. powdered buttermilk
¼ c. baking powder
1 T. salt
2 c. shortening*
Sift dry ingredients together 3 times. Cut in shortening to resemble cornmeal. Keep in an airtight container. Store in a cool dry place and use within six months.
*You can use butter or coconut oil in place of the shortening. Just store in the fridge, if you do. I use coconut oil.
My Favorite Apple Cake
I have posted this cake recipe in the past. It truly is my favorite apple cake ever. I had a request for this recipe yesterday, so here it is.
I’ve had this recipe since I was a kid. My Aunt Josie gave it to my mom. Not sure where she got, it but it has been a family favorite since we first made it.
It’s a simple recipe that comes out moist and flavorful. I normally bake it in a 13×9- inch pan but it can be baked in a Bundt pan. While the recipe calls for cinnamon sugar- I sometimes add a little fresh ground nutmeg, too. I also like to use olive oil or even avocado oil in this cake. It gives it a really nice flavor.
Almost any apple works in this recipe- except maybe Red Delicious. Perfect for dessert or even served with brunch. Who am I kidding? I would eat this cake for breakfast.
Note: The batter is really thick. Don’t think you’ve done something wrong.
Classic Apple Cake
1 c. oil, I use olive oil
4 eggs
1 t. vanilla
1/3 c. orange or lemon juice
Combine above ingredients and set aside.
Mix together the following dry ingredients. Make a well and stir in egg mixture to make a stiff batter.
3 c. flour
2 c. sugar
3 t. baking powder
¼ t. salt
Mix ½ c. sugar and 2 t. cinnamon and set aside
Peel, core and slice 4 medium apples.
Grease a 9×13 inch pan or a Bundt pan. Preheat oven to 350-degrees. Place ½ of batter in prepared pan. Arrange apple slices on batter and sprinkle on ½ of the cinnamon mixture. Pour on remaining batter and sprinkle with remaining sugar mixture.
Bake 1-1 ½ hours. One hour for 13×9-inch pan and 1 1/2 hours for Bundt. I find that sometimes it takes less than an hour- check at 50 minutes.
Chocolate Beet Cupcakes – Pink Velvet
I have recently been gifted with some beets. Not just some beets, but pounds and pounds of beets. I will be making a lot of dishes with them, including pickled beets and beet relish. It’s a good thing I like them so much.
Thought I would share this fun recipe for cupcakes, using beets. I already make a chocolate beet cake- which has red tones from the beets. I wanted a lighter texture for cupcakes, with more chocolate flavor, so I made some changes to the beet cake recipe and ended up with these cupcakes.
Rich, but light, with a very subtle blush of red. I decided to call them Pink Velvet. I topped them with cream cheese frosting, but a dusting of powdered sugar would work well, too, or a favorite buttercream.
Here is the recipe. I hope you will give them a try.
Pink Velvet Cupcakes (Chocolate Beet)
2 cups all-purpose flour
2 t. baking soda
½ t. salt
¾ c. cocoa powder
1 c. butter, softened
1½ c. sugar
3 large eggs
2 teaspoons vanilla
1½ cups grated cooked beets
Powdered sugar, optional
Preheat oven to 350°. Line 24-28 muffin tins with paper liners; set aside. Combine dry ingredients in a bowl; set aside. In a mixing bowl, combine the butter and sugar. Beat until light and fluffy. Beat in eggs one at a time, beating well after each addition. Beat in vanilla. Slowly beat in dry ingredients until well mixed; stir in beets. Spoon batter into prepared tins, filling about 2/3 full. Bake 18-20 minutes, or until cupcakes spring back when touched lightly or when toothpick, inserted into cupcakes , comes out clean. Cool before frosting. Makes 24-28.
Cream Cheese Frosting
8 oz. cream cheese, softened
1 stick, (½ cup butter) softened
2-3 c. confectioners’ sugar
1T. vanilla
Beat all ingredients together until smooth and fluffy. Store in the fridge.