Cauliflower and Grilled Corn Gratin

Cauliflower and Grilled Corn Gratin
I made this dish for a dinner with friends this weekend. It was a big hit. The cauliflower, corn and carrots worked perfectly together. Of course, the bechamel sauce, cheese and bread crumbs didn’t hurt, either.
This dish came about because I needed a side dish and wanted to use what I had on hand. I had recently purchased a rather large head of cauliflower. I was thinking gratin, but wanted more than cauliflower so I looked to see what else I had around. Carrots seemed like a natural addition. I like their sweetness with cauliflower, plus they would add a pop of color. A trip to the freezer for something else was a lucky break.
I saw a package of corn I had recently frozen. I had been to a clambake the weekend before. They had grilled corn on the cob and had extras. I was given some to take home. Thanks, Arlene!!!
I cut the corn off the cob and used some of them in a chowder. I froze the rest, about two cups worth. I just knew that was what I need to round out the flavors in the gratin.
I was right. It was a wonderful combination. If you don’t feel like grilling corn, you can cook it under the broiler.
So here is the recipe. Hope you give it a try.
Cauliflower and Grilled Corn Gratin
6 c. cauliflower- broken into bite sized pieces
4 ears corn, grilled, cooled, kernels cut off the cobs- about 2 cups
3 medium carrots, peeled and sliced thin
4 T. butter
4 T. flour
2 ½ c. half and half, warmed
Salt and pepper to taste
4 oz. sharp cheddar cheese, shredded
¼ bread crumbs
Prepare cauliflower by steaming until just tender. Steam the carrots until just tender, too. I was lucky enough to have corn that had been grilled, minus the husks, so it had a nice char on it. The smoky flavor really added to the dish. You can cook the corn under the broiler, too, to get that char. Combine the vegetables in a lightly buttered casserole dish. I used a 9×9-inch square pan. Then make the white sauce (bechamel) by melting the butter together in a pan with the flour, whisking until smooth. Stir in the half and half and cook over medium heat, stirring constantly, until sauce is thickened and bubbly. Season with salt and pepper- use enough- the veggies don’t have any salt on them. Pour the sauce over the veggies in the casserole dish and stir a little to coat evenly. Sprinkle with the cheese and then the bread crumbs. Bake in a 350 degree oven until the mixture is bubbly and the top is golden brown, about 30 minutes. Serves 6.
Maple Syrup Cookies

Maple Syrup Cookies
The addition of maple syrup makes these cookies really special. Crisp and mildly sweet, they can be eaten plain, or you can coat them with a maple glaze.
The cookies are crisp, but will soften slightly, if glazed. Either way, they are really tasty. They make a nice dessert for Autumn dinners and Thanksgiving, too.
Maple syrup is one of my favorite natural sweeteners. It’s unique flavor, along with it’s sweetness makes it a perfect addition to all sorts of dishes.
You can do a lot more with maple syrup than just a topping for pancakes and waffles. Maple syrup can be used in sauces, salad dressings and marinades. You can also use maple syrup in baking, like in these cookies.
So here is the recipe- and be sure to use real maple syrup. 🙂
Maple Syrup Cookies
1 c. butter
1 c. sugar
½ c. maple syrup
1 egg yolk
3 c. flour
3/4 t. salt
Glaze:
2 c. powdered sugar
½ c. maple syrup
To make glaze: Beat sugar and syrup together until smooth.
Beat together butter, sugar and syrup. Beat in yolk. Combine flour and salt and add to butter mixture. Mix well. Wrap dough in plastic wrap and chill. Roll chilled dough 1/8 inch thick and cut out with assorted cutters. Leaves and other autumnal cutter shapes are best. Place on an ungreased baking sheet and bake in a preheated 350-degree oven for 12 minutes. Cookies should be lightly browned around the edges. Cool and decorate with glaze. Makes about 4 dozen cookies.

Un-glazed are tasty, too.
New Day Cleveland- Kitchen Hints
Here is my most recent appearance on New Day Cleveland. It was a lot of fun.
Sweet Potato Pound Cake
Sweet Potato Pound Cake
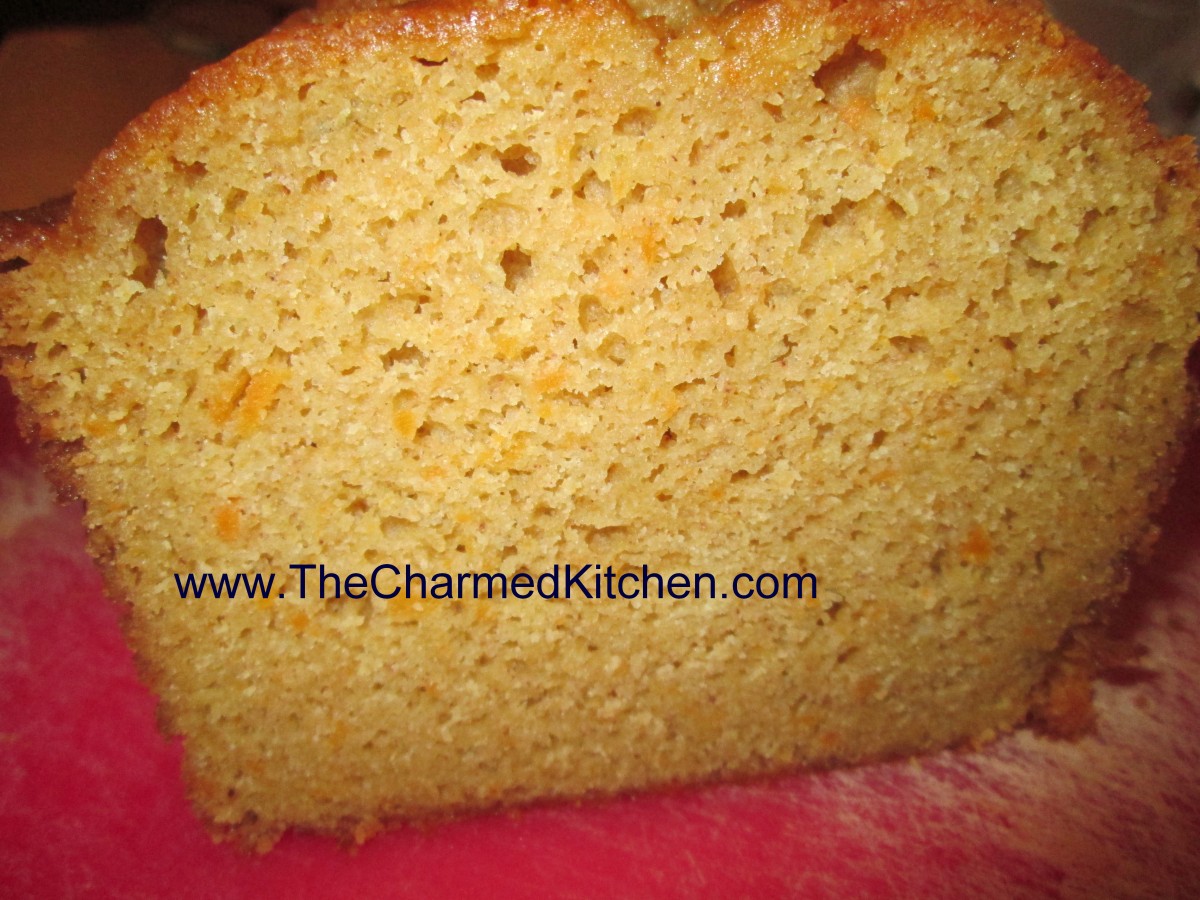
I made this cake for a cooking class the other day. Everyone loved it. No surprises there, it is a wonderful cake. A nice dessert for Thanksgiving, too.
If the only way you enjoy sweet potatoes is as a side at the holidays, or in pie, it is time to expand your thinking about them. In this recipe, the mashed sweet potatoes add both sweetness and moistness to the finished cake. Great plain, or with a dollop of whipped cream and some fresh berries.
This cake makes a lovely dessert or a nice addition to a brunch menu. Also a nice way to use up leftover mashed sweet potatoes, if you find yourself with leftovers.
I mentioned this recipe to a friend and she was very interested. I will be seeing her over the weekend and think I will make this for our dinner together.
Sweet Potato Pound Cake
1 1/2 c. cake flour*
1/2 t. each baking soda, salt, cinnamon and nutmeg
1/2 c. unsalted butter, room temperature
1/2 c. sour cream, room temperature
1 1/3 c. sugar
3 eggs, room temperature
1/2 c. mashed sweet potato
1 t. vanilla
Preheat oven to 300 degrees. Lightly oil an 8×4-inch loaf pan. Mix flour with next 4 ingredients and set aside. In large mixing bowl beat together butter and sour cream. Beat in sugar and then beat in eggs 1 at a time, beating well after each addition. Stir in mashed sweet potato and vanilla. Stir in dry ingredients and pour batter into prepared pan. Bake until tester comes out clean, about 1 hour and 15 minutes. Cool in pan 30 minutes before loosening cake sides from pan and removing. After cake has cooled wrap in foil and store at room temperature. Serves 8.
* If you don’t have cake flour you can make your own. Simply measure out a cup of all purpose flour and remove 2 tablespoons of the flour. That is now the same as a cup of cake flour OR remove the 2 tablespoons of flour and replace them with 2 tablespoons of cornstarch and sift together to combine. I do the flour/cornstarch mix and keep a batch on hand for when I need it in baking.
Halloween Candy Mini Cheesecakes
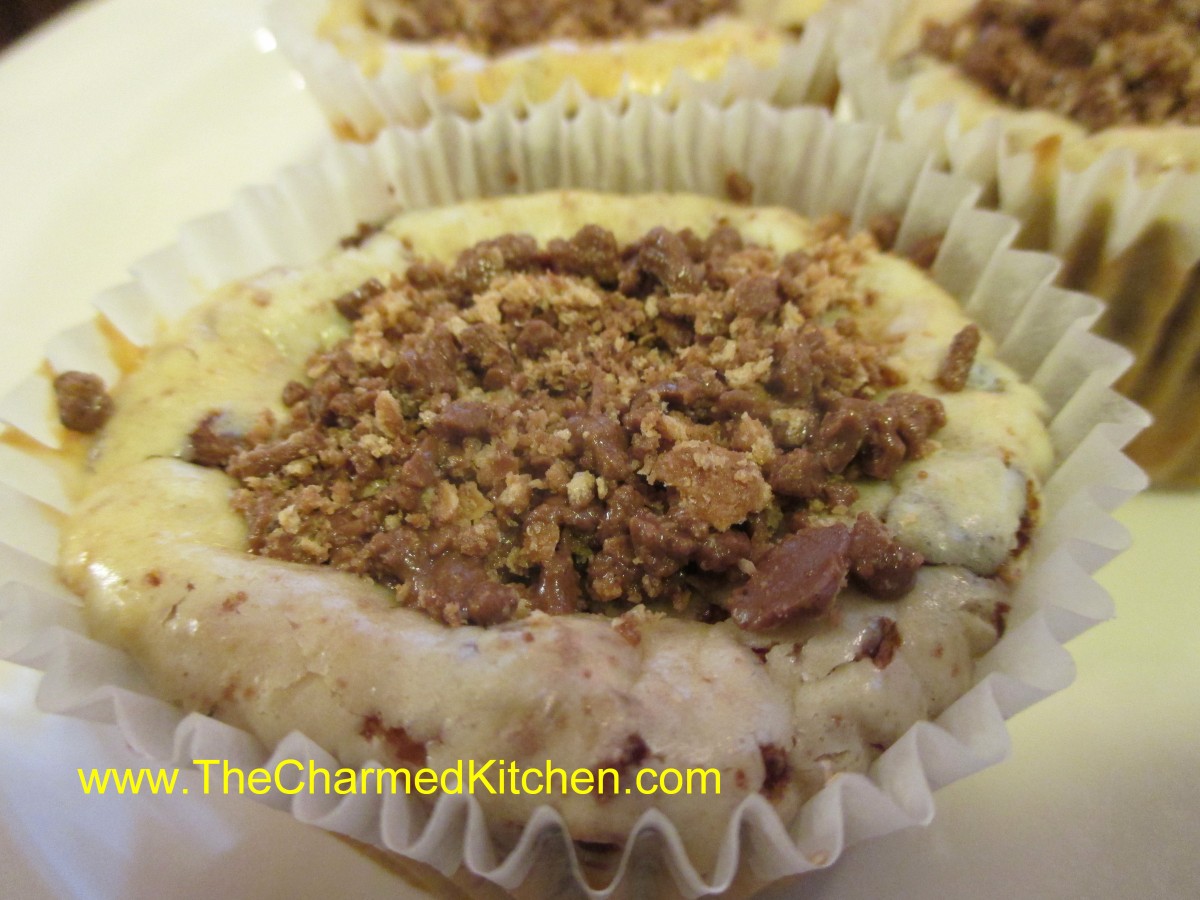
Kit Kat Mini Cheesecake
Sometimes you end up with leftover Halloween candy. It’s very cold here today, so I doubt there will be as many kids out as usual. I am sure some of you will have leftover candy.
You could just eat the candy- or you can transform it into a dessert.
The idea I came up with was mini cheesecakes. I’ve made them before, so I used my recipe, and just folded in crushed candy bars. Once the cheesecakes cool they deflate a little, so I also added some crushed candy bars to the top to make them look nice.
Only change from the original recipe was a slight decrease in sugar to compensate for the extra sweetness of the candy. I used what I had, but I am sure a lot of different candy bars would work. I used a small food processor to really crush up the candy bars. I made 2 batches, one with cookies and cream candy bars and the other with Kit Kat bars.
Halloween Candy Mini Cheesecakes
12 vanilla wafers
2 (8 oz.) cream cheese, softened
1/3 c. sugar
2 t. vanilla
2 eggs
2/3 c. crushed candy bars plus 1/4 c. crushed candy bar, for topping
Line 12 muffin tins with paper liners. Place 1 wafer in each. Beat together remaining ingredients (except candy) for 1 minute with electric mixer. Fold in candy. Divide this mixture in the muffin tins, filling each 3/4 full. Bake 25 minutes at 325 degrees. Cool and decorate with extra crushed candy. Makes 12. These can be frozen.
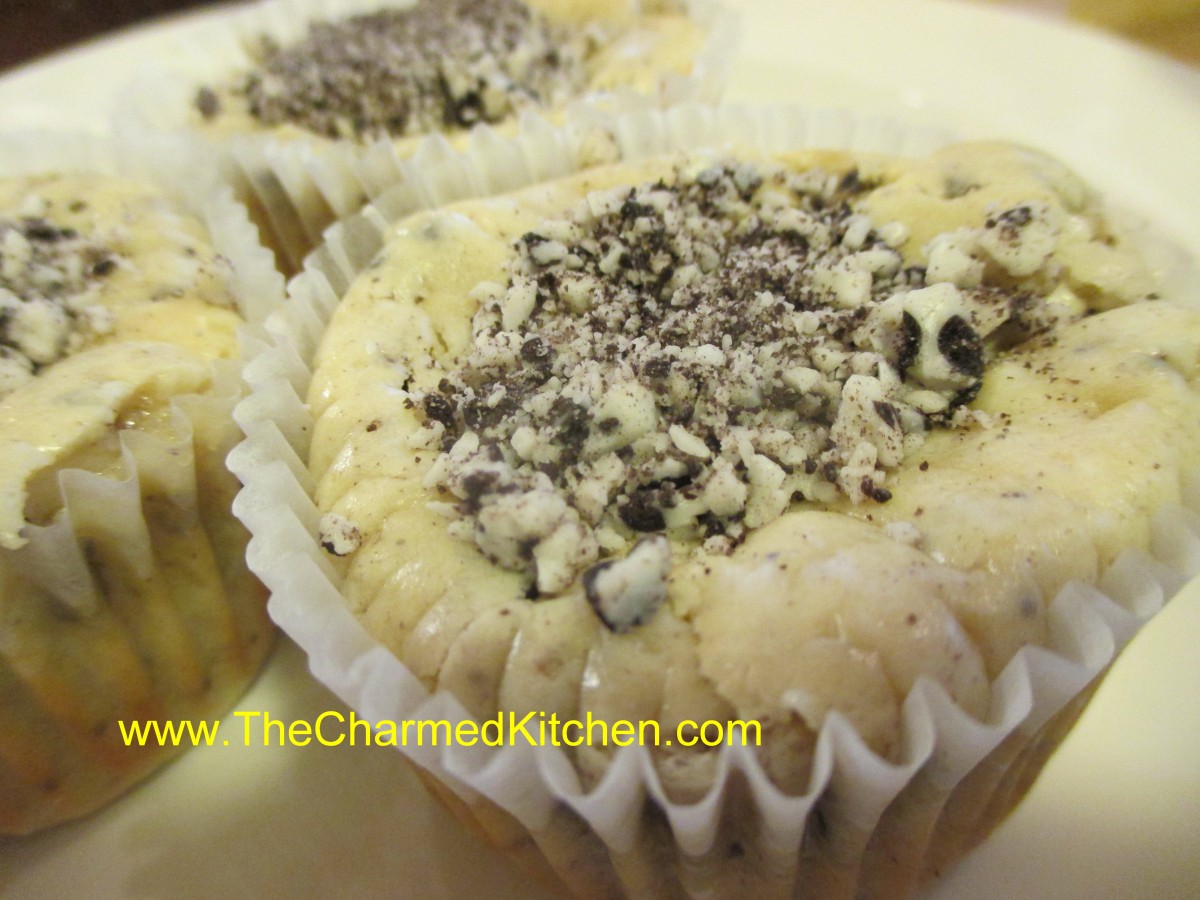
Cookies and Cream Mini Cheesecakes

Leftovers
Pumpkin Chiffon

Pumpkin Chiffon
I fondly remember when my Mom used to make this dessert. I think of her whenever I make it. From a technical cooking standpoint, it’s not really a chiffon, but that is what my Mom called it, so I will leave it as Pumpkin Chiffon.
It’s more like a pumpkin pie, without the crust. Super easy to make and quite tasty. I bake it in a casserole dish but you could also make it in individual ramekins. This recipe is always a big hit when I make it for friends.
You could use canned or fresh cooked pumpkin or winter squash, like butternut or Hubbard. I always cook up and freeze pumpkin and squash for later use, so frozen would work, too. Because there is no crust, it is also gluten-free. I sometimes serve it with gingersnaps and whipped cream. It is a lovely Fall dessert.
Mom’s Pumpkin Chiffon
½ c. applesauce
1 c. cooked or canned pumpkin or squash
¾ c. brown sugar
1 t. cinnamon
½ t. salt
½ t. nutmeg
1/8 t. cloves
4 eggs, well beaten
1 c. half and half or evaporated milk
Stir together first seven ingredients. Beat in eggs and stir in milk. Place mixture in 1 ½ quart casserole and bake in a 350-degree oven for 1 hour and 15 minutes. Serve alone or with cookies. Serves 6-8.
Ice Cubes in My Soup and Other Helpful Hints
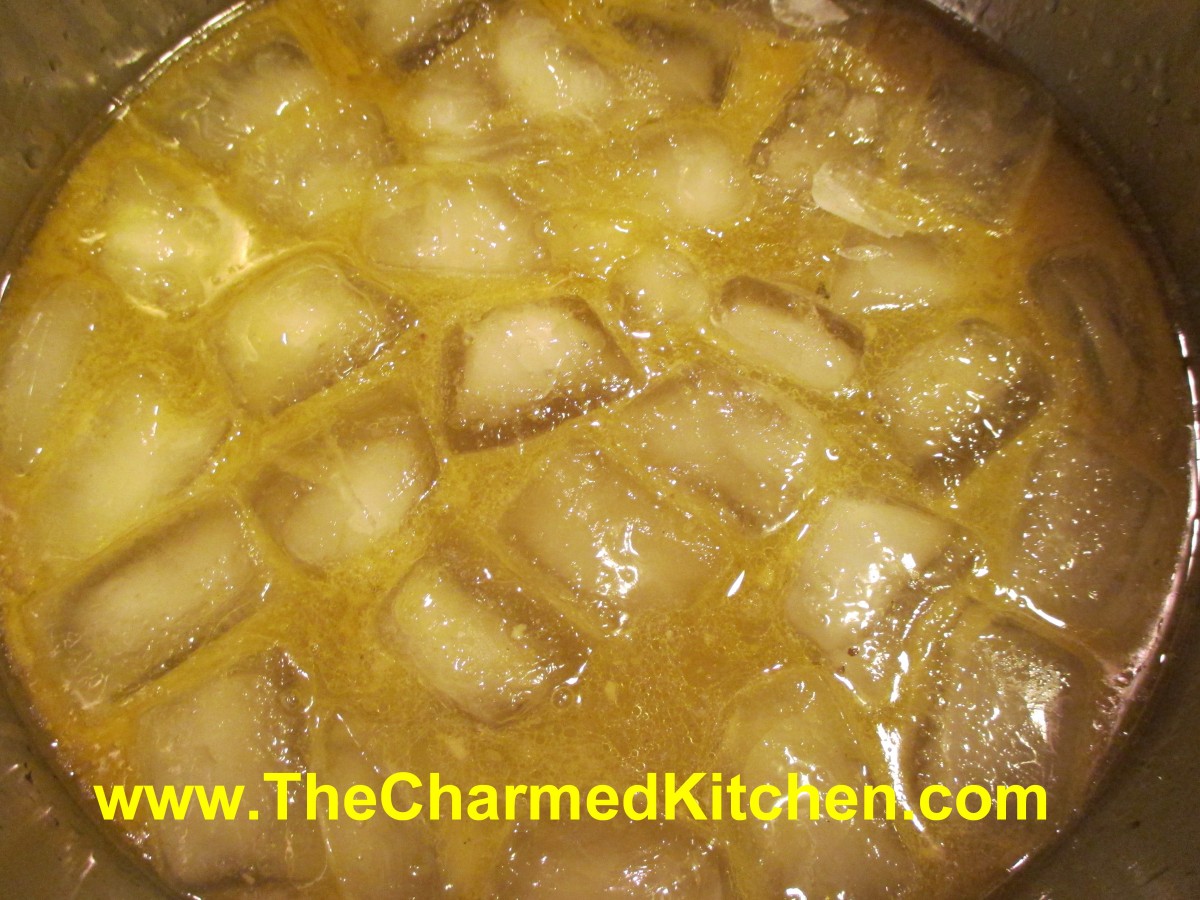
Ice Cubes in Soup Stock
So why are there ice cubes in my soup? Well, not in my soup, but rather in my pot of soup stock. This is an old trick of my Grandmother’s. When you make a pot of soup stock, there is often quite a bit of fat on top. If you have the time, you can just chill the soup and remove the fat later. But what if you want to use the stock right away, when it is still pretty hot? If there is a lot of fat, you can skim some off with a spoon. This helps, but doesn’t get off all the fat. Just drop in a tray of ice cubes. Bob them gently on the surface with a slotted spoon. The fat will freeze around the ice cubes. Work fast so they don’t melt. After the cubes are coated with fat just lift them out with the slotted spoon. You won’t dilute the soup- you’ll only add a couple of ounces of water, if that. Now your soup is ready to eat!!
Over the years, I have collected some really good tips for around the kitchen- and around the house. I thought I might share some of these tips with you today.
How do I cut open winter squash safely? Because of the shape of winter squashes, they are difficult to cut open. They are very hard and round, making it easy for the knife to slip. There are two methods I have used to make the job easier. First, you can place the squash on a folded kitchen towel, to give you more stability before cutting. The other method is to stand the squash upright and slice a small amount off one side. When you place the squash down on the cut side, it now has a flat spot, which making cutting easier. Of course, there is always my sister, Cindy’s, method for opening Hubbard squash. Cindy lives in Michigan and gets these really big squashes from her neighbor. They are like rocks to cut through. She just tosses the squash off her deck to the driveway below. It breaks them into pieces, which she can now carefully cut up and cook. When cutting up any of the hard squashes, be sure to use a large, heavy knife with a sharp blade. Tiny knives, with thin blades can bend or break when cutting larger squash.
When is the oil hot enough? You’re wanting to fry something and you aren’t sure the oil is hot enough. Low-tech solution- just put a single kernel of un-popped popcorn in the pan with the oil. It will pop when the oil reaches 350 degrees.
How do I get all the food out of my food processor? It’s very frustrating to make something in the food processor and then try to navigate around the blade to get it all out. I am sure I am not the only person who has cut a rubber scraper on that sharp blade. The easy solution- scrape out what you can easily- leaving anything on the blade behind. Then turn the processor back on. Since it is nearly empty the remaining food will go to the outside of the work bowl- leaving the blade clean. Just remove the blade and finish scraping out the bowl.
How do I clean the flour off the work surface after making bread? I love baking bread. My father was a baker and he taught me a little trick. Using hot water will cook the flour- causing it to get thicker and stickier. first scrape off any loose flour. Then clean counter tops with cold water. It will dissolve the flour without making it sticky. Use cold water to clean out bowls, too. Once the flour is gone you can wash with warm, soapy water. This also works when cutting raw meats on a cutting board. If you start washing the surface with hot water, you cook the meat and it sticks. Better to do a cold water rinse first, to remove any residue, then follow up with a hot, soapy wash.
How can I peel garlic faster? This is really fun. Just break apart a head of garlic into individual cloves. Place them in a bowl. Get another bowl that is the same size and turn it over on top of the bowl with the garlic, like a dome. I like to use bowls with a nice edge on them- makes it easier to hold. Grab the bowls and shake them really hard for 10 seconds., When you take off the top bowl you will have a bowl full of peeled garlic cloves! You can do this in a jar, too. Just make sure it has a tight fitting lid.
How do I get honey and other sticky foods out of a measuring cup? The easiest way I know is to spray the measuring cup with non-stick spray before adding the honey, molasses or other thick liquid. It will pour out quite easily. You can also add a little oil instead or coat the measuring cup with butter or margarine.
Fruit flies are around my kitchen- how do I get rid of them? Fruit flies are more common in warm weather but can show up any time of the year. Just take a jar or glass and pour in a little apple cider vinegar. Add a drop of dish washing liquid then cover the glass with plastic wrap. Poke a few holes in the wrap with a pencil and set on a kitchen counter- closest to where you are seeing the fruit flies. They will fly into the jar- but can’t find their way out. The detergent removes the surface tension of the vinegar so if they land on it, they will sink.
Making sure your frozen food stayed frozen. You went on vacation. While you were away the power was out. It’s back on, but did your frozen food thaw out, thus becoming unsafe to eat? Before going out of town, freeze water in a cup- just a plastic cup is fine. Then place a quarter on top of the ice and place in the freezer. When you come home- check the cup. If the quarter is still on top of the ice- your freezer remained cold enough to keep your food frozen. If the quarter is on the bottom of the cup, the ice thawed and the coin sank- meaning your food got too warm to be safe.
How do you get the rest of the spaghetti sauce out of the jar? My niece Sarah, also shared a good tip. When using a jar of pasta sauce, use wine to rinse out what is left in the jar. That way the wine adds extra flavor to the dish. I love this tip- I normally use water. Thanks, Sarah.
How do I make my salad greens crisper? For crisper salad greens, wash them and spin dry several hours before using. Keep in the fridge until ready to use and they will crisp up nicely. If you don’t have a salad spinner, shake off as much water as you can before storing in the fridge.
How can I keep my salad green from getting rotten? Speaking of storing leafy greens, have you ever tried storing them in a fabric bag? Plastic does not allow air in, and can cause the greens to spoil more quickly. You can purchase, or even make a fabric bag. Linen and muslin both work well. Just place washed greens in the bag and store in the fridge. They stay fresh so much longer.
My drain is running slow. How can I fix it? An easy fix is to use baking soda and vinegar. Just pour some baking soda in the drain- a few tablespoons should be fine. Then pour a cup of vinegar in. It will bubble like crazy. Let it alone for 30 minutes, then flush the drain with hot water. It really helps drains to drain faster.
How can I keep fruit juices from getting all over when I cut up large fruits, like melons or pineapples? When you cut up a pineapple, melon or other juicy fruits do you get annoyed at juices dripping everywhere? Simple solution: Place your cutting board in a jelly roll pan. That way drips are contained and clean-up is so much easier.
How can I keep my linen closet more organized? I know how annoying it is when changing sheets to find the whole sheet set. There always seems to be one pillowcase missing. One easy solution is to use one pillowcase to hold the whole set of sheets. When you wash your sheets and are getting ready to put them away- fold the top and fitted sheets and one of the pillowcases. Take the sheets and folded pillowcase and put them inside the unfolded pillowcase. Now, when you are ready to change the sheets, the whole set will be together.
Red Onion Relish
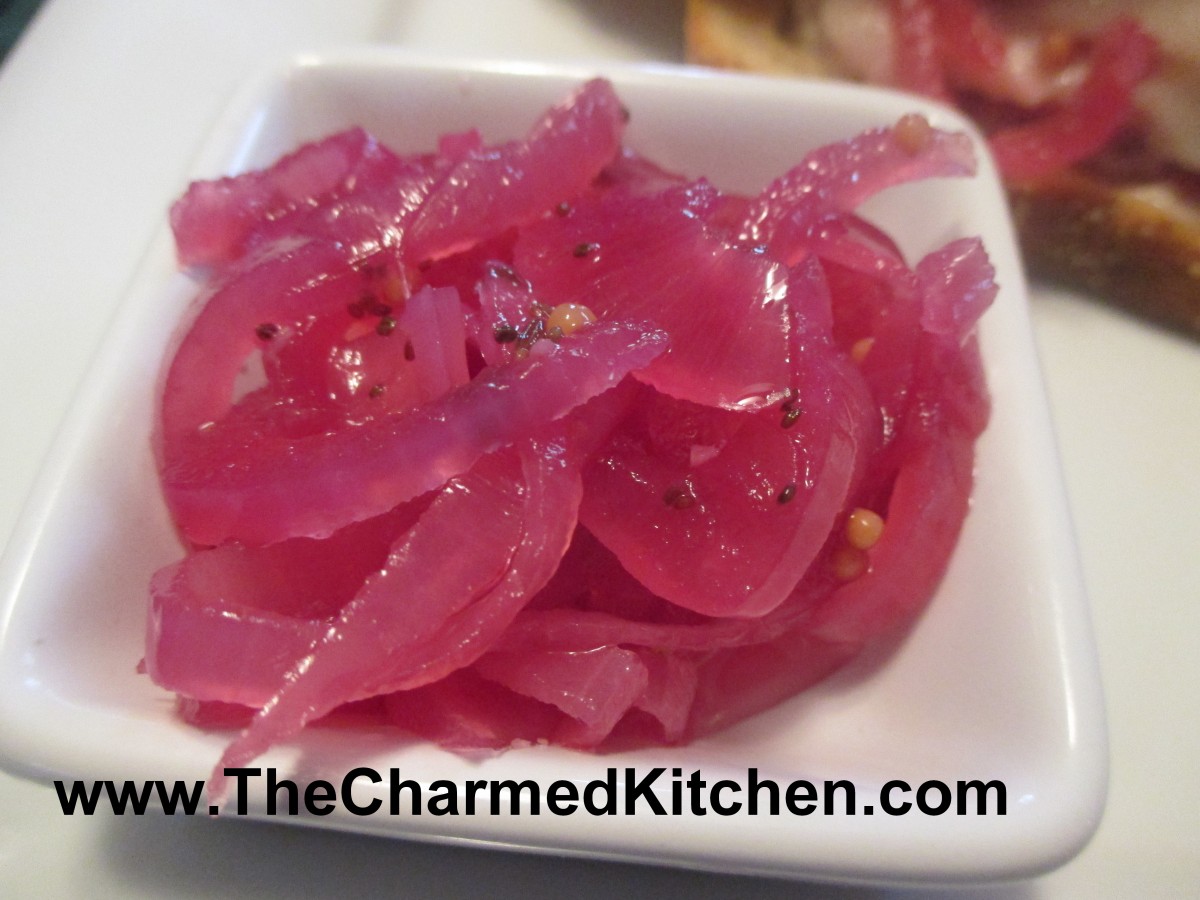
Red Onion Relish
I had some red onions and turned them into this zesty relish. I love the tart flavor and bright color it adds to my food. This relish is a great topper for sandwiches, but can be used for a whole lot more.
The onions can be served with cheese and crackers for an easy appetizer. You can add some to salads, and the liquid can be combined with a little oil for a simple salad dressing.
I even had some with my scrambled eggs for breakfast. After you cook it , you just ladled into jars, cool it down and store it the fridge. It will keep for weeks and weeks.
Red Onion Relish
4-5 medium red onions, peeled and sliced thin
2 c. red wine vinegar
1½ water
1 c. sugar- or to taste
2 T. salt
1 T. mustard seed
1 T. celery seed
1 t. fennel seeds, optional
2 cloves garlic, minced
1 cinnamon stick- 4 inch
4 whole cloves
Place all ingredients in a pot and bring to a boil. Turn down to a simmer and cook, uncovered for 10-15 minutes. Cool and place in jars, then store in the fridge. Use as a sandwich topper, salad addition, appetizer with cheese and crackers. You can also use the liquid as the base for a salad dressings, with the addition of some oil. Keeps for weeks in the fridge. Makes 5 cups.
Sweet Potato Pancakes
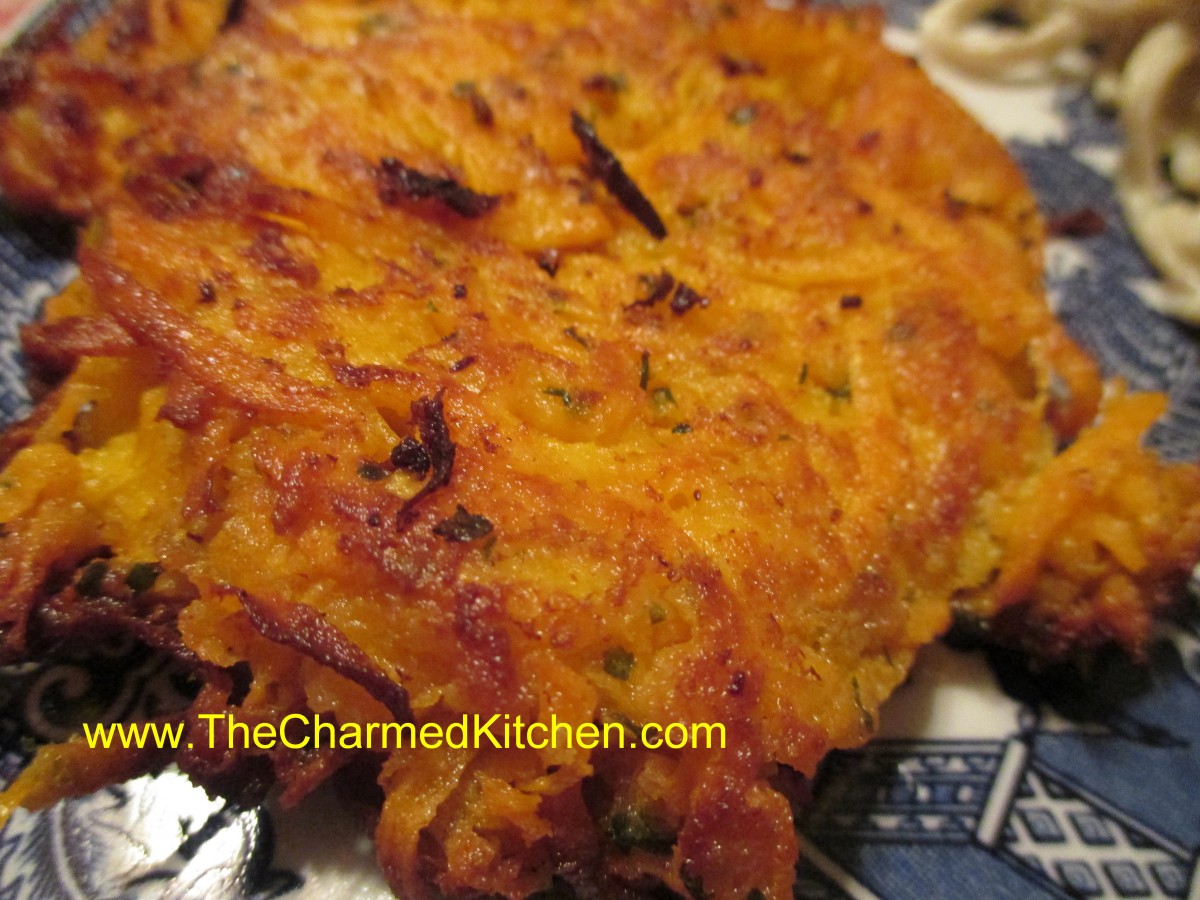
Sweet Potato Pancake
I am a big fan of sweet potatoes. They are so versatile to cook with. For me, just roasting or steaming a sweet potato, and enjoying with salt, butter and a sprinkle of nutmeg is fine. This time of year, I find myself cooking with sweet potatoes all the time.
For dinner with a friend the other night, I was looking for something different to do with sweet potatoes. I didn’t want to just roast or steam them. I ended up shredded them and making sweet potato pancakes. I had duck fat so that is what we used to fry them in.
They were amazing. Crispy on the outside and tender in the middle. I am definitely going to make them again. I could see making smaller pancakes and serving as an appetizer. Here is the recipe.
Sweet Potato Pancakes
2 small sweet potatoes, peeled and shredded- you want to end up with 3-4 cups of shredded sweet potatoes- 1 medium /large one would also work
2 eggs
½ c. panko bread crumbs
1 T. parsley flakes
1 t. hot pepper sauce, or to taste
½ t. garlic powder
½ t. onion powder
Salt and pepper to taste
Oil for frying- we used duck fat and it was wonderful
Combine all ingredients in a mixing bowl and stir until well mixed. Heat oil or fat in large skillet to 350 degrees.* Spoon batter into skillet in 4-5 pancakes, depending on the size you prefer. Cook until golden on one side- and starting to firm up- about 5 minutes. You might have to cook them in two batches – depending on the size of your pan. Don’t over crowd. They are tricky to turn over. Turn over carefully and cook at least another 5 minutes or until both sides are golden brown and crispy. Makes 4-5
* A little trick to know when your oil is hot enough. Place an un-popped kernel of popcorn in your pan with the oil when you are heating it up. Popcorn pops at 350 degrees. When the popcorn pops – it is time to add the batter.
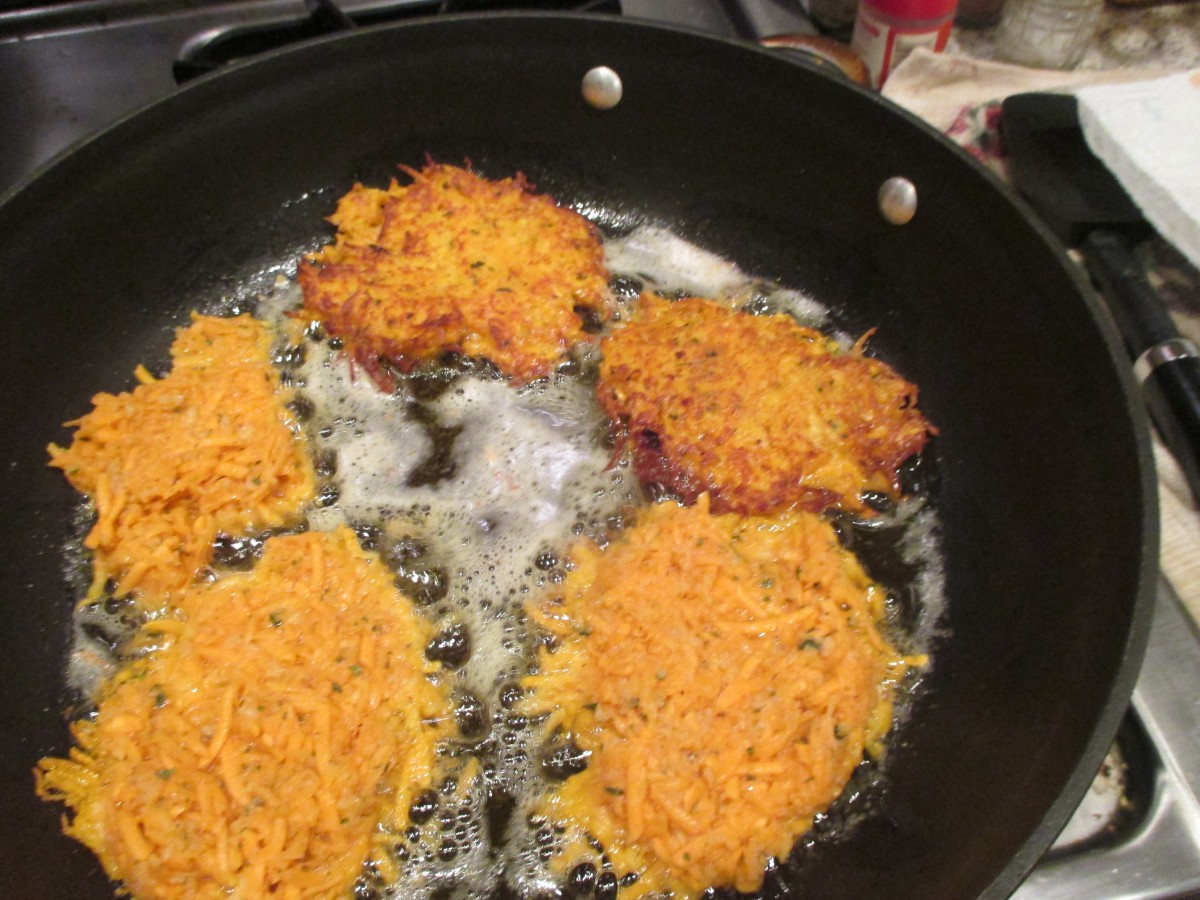
Sweet potato pancakes cooking
Vampire Chasers- Cheesy Garlic Toast

Vampire Chasers
If you are concerned about keeping away vampires this Halloween, you might want to make this recipe for cheesy garlic toast. Garlic is widely accepted as a repellent for vampires- and a lot less messy than a stake through the heart.
This is one of my favorite appetizers. I make them a few times a year, but they are extra fun to serve at a Halloween party.
A mixture of garlic and onions are cooked in butter, then spread over the bread slices. That would be plenty for most garlic bread- but you take it up a notch with a cheesy/ mayo mix on top. Baked for just a few minutes- these are always a hit. They can be served as an appetizer, or as a side with dinner.
Vampire Chasers
1 French baguette, cut into 3/4 inch diagonal slices
1 large minced onion
8 cloves minced garlic
1/4 cup butter
2 cups shredded mozzarella cheese
1/2 cup grated Parmesan cheese
1 cup mayonnaise
Slice the French baguettes diagonally into 3/4 inch slices. In a medium skillet, over medium heat, melt the butter. Combine the onions and garlic in the skillet. Cook and stir until tender. Set aside to cool. In a mixing bowl, combine the mozzarella cheese, Parmesan cheese and mayonnaise. On a cookie sheet, arrange the French bread slices in a single layer. Spread the onion and garlic mixture on the bread slices. Spread the cheese and mayonnaise mixture over the onion and garlic mixture on the bread slices. Bake in a 400 degree oven for 10 minutes or broil about 5 minutes, until the cheese is bubbly and slightly browned. Serve immediately.


