Flaming Ghost Cake
Flaming Ghost Cake
I have posted this recipe before, but thought it might be a good time to post it again. This one is fun for Halloween.
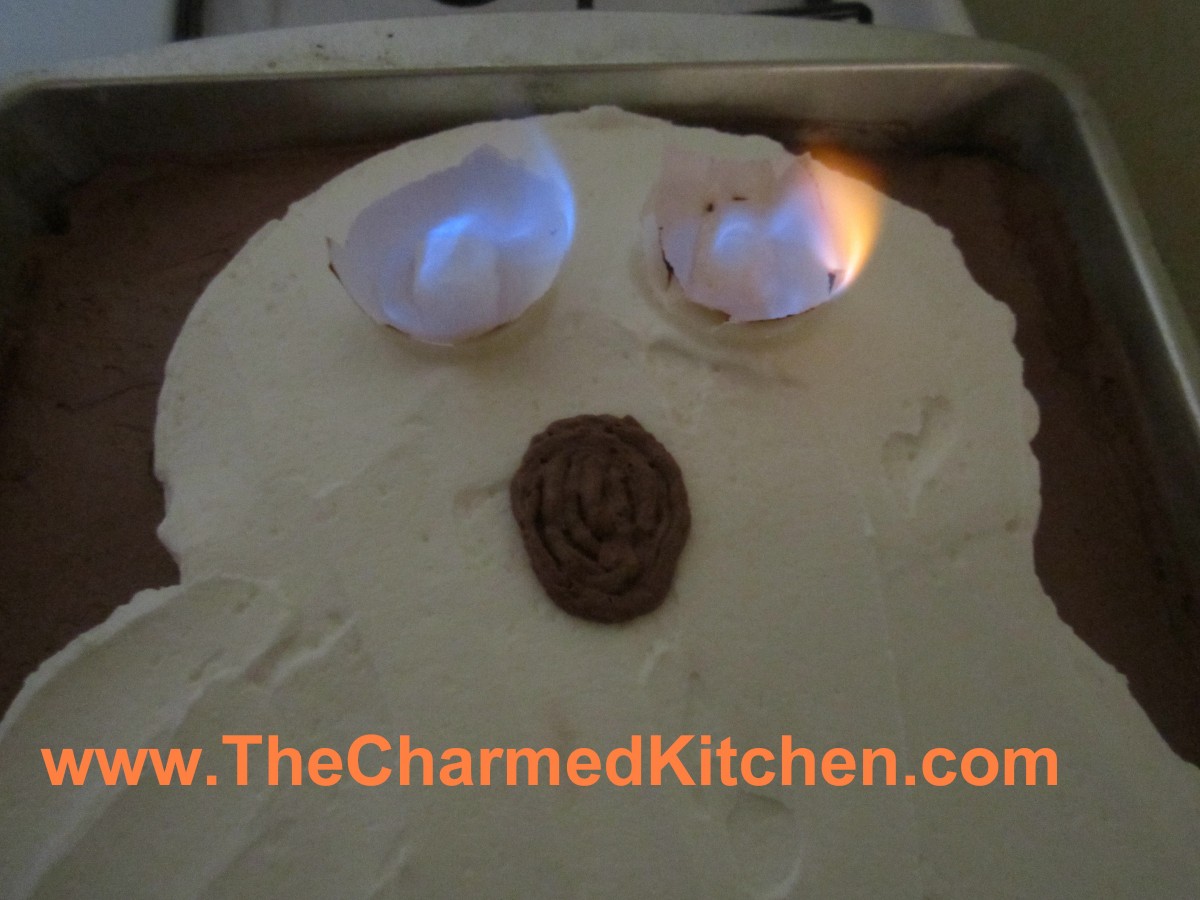
You start with a baked 9×13-inch cake. Frost it with chocolate frosting and then use white frosting to draw a ghost on the cake.
You can make all sorts of images- cats, bats, pumpkins, if you prefer.
When ready to serve the cake, the eyes are set on fire. Fun effect. Kids and grown-ups both will get a kick out of it. Just be sure to have proper adult supervision for the kids.
The picture doesn’t do it justice. Very cool blue flames. Don’t forget to turn down the lights!
Flaming Ghost Cake
1 prepared 9×13- inch cake, any flavor
2 c. chocolate frosting, I prefer homemade
1 c. vanilla frosting, I prefer homemade
3 oz. semi sweet chocolate, optional
2 empty eggshell halves, washed well and dried
2 sugar cubes
Lemon extract
Frost cake with chocolate frosting, then spread vanilla frosting in the shape of a ghost. Melt chocolate in a small plastic bag. When chocolate is melted snip off the corner of the bag and use to outline ghost. Place eggshell halves in cake, round side down where the ghost’s eyes would be. Soak sugar cubes in lemon extract and place in eggshells. When ready to serve light sugar cubes and turn off the lights. Serve 12-16.
Variations: You can use the flaming eyes effect on cat shapes, pumpkins or even bats. Practice drawing the shape on paper before frosting the cake. If you bake a larger round cake the whole thing can be the pumpkin. Just frost it with orange tinted frosting.
Butternut Squash Saute

Butternut Squash Saute
Winter squash season is here, and I could not be happier. I love the variety of squash (and pumpkin) at the markets this time of year. They are both beautiful and tasty.
This dish is a saute of butternut squash with onions, garlic, carrots and finished off with black sesame seeds.It makes a great, seasonal side dish.
I used butternut squash, but you could use any number of hard squashes, or even pumpkin. If you are looking for a different way to cook some of those squash- try this dish. I think you might be surprised at just how good it is.
When cutting up hard squashes, you have to be careful not to cut yourself. A round, hard squash, with a tough outer skin can be a recipe for disaster. I trim a small slice off one end of my squash, creating a flat side. Then I lay it down on that side, to make it more stable for cutting. With the butternut, once it was sliced on one side, I was able to cut in in half pretty easily.
Butternut Squash Sauté
3 tablespoons olive oil
1/2 cup chopped onion
1 teaspoon minced garlic
4 cups cubed fresh butternut, acorn or Hubbard squash or pumpkin
1/2 cup grated carrot
2 tablespoons soy sauce
1 teaspoon salt
1 teaspoon ground black pepper
2 teaspoons black sesame seeds
Heat the oil in a large skillet. Add the onion and garlic; cook and stir until the onions begin to brown. Stir in the squash, carrot, soy sauce, salt, and pepper; cook, covered, another 5 to 7 minutes, until squash is tender. Sprinkle with sesame seeds before serving.
Homemade Pumpernickel Bread

Pumpernickel Bread
There are few aromas I like more than freshly baked bread. I don’t bake much during the hot summer months, and look forward to cool Autumn days and fresh baked bread. I enjoy baking all sorts of breads.
For a bread baking class last night, I made Pumpernickel Bread. The dark color comes from a mixture of rye flour, strong coffee, cocoa powder and molasses. These ingredients also give this bread a richness and texture I adore.
It’s hard for me to find a store bought Pumpernickel bread that comes close to this one. Some store bakeries rely on caramel coloring for the color in the bread. For real flavor you need the real ingredients. It really is worth the time to make your own.
Pumpernickel Bread
2 Packages active dry yeast
½ c. warm water
2 c. lukewarm strong coffee
¼ c. each molasses and unsweetened cocoa
2 T. Caraway seeds
2 t. salt
5-6 c. flour- I use bread flour
2 c. rye flour
Cornmeal
1 egg white, slightly beaten
In large bowl dissolve yeast in warm water. Stir in coffee, molasses, cocoa, seeds, salt and 3 cups of flour. Beat with wooden spoon about 2 minutes. Stir in rye flour and enough of the remaining regular flour to make soft dough. Turn onto floured surface and knead until dough is smooth, about 10 minutes. Place in greased bowl, turning to grease top, cover and let rest until doubled, about 1 hour. Grease large baking sheet and sprinkle with cornmeal. Set aside.
Punch down dough, divide in 2, and form into balls. Place on baking sheet and cover. Let rise until double, brush with egg whites, slash tops and bake at 375 for 35-40 minutes. Makes 2 loaves.
Homemade Tomato Pasta
Fresh Tomato Pasta
Tomato season is coming to an end. I won’t have fresh tomatoes too much longer. I will miss them, and enjoy each one all the more.
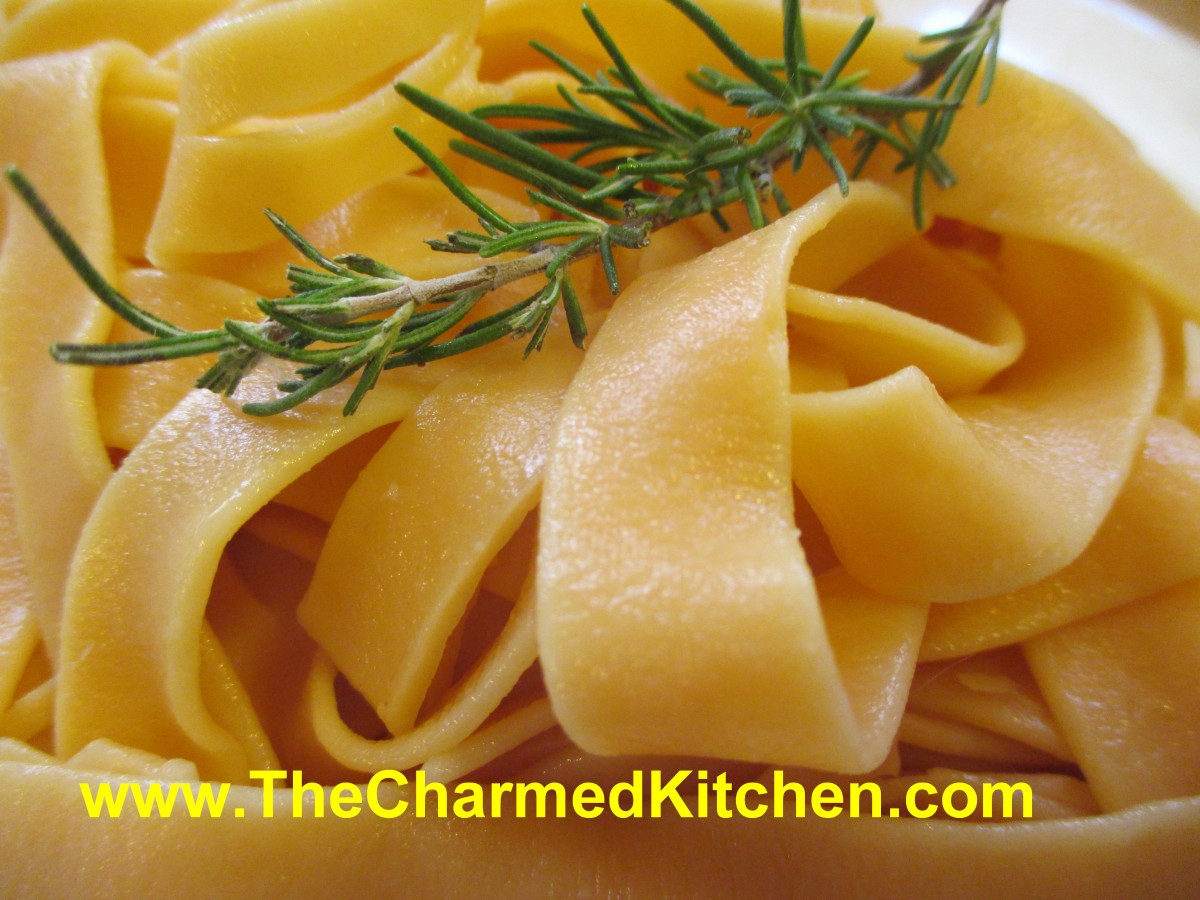
I really enjoy making fresh pasta. I often use vegetables and herbs in homemade pasta for added flavor. I decided to make a fresh tomato pasta today, using, well, a fresh tomato or two. You could use tomato juice in this recipe, but since I had fresh tomatoes, I just used fresh tomato.
I put a medium sized tomato in the blender and pureed it until smooth. I left the skin on and the seeds in. I didn’t have quite enough liquid, so I added a couple cherry tomatoes and blended again.
The pasta might look a little pale to you. I assure you, it was made with tomatoes. The pasta fades a little when cooked. I also used an orange tomato, so it was never going to be a bright red color. The flavor, however is quite nice. Subtle, but definitely tomato. Here is the recipe.
Fresh Tomato Pasta
2 c. flour
1 t. salt
½ -2/3 c. tomato juice- I just pureed a fresh tomato in the blender, seeds, skin and all. You might need a little more.
Fresh minced herbs, like chives, basil, parsley, rosemary, optional
Place flour and salt in bowl and stir to blend. Start adding the tomato juice, stirring to form a firm dough. Knead until smooth and cover dough, allowing to rest at least 20 minutes. I like to mix the dough in a food processor. Just mixes faster. You can also mix in a stand mixer using the dough hook.
Once dough is rested, roll out to desired thickness and cut into noodles or use as the base for ravioli. Fresh pasta cooks in just a couple of minutes. Watch carefully.
Serves 3-4.
Homemade Popcorn Balls
Homemade Popcorn Balls
I have fond memories of eating popcorn balls when I was a kid. One memory was during the summer. An amusement park near my home was famous for their popcorn balls. Every time we went there, we would end the day with popcorn balls.
The other memory was making our own, around Halloween. They seem to be a part of more than a few Halloween parties when I was younger.
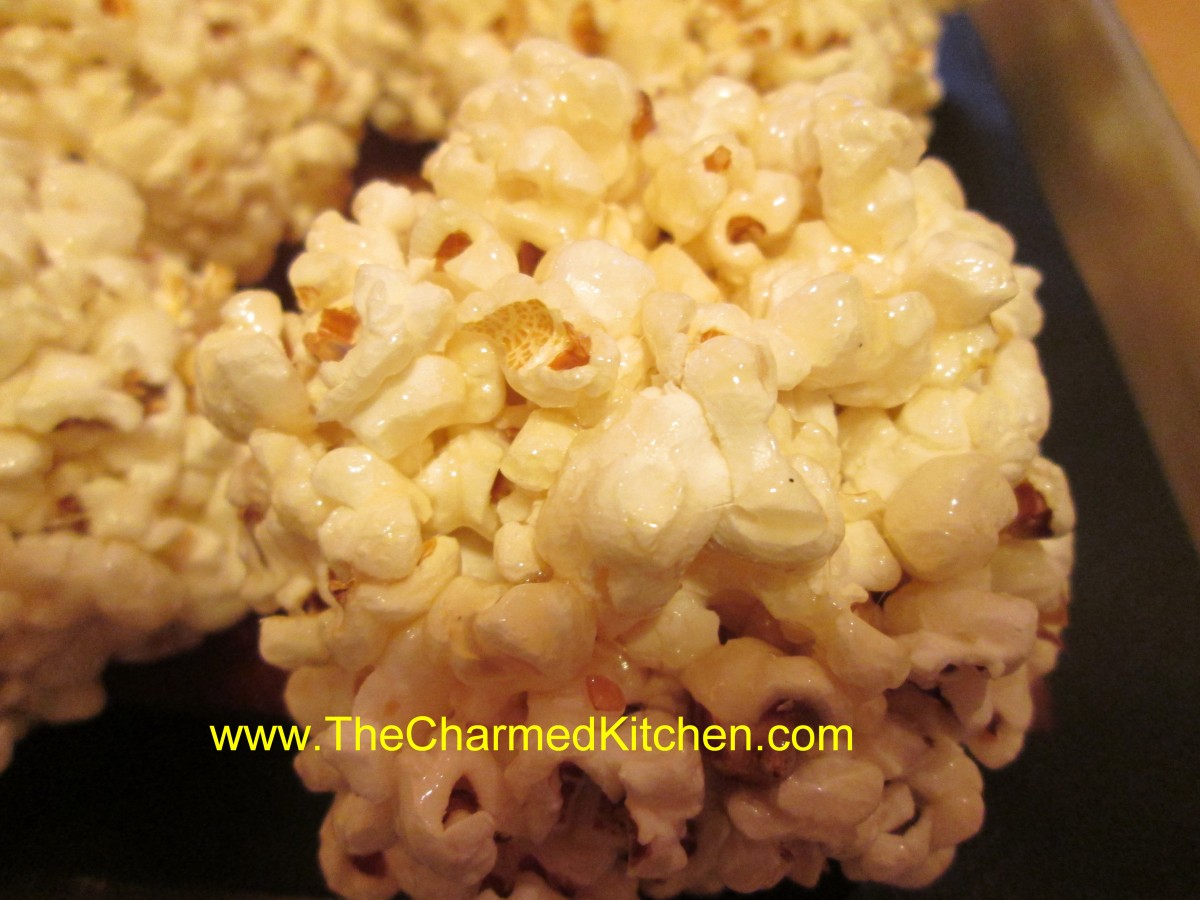
I don’t make them often, but popcorn balls are always a special treat for friends and family. This recipe is pretty easy. Kids, supervised, could help make them. You just have to make sure the mix cools down enough before you let them form the popcorn into balls.
I am a bit of a purist and enjoy them plain, but you can add Halloween themed candies to the mix, to dress them up for a party. Candy corn or black and orange M&M’s would both work.
The recipe calls for corn syrup. If you don’t want to use corn syrup, my recipe for a corn syrup substitute, (sugar syrup) is listed below.
Homemade Popcorn Balls
9 c. popped popcorn
1 c. sugar
1 T. butter
1 T. vanilla
1 c. corn syrup*
Place popcorn in large bowl and set aside. Combine sugar, butter, vanilla and corn syrup in a saucepan. Heat and boil until thick, about 4 minutes. Pour over popcorn. Stir until well coated. Let cool until safe enough to handle. With buttered hands form mixture into balls. Store wrapped tightly in plastic wrap until ready to eat. Best eaten within a few days of making. Makes about 8.
*If you don’t have corn syrup- or don’t want to use it here is a way to make a substitute for it.
Sugar Syrup- corn syrup substitute
3 cups granulated sugar
1 cup Water
1/2 tsp. Cream of Tartar
1/4 t. salt
Combine ingredients in a large saucepan. Bring to a boil and cover the pot. Reduce to a simmer and cook covered for 5 minutes. Uncover and cook to soft-ball stage. Stir frequently.
Soft ball stage occurs at 235-245 degrees. This stage can be determined by dropping a spoonful of hot syrup into a bowl of very cold water. In the water, use your fingers to gather the cooled syrup into a ball. If it has reached soft-ball stage, the syrup easily forms a ball while in the cold water, but flattens once removed from the water.
Remove from heat. Cool and store at room temperature. It will keep well for a month or two.
Mom’s Cabbage and Noodles
Cabbage and Noodles
Cabbage and noodles is not a glamorous dish and it never will be. That’s fine with me. It is a dish that will always remind me of my childhood. My Mother would make cabbage and noodles as a side dish, at least a couple of times a month. I loved it. I think of her every time I make it. It is, for me, a favorite comfort food.
I was making this dish for a class this morning. One of the ladies said I must be of Eastern European descent. She was right. This dish is definitely the food of my people.
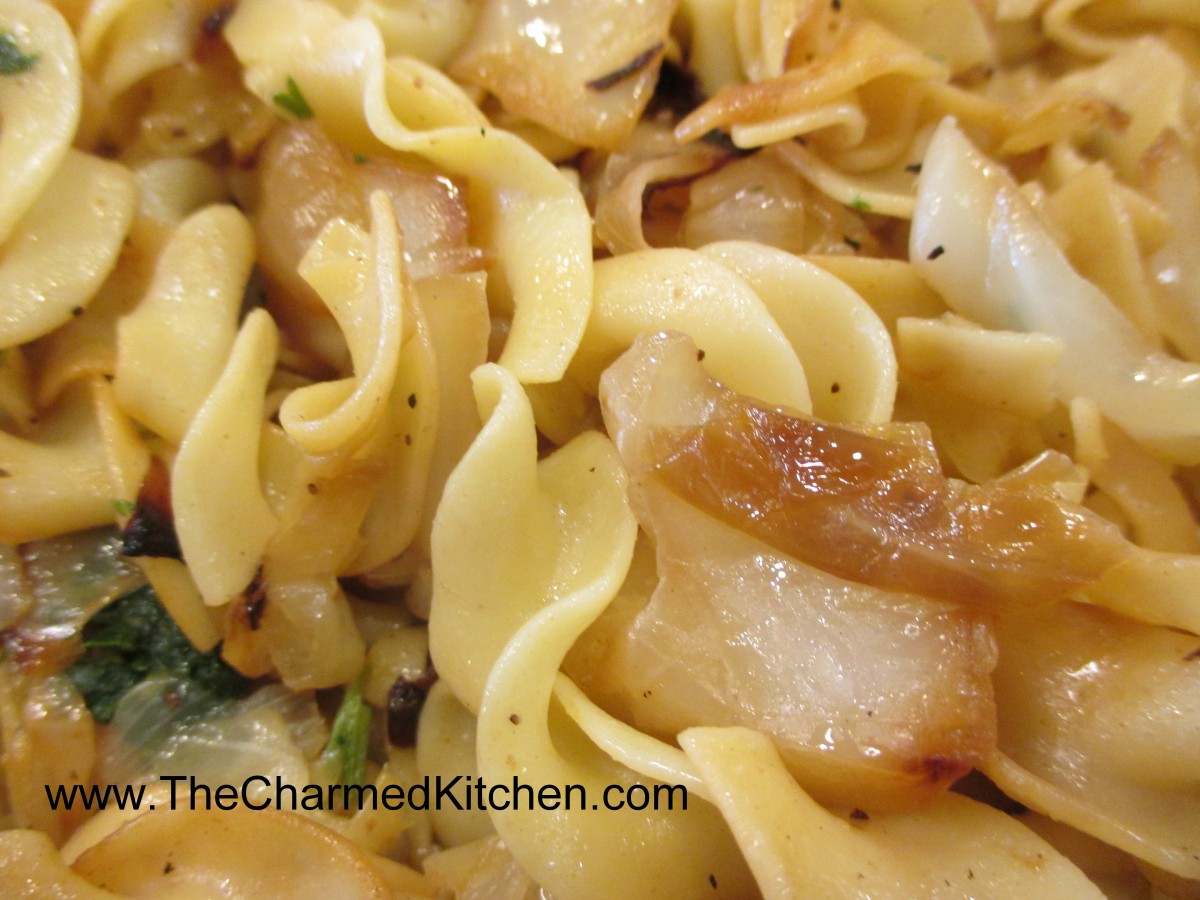
One reason it tasted so good, is that Mom took the time to caramelize the onions and to let the cabbage brown some, too. That added another layer of flavor to the dish. Simple and very tasty.
I used green cabbage this time, but you can use red cabbage, or a combination. Cabbage and noodles can be a side dish or even a main dish. You can play around with adding other ingredients. Sometimes I add cooked bacon, or leftover ham.
Cabbage and Noodles
1 onion, chopped
Oil
4-6 cups chopped cabbage
4 c. cooked noodles
Salt and pepper to taste
Fresh or frozen chopped parsley
Heat oil in skillet and cook onion until wilted and a little brown. Add cabbage and stir fry until cabbage in tender and starts to turn a little brown. Stir in noodles and cook until heated through. Season to taste and toss in parsley. Serves 4.
“Pumpkin” Ravioli Soup
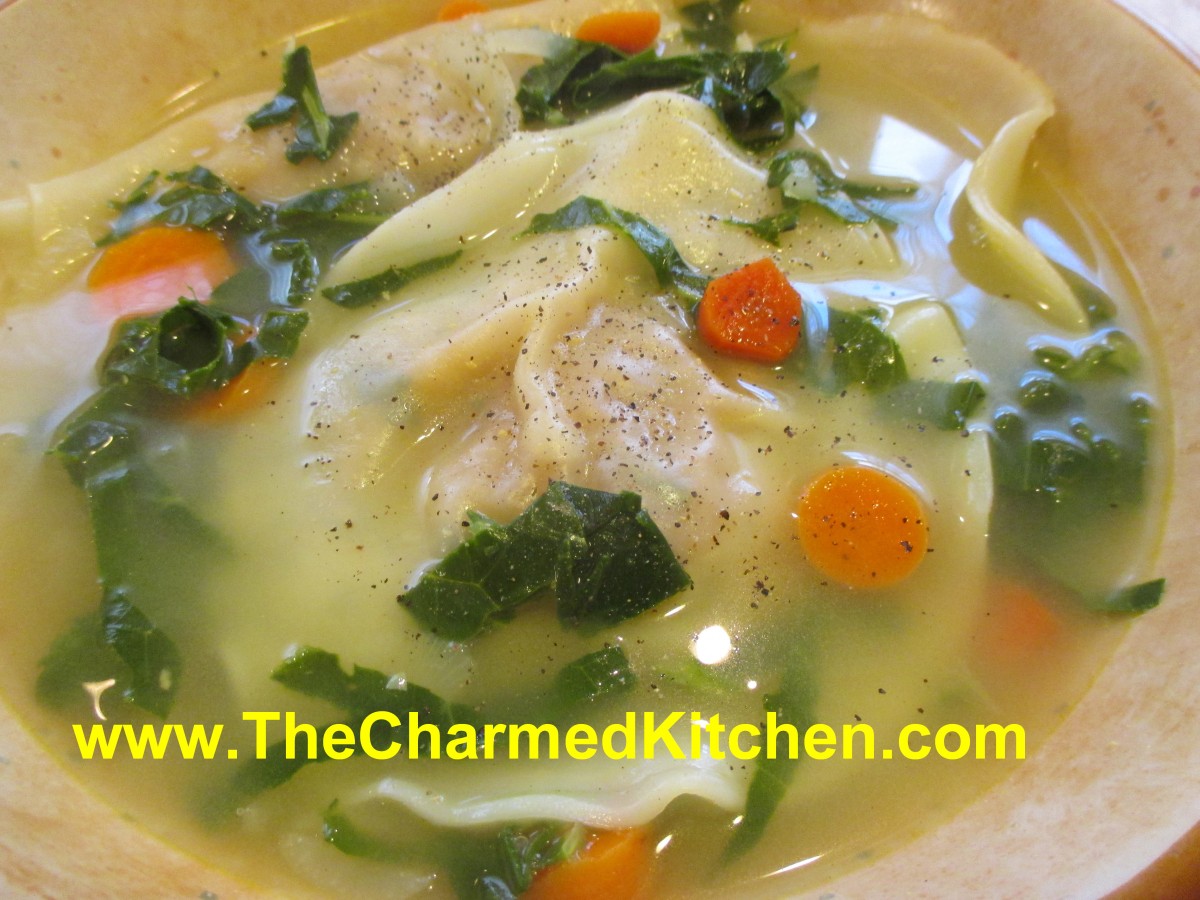
“Pumpkin” Ravioli Soup
Fall is the time for cooking with pumpkin and other winter squash. I make plenty of pumpkin bread, pumpkin cake, pumpkin soup, and so on. I often am actually using butternut or Hubbard squash in place of the pumpkin. This was the case with this soup. I have made it with pumpkin before, but this time I had a butternut squash, so that is what I used. Many winter squash can be used in place of pumpkin in cooking.
After cooking up one of my butternut squash, I was looking for a way to use some of it in a soup. I decided to use the squash as a filling for ravioli, then just put the ravioli in the soup.
I played with the spices and added some butter to the filling, too. It needed that extra bit of fat for flavor. It worked well. I just cooked the ravioli right in the soup, but you could cook and eat the ravioli without soup at all.
You would cook the ravioli in water. Once they are tender, drain and top with the sauce of your choice. I like brown butter with a little sage, but even a red sauce would be nice with these ravioli. Here is the recipe- for both the ravioli and the soup.
“Pumpkin” Ravioli Soup
Ravioli:
24 round won ton/dumpling wrappers
Filling:
1 cup cooked pumpkin or winter squash
2 T. softened butter
1 T. chopped parsley
1 t. paprika
1 t. nutmeg
½ t. garlic powder
Salt and pepper to taste
Pinch of cayenne
Soup:
2 T. oil or butter
2 onions, peeled and sliced
6 c. stock- chicken or veggie
3-4 carrots, peeled and sliced
2-3 c. thinly sliced collard greens
Salt and pepper
Dash of hot sauce
Fresh chopped parsley
Combine ravioli filling. Adjust seasonings. Place a rounded tablespoonful of filling on one of the wrappers. Dampen edges with water and place another wrapper on top. Seal, pressing out as much air as possible. Continue with remaining filling and wrappers- you should have 12 raviolis in all. Set aside while making the soup.
Heat oil or butter in a pot and add the onions. Cook until onions are tender. Add stock and bring to a boil. Add carrots and collards and cook until veggies are tender. Add seasonings and bring soup to a boil. Add the raviolis and let the soup simmer gently until they are cooked- about 4 minutes. Stir a little to keep them from sticking, but gently. They get a lot bigger and are sort of delicate. Transfer gently with a large spoon to soup bowls and ladle over the soup. Serves 4- 6.
Beet Dumplings
Beet Dumplings
These dumplings were inspired by gnocchi. Gnocchi are wonderful little dumplings made with potatoes in the dough. I love them and make them often.
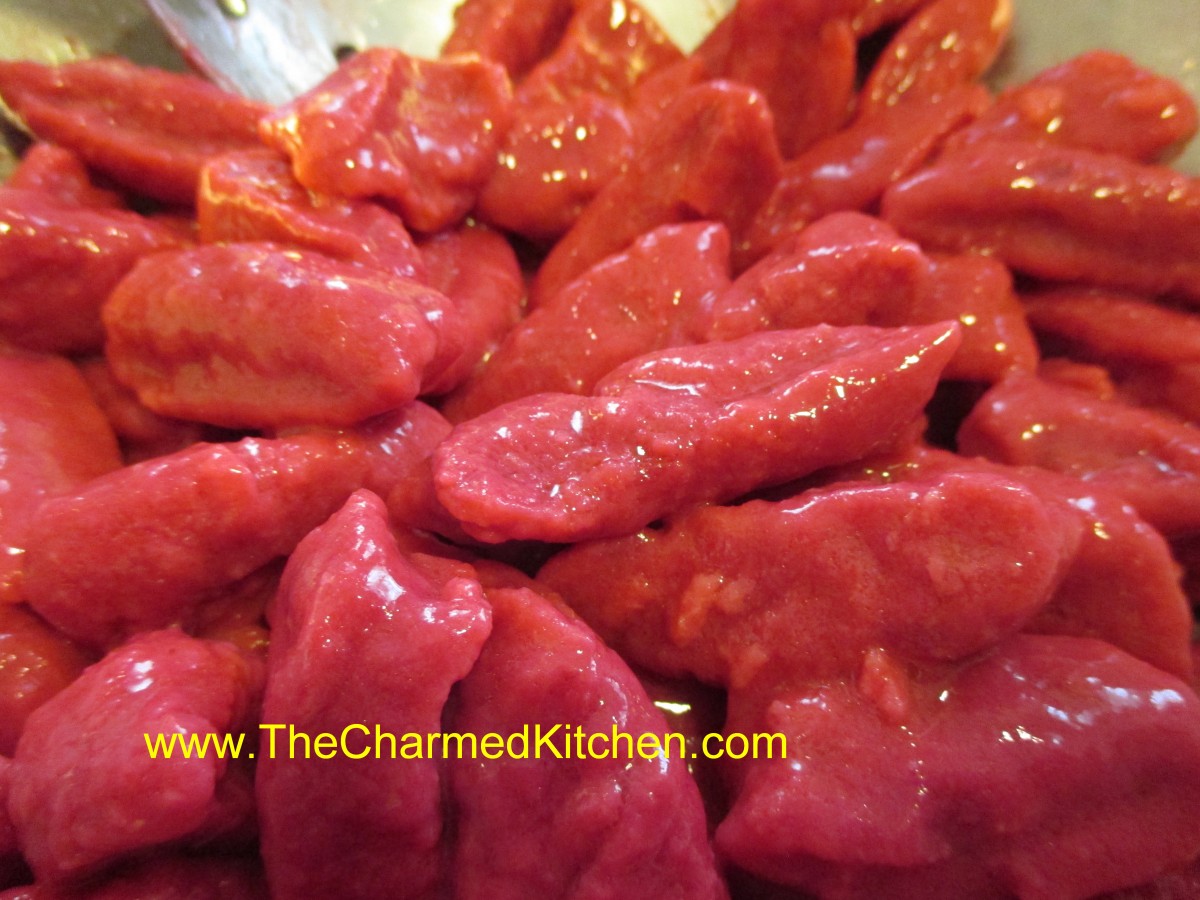
Since I had a lot of beets, I wanted to use some, to shake things up a little. I made a version with cooked beets. The color came out so vibrant.
The flavor of the beet is somewhat muted in this little dumpling. For serving, I combined the beet version with traditional gnocchi and some made from sweet potatoes. These would be a nice side dish for all sorts of dishes. I will make more and serve them with a roast chicken this weekend.
I do a very rustic version- just slice dough off into 1/2 -inch thick pieces and boil them up. These could be made ahead and frozen, too.
Beet Dumplings
2 small russet potatoes, 11-12 oz. total, peeled, diced into 1/2-inch cubes
2 medium/small beets, roasted, skin on, cooled
1 egg
1/4 c. whipping cream
1 1/4 t. salt
¼ t. dill weed
1 1/2 c. (about) flour
Steam potatoes over boiling water until tender, about 12 minutes. Place in bowl and mash or put potatoes through a ricer. Place in bowl and cool about 10 minutes. Remove skins from cooled beets and dice. Place beets in a food processor or blender. Add the cream and process until smooth. Combine with potatoes, egg, salt and dill and mix well. Stir in flour and combine until slightly sticky dough forms. Add more flour a tablespoon at a time if the mixture is too moist. Turn dough onto lightly floured work surface and divide into 6 equal portions. Roll out 1 piece into a rope about 20-inches long by 3/4 inch. Cut dough into 3/4 -inch pieces and arrange finished dumplings in a single layer on a floured baking sheet and repeat the process with the remaining dough. Boil the dumplings in well-salted boiling water, about 1/3 at a time. Boil for 4-5 minutes. They will come to the surface and be tender. Check after 4 minutes. Serve with butter and Parmesan cheese or with your favorite sauce. Serves 6.
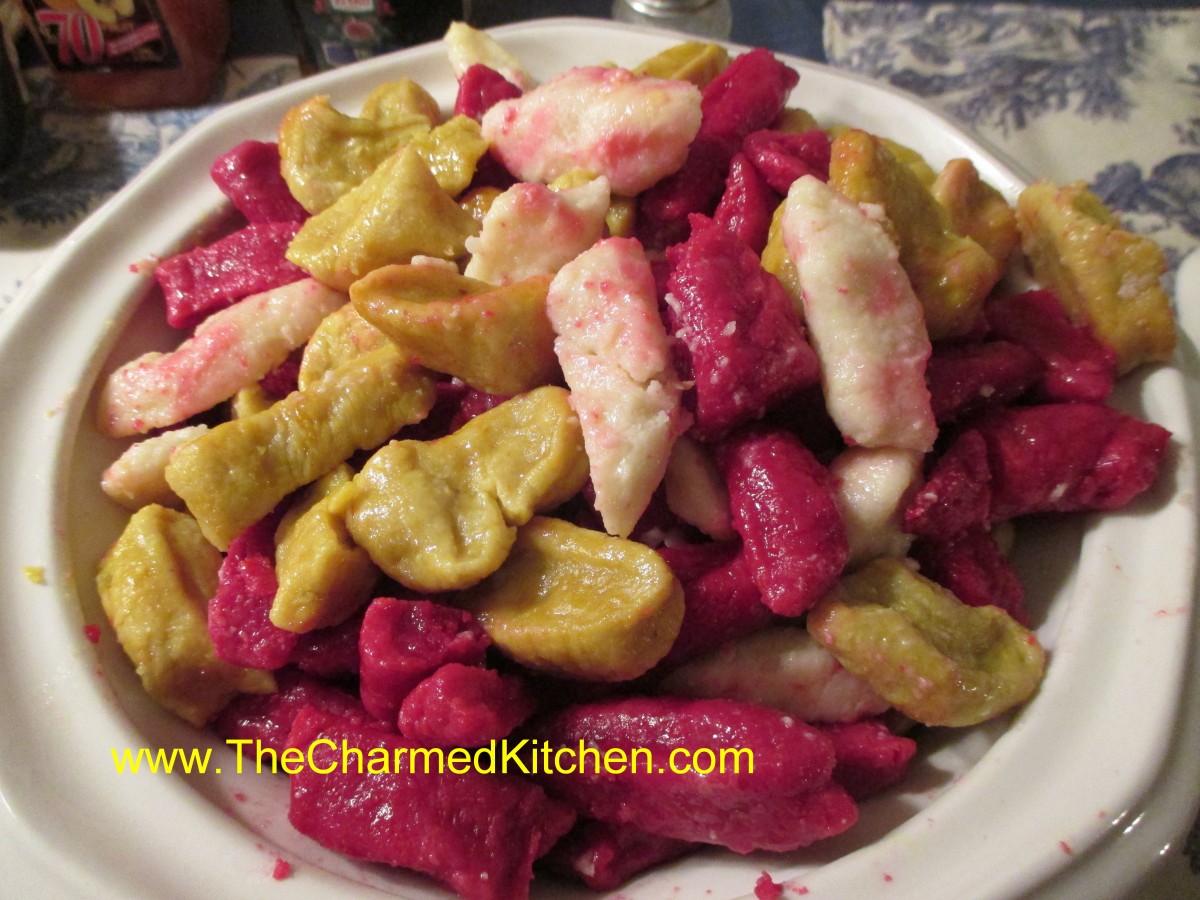
A Trio of “Gnocchi”
Coconut Shrimp

Coconut Shrimp
Coconut shrimp is a favorite of mine, and pretty easy to make. Cleaned, raw shrimp are dredged in flour, egg wash and a Panko bread crumb-coconut mix and then fried. I add some homemade curry powder to the eggs for a little extra flavor.
You can serve coconut shrimp as an appetizer or over rice. I serve mine with a sweet chili sauce.
Eating shrimp always feels like a splurge or a special occasion. I think that started in my childhood. We didn’t eat shrimp often when I was a kid. Only a few times a year, always a special occasion. New Year’s Eve, for sure. My mom would make the classic shrimp cocktail, cold shrimp, served with cocktail sauce, served in pretty stemmed glasses. As an adult I have learned to enjoy shrimp a lot of different ways. I eat it more often now, but it still feels special.
Here is how I make mine. You don’t need a special occasion to make it.
Coconut Shrimp
2 cups oil – I like to use peanut oil or avocado oil
1 cup Panko bread crumbs
1 cup unsweetened shredded coconut
1 pound shrimp, peeled and deveined
Kosher salt and freshly ground black pepper, to taste
1/2 cup all-purpose flour
2 large eggs, beaten
1-2 t. curry powder, or to taste
Heat oil in a large skillet or Dutch oven over medium high heat. In a large bowl, combine Panko bread crumbs and shredded coconut; set aside. Combine eggs with curry powder, set aside. Season shrimp with salt and pepper, to taste. Working one at a time, dredge shrimp in the flour, dip into the egg mixture, then dredge in the coconut mixture, pressing to coat. Working in batches, add shrimp to the Dutch oven and fry until evenly golden brown and crispy, about 2-3 minutes. Transfer to a paper towel-lined plate. Serve immediately with sweet chili sauce, if desired. Serves 4.
Pear Cobbler

Pear Cobbler
Cobbler is one of my favorite desserts for this time of year. I really enjoy making this pear cobbler for family and friends. Like apples, pears always remind me of Fall.
While cobblers can be made with any number of different fruits, I love using pears. It is one of the simplest desserts you can make from scratch, and one of my favorites, for sure.
In the time it takes to preheat the oven, you can have it ready to bake. This recipe calls for baking mix, like Bisquick. I make my own- recipes follows, but use what you like.
The cobbler is fine served plain, or with a dollop of whipped cream or ice cream. It can also be served cold, but I prefer to serve it warm.
If you prefer, you can also make the cobbler with a combination of pears and apples.
Classic Pear Cobbler
4 c. peeled and sliced pears
½ c. sugar
1 T. plus 2/3 c. baking mix (Like Bisquick or Jiffy Mix or even homemade)- recipe follows
1-2 t. cinnamon
2 T. packed brown sugar
¼ c. butter
2 T. milk
In 1-quart shallow casserole, combine fruit, sugar, 1 tablespoon of the biscuit mix and cinnamon. In medium bowl combine remaining biscuit mix with sugar. Cut in butter to resemble coarse crumbs. Stir in milk to make a soft dough. Drop by spoonfuls over fruit mixture. Bake in a preheated 400-degree oven for 30 minutes, or until toothpick inserted into dough comes out clean. Let stand 5 minutes. Serves 4-6.
Baking/ Biscuit Mix
8 cups sifted, all-purpose flour
1 c. powdered milk
1 c. powdered buttermilk
¼ c. baking powder
1 T. salt
2 c. shortening*
Sift dry ingredients together 3 times. Cut in shortening to resemble cornmeal. Keep in an airtight container. Store in a cool dry place and use within six months.
*You can use butter or coconut oil in place of the shortening. Just store in the fridge, if you do. I use coconut oil.


