Peanut Soup


This is one of the easiest soups I make. It is also one of my favorites. It’s a rich soup with a creamy texture and just a hint of heat. You could make it spicier, of course. The recipe is very versatile. As written, the soup is vegan, but you could make it with a meat-based stock, if you prefer.
If your only experience with eating peanut butter is on a sandwich or in cookies, you might be surprised at just how good this soup tastes. I have made it with almond butter. If you don’t have peanut butter, the almond butter works fine. Other nut butters would also work. but I still prefer it made with peanut butter. It freezes well, too.
Peanut Soup
2 c. chopped onions
1 T. oil
cayenne pepper to taste
1 t. grated fresh ginger
1 c. chopped carrots
1 c. chopped sweet potatoes
1 c. chopped white potatoes
5 c. vegetable stock or water
1 c. tomato sauce
1 c. smooth peanut butter
1 T. sugar, optional
1 c. chopped green onions
Sauté onions in oil until tender. Add seasonings and carrots and sauté 3 minutes more. Add potatoes and stock and simmer until vegetables are tender. Puree soup in blender in batches until smooth. Return to pot and add tomato sauce and peanut butter. Add sugar if soup is not sweet enough. I never add the sugar, but some people do. Warm gently and serve with green onions on top. You could also top with chopped peanuts, for a little crunch. Serves 6-8.
Green Tomato Sweet Relish

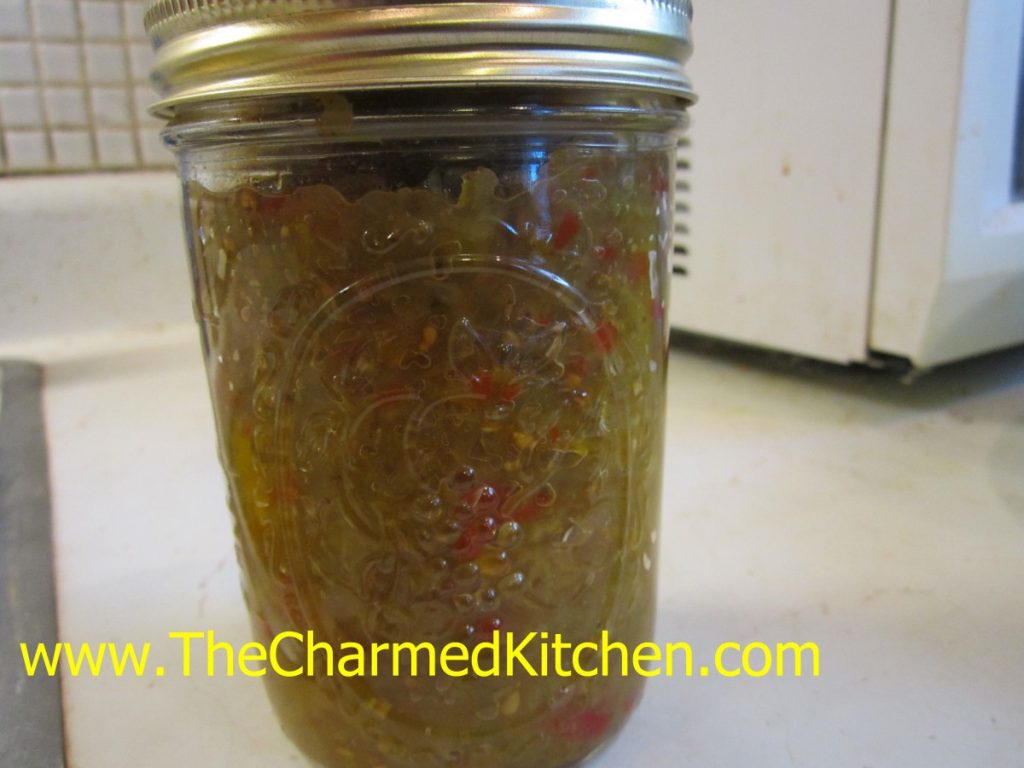
This sweet relish is a great way to preserve those last of the season tomatoes. It is every bit as good as relishes made from cucumbers.
Someone asked me for the recipe- so here it is.
Green Tomato Sweet Relish
6 pounds green tomatoes, about 22 medium
2-3 medium onions
2 medium sweet red peppers
1 sweet green pepper
1 large rib celery
1 3/4 c. white or cider vinegar ( 5% acidity)
1 2/3 c. sugar
3 T. canning salt
1 1/2 t. celery seeds
1/2 t. each cinnamon, cloves, allspice and turmeric
1/4 t. cayenne pepper
Wash trim and quarter vegetables. Put vegetables through food grinder using medium blade or pulse in food processor to chop finely. Drain, discarding liquid. Wash jars in hot, soapy water. Rinse and set aside. Combine vinegar with remaining ingredients in large saucepan and bring to a boil. Add vegetables and simmer 10 minutes, stirring occasionally. Continue simmering while packing hot jars, one at a time. Fill to within 1/2 -inch from top of jar. Wipe rims and place on lids. Process 10 minutes in a boiling water bath. Makes 5-6 pint jars.
Sage Advice


Sage deserves better. It is a wonderful herb, but I think it doesn’t get used enough. Like rosemary, sage has strong flavor, and can overpower a dish if used too liberally. The secret is to use a light hand with sage. Dried sage has a more concentrated flavor than fresh. If you haven’t cooked with sage lately, maybe you should.
Traditionally used in poultry stuffing, sage is wonderful with meats, stews, and soups. It can also be used with shellfish and other seafood. Sage pairs nicely with cheese, and in dips, in poultry seasoning, sausages, and with any wild game, especially venison. I love to add sage to winter squash soup and pumpkin dishes, too.
A fun addition to any plate is fried sage leaves. Just drop a few leaves in a pan with a small amount of hot oil. They crisp right up.
Sage is also one of the easiest herbs you can grow. It is a hardy perennial that thrives in a sunny location, although it will tolerate some shade. Deer seem to leave it alone, too. The reward is fresh sage leaves all season long. You can freeze or dry sage leaves for use year round.
So here are some recipes for using sage. Enjoy!!

Scotch Eggs
1 1/4 lbs. bulk country style or herb sausage
1 t. sage
1/2 t. thyme
1/4 t. cayenne pepper
4 hard cooked eggs, peeled
1/2 c. flour
2 raw eggs, beaten
1-c. fresh bread crumbs
vegetable oil for deep frying
Combine sausage and flavorings and mix well. Divide into 4 equal portions and flatten. Place an egg on each flattened sausage piece and press sausage to completely cover each egg. Dredge eggs in the flour, and then dip in the eggs. Roll in the breadcrumbs and fry in 2 1/2 inches of oil (heated to 350 degrees until well browned. This will take about 10 minutes. Drain. Keep warm until served. Makes 4.

Breakfast Sausage
2½ lbs. ground pork or turkey (leave on a little fat)
1 T. dried sage
2 t. salt
2 t. pepper
1 t. dried marjoram
½ t. dried thyme
¼ t. allspice
¼ t. nutmeg
¼ t. dry mustard
⅛ t. cloves
pinch of cayenne pepper
⅓ c. warm water
Mix herbs and spices with water and let stand 10 minutes. Add the water and spice mixture to the meat and blend thoroughly. Form into patties, and chill or cook immediately. Patties can be fried or baked. This sausage can also be frozen for later use. Makes almost 3 pounds.
Dressing/Stuffing
1 c. sliced mushrooms
¾ c. diced celery
3 T. minced onions
2 T. chopped parsley
4 T. butter
4-5 c. bread cubes
salt and pepper to taste
¼ – ½ c. turkey or chicken broth if making dressing
Sauté vegetables in butter until tender. Add bread and seasonings and toss to coat. Stuff into turkey just before cooking or add broth and place in covered casserole, cooking for 45 minutes to an hour at 350 degrees. When making stuffing allow ¾ c. per pound of turkey. You may want to stuff the bird and still make extra dressing for the next day. When making dressing be sure to cover the pan well to keep the dressing from drying out.

Amy’s Skillet Chicken Pot Pie
¼ c. olive oil
2 T. butter
1 sweet onion, chopped
4 parsnips, peeled and sliced
4 cloves garlic, minced
1 tablespoon chopped fresh sage
1 small bunch kale, center ribs and stems removed, leaves chopped
Kosher salt
freshly ground pepper
¼ cup all-purpose flour
3 cups low-sodium chicken broth
2 T. sherry
½ small butternut squash, peeled, cut into 1/2-inch pieces (about 1½ cups)
½ of a roasted chicken- meat removed from bones, torn onto bite sized pieces – about 1½ cups of meat
1 sheet frozen puff pastry, thawed
1 large egg
Place a rack in upper third of oven; preheat to 425°. Heat oil in a deep 12-inch cast-iron or other heavy ovenproof skillet over medium-high heat. Add onions; cook, stirring occasionally, until beginning to brown, about 4 minutes. Reduce heat to medium-low. Add parsnips, garlic and sage to skillet and cook, stirring occasionally, until garlic begins to brown, about 2 minutes. Add kale and season with salt and pepper. Cook, tossing often, until wilted, about 4 minutes. Sprinkle flour over. Cook, stirring constantly, for 4 minutes. Stir in broth, 1/2-cupful at a time, then add squash. Bring to a boil, reduce heat, and simmer until squash is just softened and broth is thickened, 8-10 minutes. Add chicken to skillet, stir, and season with salt and pepper. Unfold pastry and smooth any creases; place over skillet, allowing corners to hang over sides. Whisk egg and 1 teaspoon water in a small bowl. Brush pastry with egg wash; cut four 1-inch slits in top to vent. Bake pot pie until pastry is beginning to brown, 15-20 minutes. Reduce oven temperature to 375° and bake until pastry is deep golden brown and crisp, 15-20 minutes longer. Let cool for 10 minutes before serving.
Spiced Yellow Split Pea Soup
1 lb. yellow split peas, rinsed
8 c. stock or water
2 c. chopped onion
2 carrots, peeled and sliced
3 potatoes, peeled and cubed
½ lb. sliced green beans
1 T. parsley
2-3 t. hot pepper sauce
1 t. chopped fresh sage- or ½ t. dried sage
1 t. dried thyme
1 t. ginger
1 t. cumin
1 t. turmeric
½ t. white pepper
2 cups diced ham
Salt to taste
Note: you can use 1 teaspoon liquid smoke if omitting meat.
Combine peas, water or stock and simmer, covered, about an hour, stirring occasionally. Add remaining ingredients, except salt, and cook, covered, over low heat for about 60 minutes. Add salt to taste. Freezes well. Serves 6-8.
Poultry Seasoning
¼ c. dried parsley
3 T. dried marjoram
3 T. dried rosemary
3 T. dried thyme
2 T. dried savory
1 T. celery seed
1 T. dried sage
2 t. dried oregano
2 t. dried basil
1 t. ground allspice
1 t. fresh ground pepper
Combine all ingredients in a blender. Store in a cool, dry place to maintain freshness.
Sage Rolls
¾ c. milk
½ c. sugar
1/3 c. butter
1 t. salt
2 packages active dry yeast
½ c. warm water
4½.-5 c. bread flour
½ c. chopped green onion or chives
1 T. dried sage
2 eggs, lightly beaten
Heat milk to almost simmering, being careful not to bum. Stir in sugar, butter, and salt. Cool milk to lukewarm. Dissolve yeast in warm water. Set aside. Place 2 cups of flour in a large bowl. Add the milk mixture, and beat together. Stir in yeast mixture, sage, and eggs. Beat with an electric mixer for 4 minutes. Gradually stir in enough of the flour to make a soft dough that leaves the sides of the bowl. Tum dough onto a floured surface and knead until the dough is smooth and elastic, about 8 – 10 minutes. Place the dough in oiled bowl, turning to grease the top. Cover, and allow dough to rise until doubled in bulk, about 45- 55 minutes. Punch dough down, tum onto a floured surface, and cover with the bowl. Allow the dough to rest 15 minutes. Divide dough into 24 – 32 pieces, depending on the size you like. Shape dinner rolls as desired. I like to roll pieces into 6 inch ropes, and then tie them into a loose knot. Place the rolls onto greased baking sheets, allowing them room to grow. Cover, and let rise until doubled in bulk, about 45 minutes. Bake rolls in a 350 degree oven until golden brown, 15- 18 minutes.
Crab Rangoons


These tasty bundles of crabby/ cheesy goodness are so simple to make. Because they are small- I don’t use a lot of oil to deep fry them. Just a couple of cups of oil in a small saucepan- fry a few at a time and you are done in no time at all. Of course, if you have a big crowd over, you might want to use a bigger pot, with more oil. A wok works well for frying them, too.
There are two ways you can go with the filling- real crab or surimi, the faux crab. That is not my call to make. It is up to you. I had friends over to make dumplings the other day. I had surimi in my freezer and had not planned on using it that day. However, when I mentioned I had it- the idea of making crab rangoons was obviously well received. I have baked them. We fried them.
You have some options with folding them. We used pre-made wrappers I bought at the local Asian market. You can fold them into triangles, like the picture above, or into little bundles like the picture at the end of this post. They taste wonderful no matter how you shape them.
So here is the recipe I like to use
Crab Rangoons
1 can (6 oz.) crab meat,drained well
1 (8 oz.) package cream cheese
1 t. horseradish
dash of hot sauce
wonton wrappers
oil for frying
Combine crab meat with cream cheese, horseradish and hot sauce. Place a wonton wrapper on work surface and place a teaspoonful of the crab filling in the middle. Fold 2 corners in to just touch. Take one of the remaining corners and roll up into a tiny roll. Dampen edge with a little water to affix. Repeat with remaining filling. You should get a several dozen. Pour 1-inch of oil into a small saucepan and heat to 350 degrees. Fry rangoons a few at a time until golden and drain on paper toweling. Keep warm in 300-degree oven until ready to serve- but best served right after you make them. Serve with Sweet and Sour Sauce.

Catfish Dumplings


Fish dumplings are kind of like meat balls, but made with fish. Still, they are different, and it is the texture that makes them so special. I had eaten fish balls at Asian restaurants and always loved them. I was curious as to how they were made. I made them and because of the tender final product, thought of them as more of a dumpling. Since I was making other dumplings with friends yesterday, I made these, too.
We added them to simmering stock and served with dipping sauces.
The big difference in making fish dumplings, as opposed to a traditional meat ball, is that the fish is pureed into a smooth paste. Combined with a few other ingredients, the mixture is very soft. More like a batter or dough in feeling and appearance. The fish batter is also mixed for a long time. It helps to give you the smooth final product you want.
Once you make the base, the balls are shaped and simmered until done. The final texture should be smooth and light. Mine are pretty basic, but you can add all sorts of seasonings for different flavors. Different fish will also give you different flavors.
When you read the recipe, it sounds like a lot of work. There is some time in prep, but a lot of that is just letting the mixer do its job. I thought they were well worth the effort. I had plenty for a party, and extra to freeze.
I used catfish and I really loved the flavor.
Catfish Dumplings
2½ lbs. of raw fish – I used catfish
1¾ c. ice water, divided
4 T. sugar
2 T. dry sherry – not cooking sherry
3 t. salt
4 eggs whites
4 T. cornstarch
Place the fish in a blender add ¾ cup ice water and puree until smooth. Remove fish puree to a stand mixer and add the sugar, sherry and salt. Use the paddle attachment and blend the fish mixture on high for 12-15 minutes. Add the egg whites, one at a time, while the mixer is running, during the 15 minute blending time. Now, with the mixer still running add ½ cup of the ice water, then 2 tablespoons of the cornstarch, blending well each time. Add the rest of the water, then the rest of the cornstarch. This should take about 5 minutes. The mixture should look really smooth and kind of silky. Turn off the mixer and place a small spoonful of the mixture in water- to be sure it floats. Now, you are supposed to squeeze small amounts of the mixture through your hand as you make a fist to form into 1- inch balls. I just used a tablespoon to spoon out the mixture, then used wet hands to form into balls. They aren’t going to be perfectly smooth and round, but that is fine. Have a big bowl of cold water standing by. As you make the balls drop them in the water. They will keep their shape and not stick together- they are soft, but should hold together. Once you have all the dough in balls, get a big pot of water just barely simmering. You don’t want the water to boil. Drop about half of the dumplings into the water at a time. Cook until they float, 2-3 minutes. Remove with a slotted spoon and set aside to cool. Now you are ready to go. It makes a big batch, so feel free to freeze some. You can add your fish dumplings to soup, sauté in oil until crisp or warm in broth and serve with dipping sauces.
Green Tomato Pickles

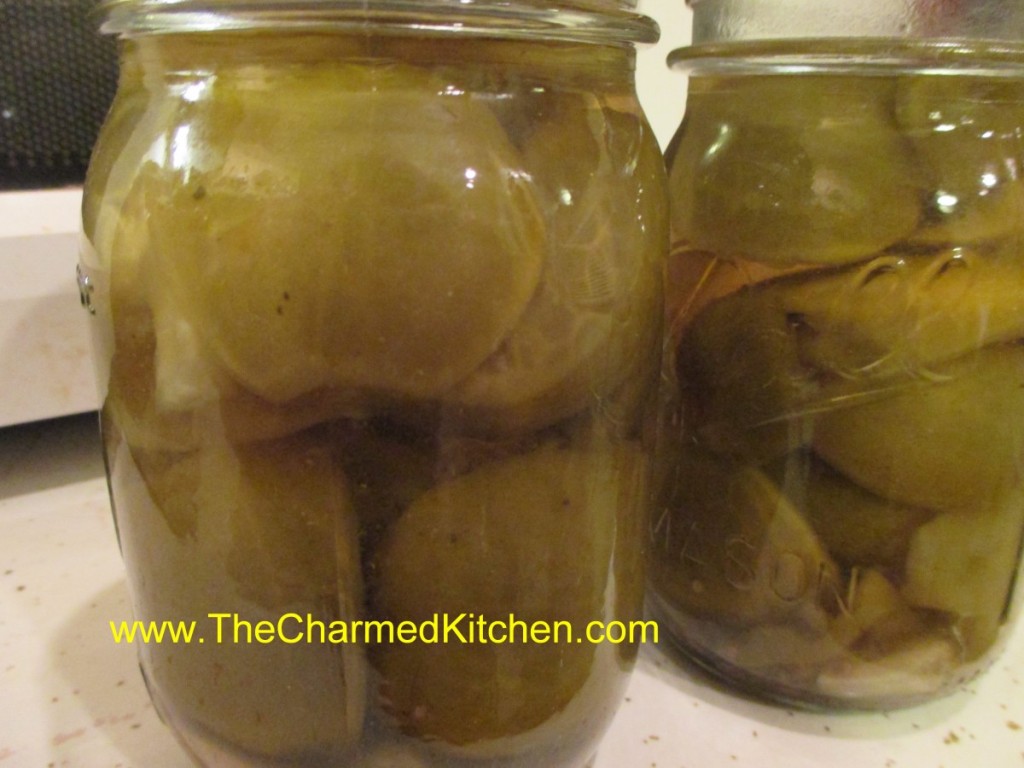
The garden season is winding down around here. A number of friends have posted pictures of their last ripe tomatoes of the year. That is a sad time. But, don’t forget about those green tomatoes. You can make fried green tomatoes, which are great. You can also make these pickles. That way, you can enjoy those home grown tomatoes a little longer.
The recipe is pretty simple. I sometimes add a teaspoon of red pepper flakes to each jar for a spicy version. The hardest part is waiting. Once the tomatoes are canned, you have to give them 4-6 weeks for the pickling to finish. Trust me, it is worth the wait. While the recipe calls for using quart jars, you can use pints. Process for the same time as the quart jars. I like to use pints for the green cherry tomatoes.
Just because your ripe tomatoes are done for the year, harvest those green ones and get a little something more from your garden.
Green Tomato Dill Pickles – Kosher Style
Green tomatoes
6 ribs celery, cut in 2-inch pieces
6 Sweet green peppers
6 cloves Garlic, peeled
2 quarts water
1 quart vinegar- 5% acidity- you can use white or cider vinegar
1 cup canning or pickling salt
Dill, optional
Use small firm green tomatoes. Pack into hot, clean canning jars. Add to each quart jar a clove of garlic, 1 piece of celery, and 1 green pepper cut into fourths. Make a brine of the water, vinegar, and the salt. Boil with the dill for 5 minutes. Pour the hot brine over the pickles to within 1/2 inch of the top of the jar. Put on cap, screw band firmly tight. Process in a boiling water bath for 15 minutes. These pickles will be ready for use in 4- 6 weeks. Yield: About 6 quarts. Source: NCHFP
Cinnamon Coffee Scones


Scones should be tender, a little crumbly, and still moist in the middle. These scones are delicate, full of coffee flavor, and not too sweet. You might think of only serving scones with tea, but these are wonderful with a cup of coffee.
As with any scone, the secret is not to over work the dough. You can eat these plain or with a bit of butter or jam. I’m having mine with a cup of coffee. They really make a tasty start to the day.
When someone tells me they don’t like scones, I am sure it is because they haven’t had good scones. In a cooking class, one of the students said she only had scones once, and they were heavy and dry. I encouraged her to seek out better scones. I think these would win her over.
Cinnamon Coffee Scones
2/3 c. half and half
2 T. instant coffee powder or espresso powder
1 t. vanilla
1 egg
2 1/4 c. flour
1/2 c. sugar
1 T. baking powder
1 t. cinnamon
1 t. salt
1/2 c. cold butter
1 T. half and half, for brushing the scones
2 T. cinnamon sugar, for sprinkling on the scones
Coffee Cinnamon Glaze- recipe follows
In microwave safe container combine half and half with the coffee powder and heat 30 seconds or so. Stir to dissolve coffee and cool down before using. Heat oven to 400 degrees. Add vanilla and egg to cooled coffee mixture and beat until smooth. Set aside. Combine dry ingredients in a mixing bowl and cut in butter until mixture resembles coarse crumbs. Some small pieces of butter can still be visible. Stir in coffee mixture and mix gently until a soft dough forms. At this point you are supposed to press the dough into an 8-inch circle on a baking sheet. To get a really neat circle use an 8-inch cake pan. Sprinkle the pan with a little flour and put the dough in the pan. Press the dough into the pan. Turn the cake pan over onto an ungreased baking sheet. Do this part fast. Slam it down and then remove the cake pan. You will have a perfect 8-inch circle of dough. Use a sharp knife to cut the dough in half. If the dough is too sticky sprinkle the top with a little more flour. Cut in half again and then 2 more times. You will have eight wedges of dough forming 8 scones. Pull dough apart slightly using a spatula. They grow a lot when baking and this will give them more room to expand. Brush with the extra half and half and sprinkle with the cinnamon sugar. Bake for 20 minutes or until they spring back when touched lightly. Make glaze and drizzle over the warm scones. Makes 8.
Coffee Cinnamon Glaze
2 T. half and half
2 t. instant coffee powder or espresso powder
1 t. cinnamon
1 c. powdered sugar
Heat half and half and coffee powder together in microwave safe container for 10 seconds. Stir until smooth. Stir in cinnamon and powdered sugar until smooth and drizzle over the scones.
Spelt Waffles


In class last week we were making waffles. One of the waffles we made were spelt waffles. Spelt is a whole grain that has an almost nutty flavor. They were a big favorite in class that night. They work great for breakfast and brunch. They would also be a nice base for chicken and waffles. If you haven’t cooked with spelt flour before, I think you will be pleasantly surprised. While it is a whole grain, it has a lighter texture and flavor that whole wheat. Spelt is a close relative of wheat flour. It has a soft texture when baked making a great choice when you want a whole- grain product with a tender “white flour” texture to it.
Spelt Waffles
2 1/4 cups spelt flour
1 tablespoon baking powder
1/4 teaspoon salt
2 eggs
1 cup milk
3/4 cup club soda – we used hard seltzer in class.
1/4 cup oil
Preheat your waffle iron. Mix the dry ingredients on a large bowl. Then whisk in all the wet ingredients until smooth. Scoop the batter onto the waffle iron and close. Cook for 2-5 minutes, than repeat. Make 12- 4 inch waffles.
Chocolate Beet Cake


When I say beet cake, a lot of people give me a funny look. First, there are the beet haters, and you know who you are. The people who just don’t like the taste of beets. I get that, beets are an acquired taste.
Then there are the people who like beets, but could never picture them in a cake. I bake cakes with carrots in them, zucchini and even parsnips. Adding beets to a cake is not so far off. The beets add a subtle red color to the cake, but they also add moistness. The end result is a cake that is full of flavor and has a wonderful, moist texture.
Truth is, I don’t really taste the beets in the cake much at all. I taste the chocolate. So here is the chocolate beet cake recipe. I hope you enjoy it.
Chocolate Beet Cake
2 cups all-purpose flour
1½ teaspoons soda
1/2 teaspoon salt
1 1/2 cups sugar
1/2 cup cocoa powder
3 large eggs, beaten
1 cup plus 2 tablespoons oil
1½ cups grated cooked beets
2 teaspoons vanilla
Powdered sugar, optional, or cream cheese frosting- recipe below
Preheat oven to 350°. Combine flour, soda, salt, sugar and cocoa in a bowl; set aside. In a mixing bowl, combine the eggs and oil. Beat in vanilla and continue beating until well blended. Slowly beat in dry ingredients until well mixed; stir in beets. Pour into a greased and floured 9×13-inch baking pan. Bake at 350° for 25 to 35 minutes, or until cake bounces back when touched lightly with finger. Cool in pan on a rack. Frost cooled cake, or dust with powdered sugar.
Frosting recipe:
8 oz. Cream cheese, softened
3/4 c. powdered sugar- or more to taste
1 stick butter, room temperature
Beat all together until fluffy. Frost cake and refrigerate until ready to eat.
Blueberry Waffles


I recently posted a recipe for blueberry pancakes and it got me to thinking- why didn’t I ever make blueberry waffles? I gave it a try and loved the way they came out. I just added some berries to one of my favorite waffle recipes. They are light and crispy, but still tender in the middle. I served them with butter and maple syrup. They would also be great with powdered sugar.
The blueberries made them special. Makes for a special breakfast. They could also be used as the base for a shortcake. Topped with ice cream or whipped cream, they would make a wonderful dessert.
Blueberry Waffles
1 1/3 cups flour
4 t. baking powder
1 t. salt
2 t. sugar
2 eggs, separated
½ c. butter, melted
1¾ c. milk
2 t. vanilla
1 c. blueberries, fresh or frozen
In a large mixing bowl, whisk together all dry ingredients. Separate the eggs, adding the yolks to the dry ingredient mixture, and placing the whites in a small mixing bowl. Beat whites until moderately stiff; set aside. Add milk, melted butter and vanilla to dry ingredient mixture and blend. Fold stiff egg whites into mixture. Fold in blueberries. Ladle mixture into hot waffle iron and bake. Makes about 6 waffles.


