Violet Jelly

Violet Jelly
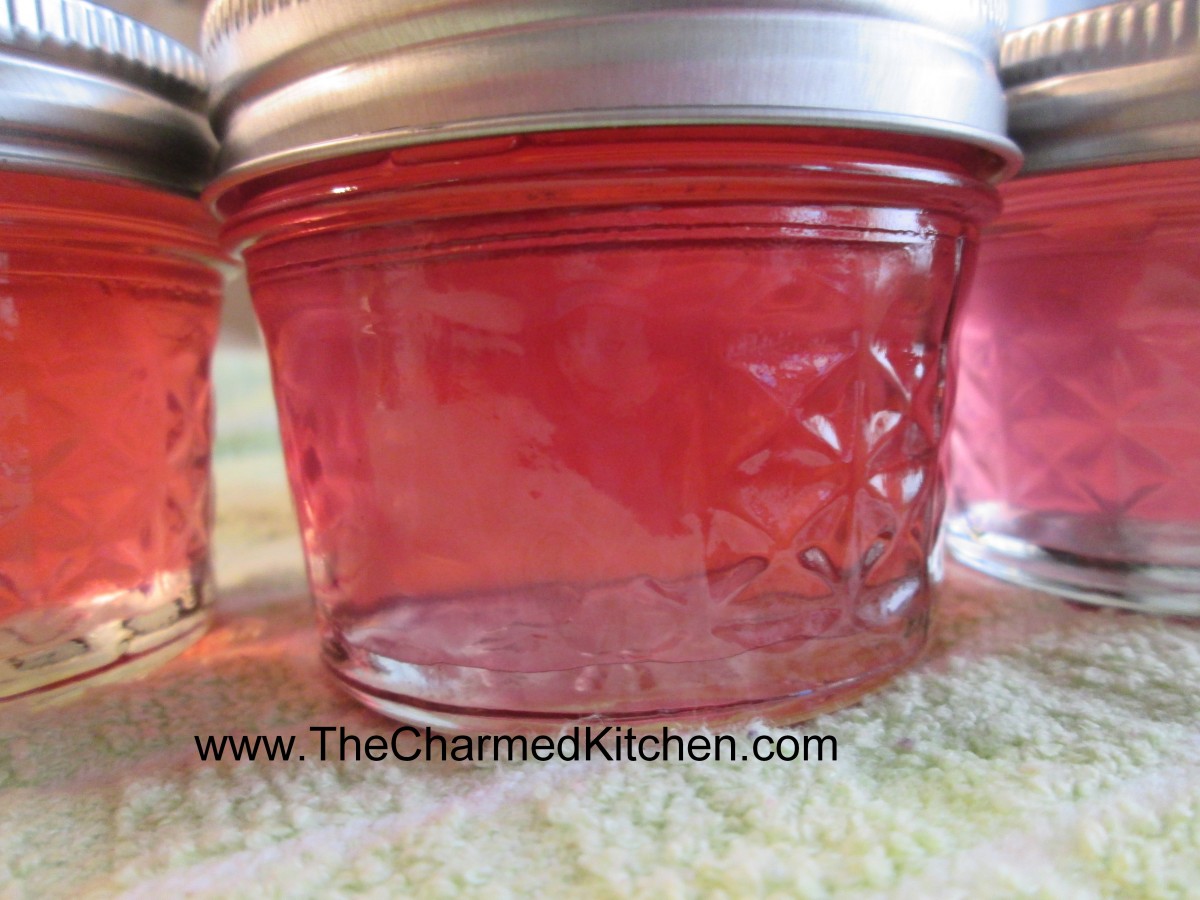
I have made a lot of jams and jellies over the years. I like them but sometimes find them too sweet for my taste. I was planning on just making infused vinegar from some of my violets this year when I decided to use the vinegar as a base for the jelly. It worked out great. The end product had a sweet taste of violets but the vinegar added a tartness I really liked. It also came out a stunning pink color. Normally when you make violet jelly you boil water and pour it over the violet blossoms, making a sort of violet tea. Then you go ahead and make the jelly. By harvesting blossoms and putting them in a jar with vinegar you can make the jelly pretty much anytime you like. Also, if you don’t have a lot of blossoms at once you can harvest a few at a time over a longer period of time. The violets in vinegar will keep. I like to have equal parts flowers and vinegar for a nice strong floral flavor, but you can get by with fewer blossoms if you need.
Start with a clean jar and put your violets in it. Pour vinegar over to cover. White vinegar or white wine vinegar can be used. Heck you could probably use red wine vinegar, too. Cider vinegar might affect the color. You can continue to add flowers to the jar as you pick them. I picked 4 cups of violets and put them in a quart mason jar. I added vinegar to fill the jar, closed it up and let the flavors blend for a week. I could have let it sit longer if I was too busy to get to it. If you are in a hurry and want to make the jelly right away just heat up the vinegar and steep the flowers.
After a week, I strained it out then poured the mixture through a coffee filter to get it really clear. I ended up with 3 1/2 cups of violet “vinegar” to use for my violet jelly. I had a basic idea of how much sugar I would need so I went from there. It worked out great and jelled perfectly.
Enough chat- here is the recipe.
Violet Jelly
3 1/2 cups violet vinegar*
1/2 c. lemon juice
1 package powdered pectin
5 c. sugar
Wash and prep jars and get water bath heating up. Place violet vinegar in pan and add lemon juice and pectin. Bring mixture to a rolling boil over high heat. Add sugar and return to the boil. Stir often. Once mixture gets to a full rolling boil, boil 1 minute. Remove jelly from heat and skim off any foam. Ladle hot liquid into jars leaving 1/4 inch headspace. Wipe rims and adjust lids. Process in a boiling water bath for 10 minutes for 4 oz. and 8 oz. jars. Remove jars to cooling rack and check seals once they have cooled down. Yield: about 7 half pint jars or 13-14 (4 oz.) jars.
*For 3 1/2 cups of violet vinegar you will need 3-4 cups of blossoms and 3 1/2 cups of vinegar.
Raspberry Crumb Cake


Raspberry Crumb Cake
With an abundance of fresh raspberries and a crunchy crumb topping this is a cake everyone will remember. Not too sweet and full of fresh berries it is just the type of dessert I enjoy most. When you add 2 cups of raspberries to the batter it might seem like too much. It is not. You want to be able to see and taste the berries in every bite.
Raspberry Crumb Cake
For cake batter:
2 c. flour
2 t. baking powder
½ t. salt
½ stick (¼ cup) butter, softened
¾ c. sugar
1 egg
½ c. sour cream
2 t. vanilla
2 cups raspberries – I used fresh but frozen should work, too
For topping:
½ c. sugar
¼ c. flour
½ t. cinnamon
½ stick (¼ c. butter, chilled and cut into bits)
Combine dry ingredients and set aside. In mixing bowl with electric mixer, beat butter and sugar until light and fluffy. Beat in egg, sour cream and vanilla. Add flour mixture gradually until just mixed in. Fold in raspberries. Grease and flour an 8 or 9-inch pan and add prepared batter. Combine topping ingredients until they resemble coarse crumbs. Sprinkle over batter in pan and bake in a preheated 375-degree oven and bake for 35-45 minutes. Use toothpick to test.
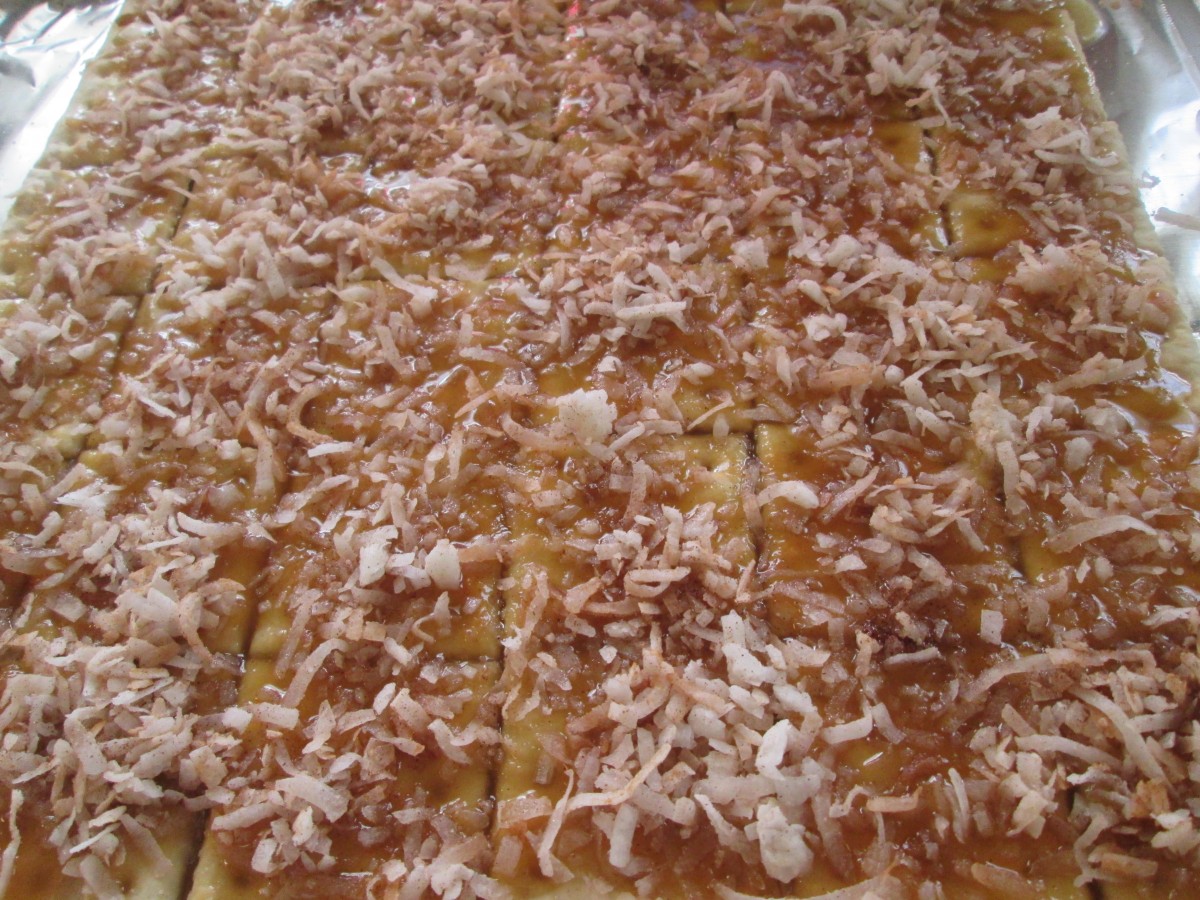
Coconut Cracker Snacks

Coconut Cracker Snacks
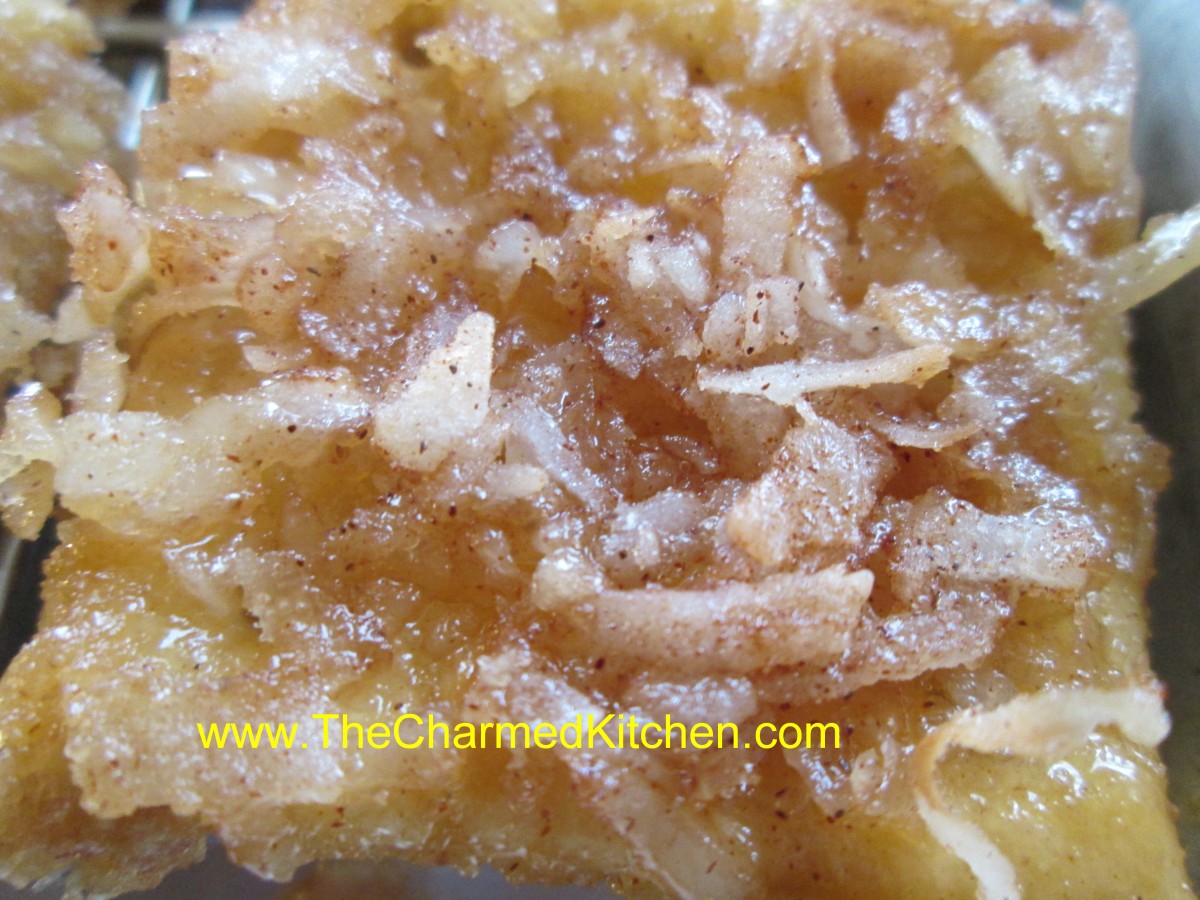
If you are craving something sweet and pressed for time these are really a fun snack to make. Super easy they are also a great recipe for kids to make. The base is saltine crackers topped with butter, brown sugar, coconut and cinnamon. They are ready in just a few minutes. Sweet and just a little salty, too. You could use chopped nuts in place of the coconut if you prefer.
Coconut Cracker Snacks
36 saltine crackers
1/3 c. butter
1/3 c. brown sugar
1 c. coconut
1 t. cinnamon
Cover a baking sheet with foil. Place the crackers, touching, side by side in a single layer. Melt butter in microwave, then add sugar and heat together 1 minute on high. Stir butter and sugar mixture together until smooth and drizzle this over the crackers. Combine coconut and cinnamon and then sprinkle the coconut over the crackers. Bake in a 350 degree oven for 8-10 minutes, or until coconut is toasted. Cool on baking sheet on a cooling rack. Crackers will easily break apart from each other. Makes 36.
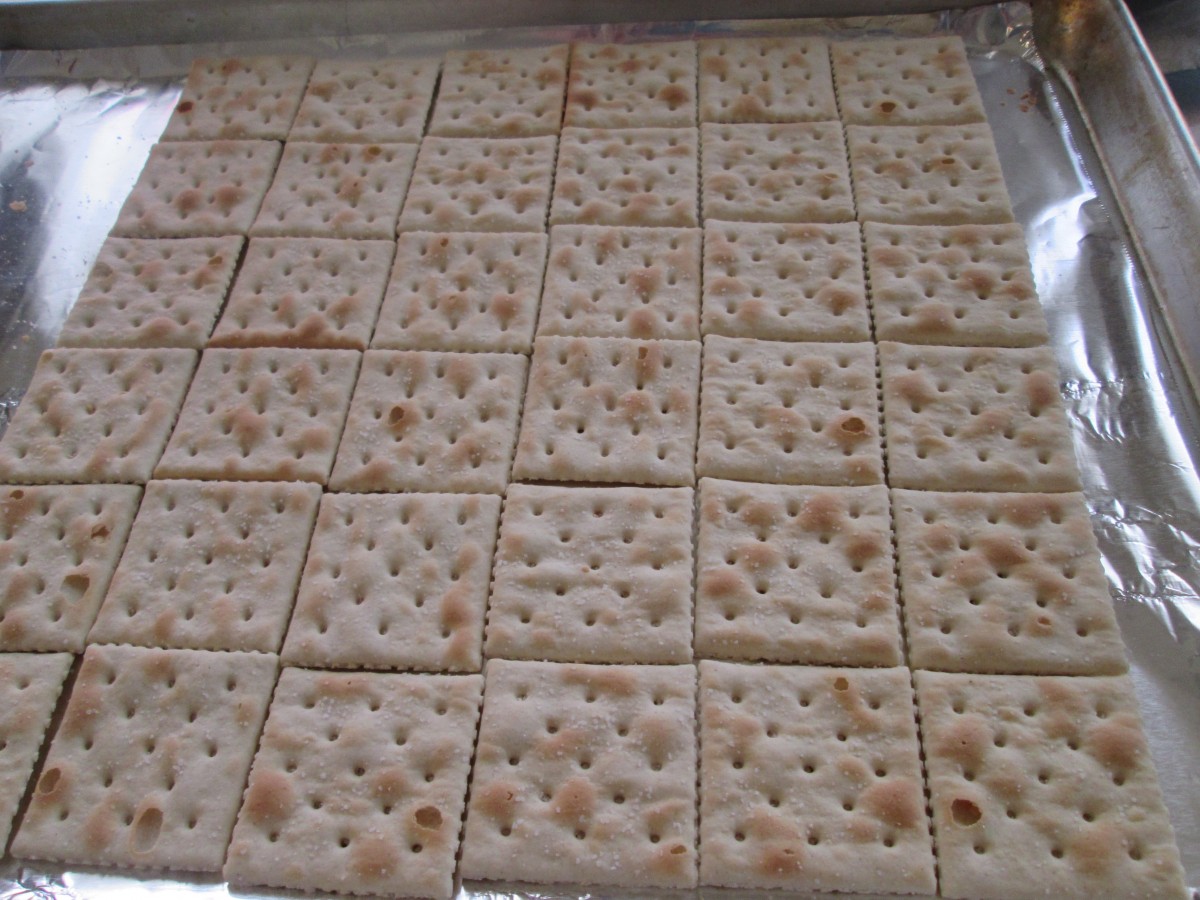
Arrange crackers on a baking sheet
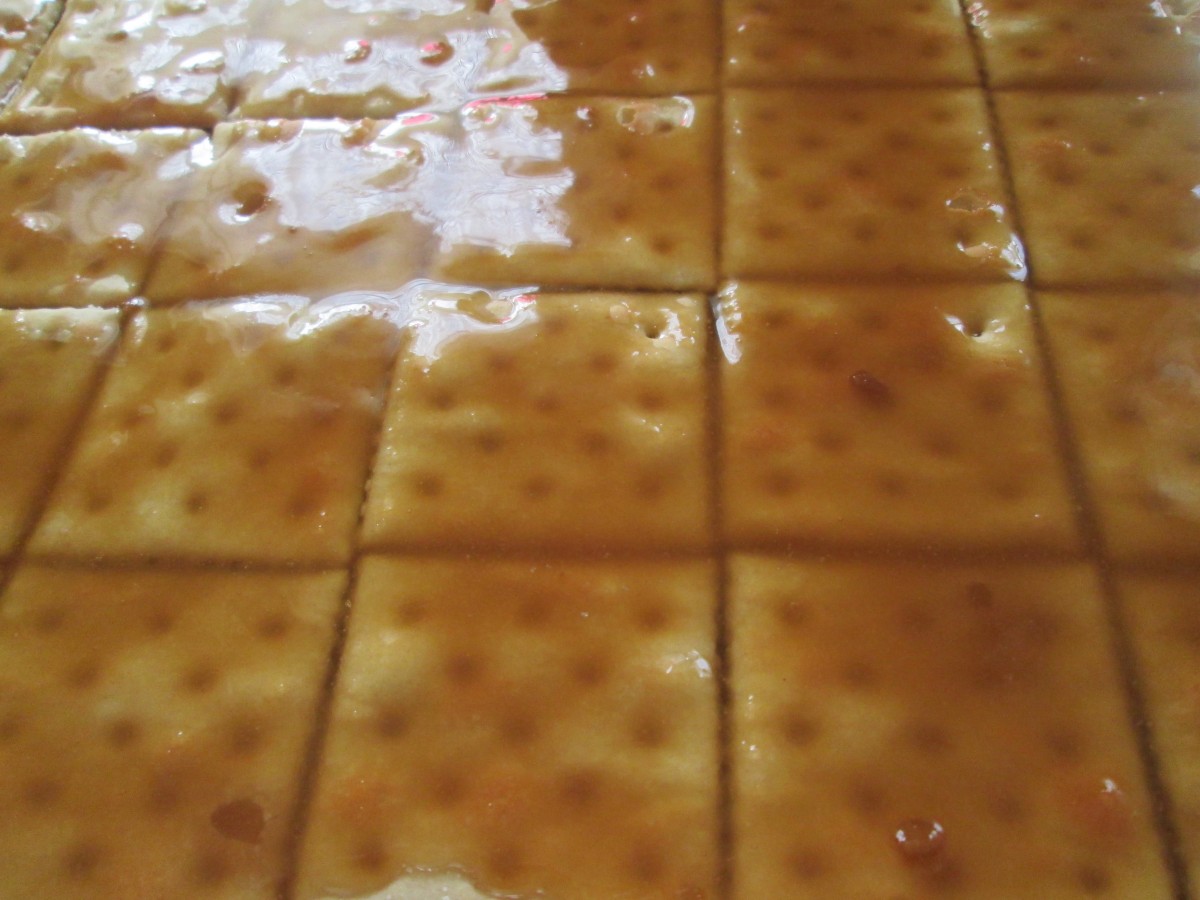
Drizzle crackers with the butter/brown sugar mixture
Sprinkle on the coconut and bake until coconut is toasted
Dandelion Gravy

Dandelion Gravy
I think most people are surprised to find that dandelions were brought to America as a vegetable and were not considered a weed. Today people spend a lot of money and use horrible chemicals to try to kill this very nutritious food source. I’ll give you that dandelions can be bitter. Don’t use the greens when the plant is flowering or just after. Early Spring growth is milder in flavor. After flowering if you cut dandelions back, the new growth will be milder, too. Still, when paired with acidic foods like tomatoes or vinegars, with breads or other starchy foods or with dairy products the bitterness of the dandelion is greatly reduced.
A classic dish using dandelions is dandelion gravy. Some versions use bacon, others not. This one uses bacon, sour cream and is served with boiled potatoes. I made this in class last night and people were pleasantly surprised to find they liked dandelions.
Dandelion Gravy
4 strips bacon
3 T. flour
1 c. water
1 lb. dandelion greens, washed and chopped
½ c. sour cream
1 T. sugar
1 T. vinegar
Salt and pepper to taste
Hot boiled or baked potatoes
Fresh chopped parsley, optional
Chop bacon and cook in skillet until crisp. Leave bacon in the pan. Remove all but 3 tablespoons of the bacon fat and stir in the flour until smooth. Add water and dandelion greens and cook over medium heat until greens are tender- about 5- 10 minutes. Add more water if mixture is too thick. Turn off heat. Combine sour cream with sugar and vinegar and stir into dandelion mixture. Adjust seasonings. Spoon gravy over potatoes.
Serves 4.
Note: If you want leave out the bacon instead add 3 tablespoons of oil to skillet along with the flour.
Raspberry Chocolate Wonton Bundles

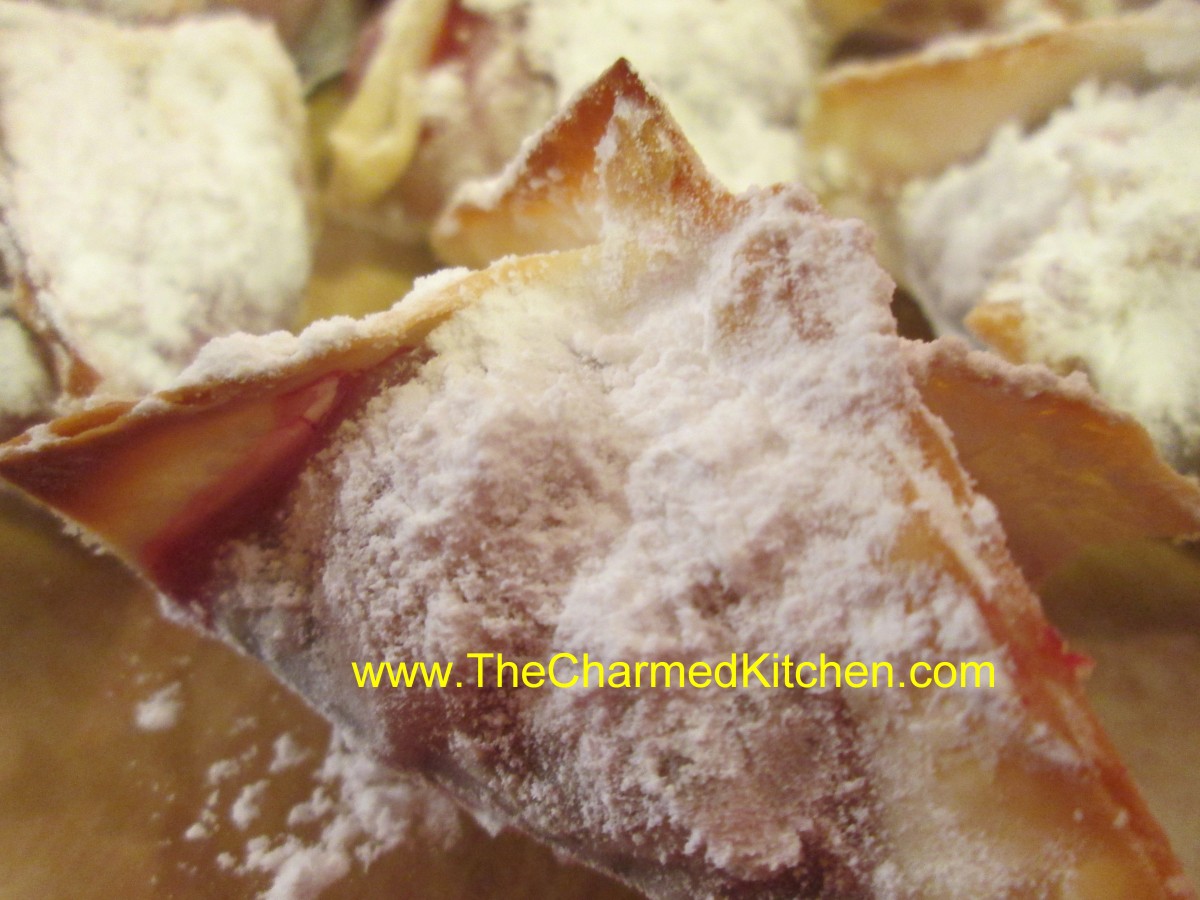
Raspberry Chocolate Bundles
Still playing around with wontons and since I have some fresh raspberries I decided to use them together. I added chocolate, too. Once I filled all the bundles I baked them until golden brown, cooled them a little, and dusted with powdered sugar. These would be a cute dessert to make when fresh berries are available. I could see using blackberries or blueberries, too. They were quick to assemble, too.
Here is what I did.
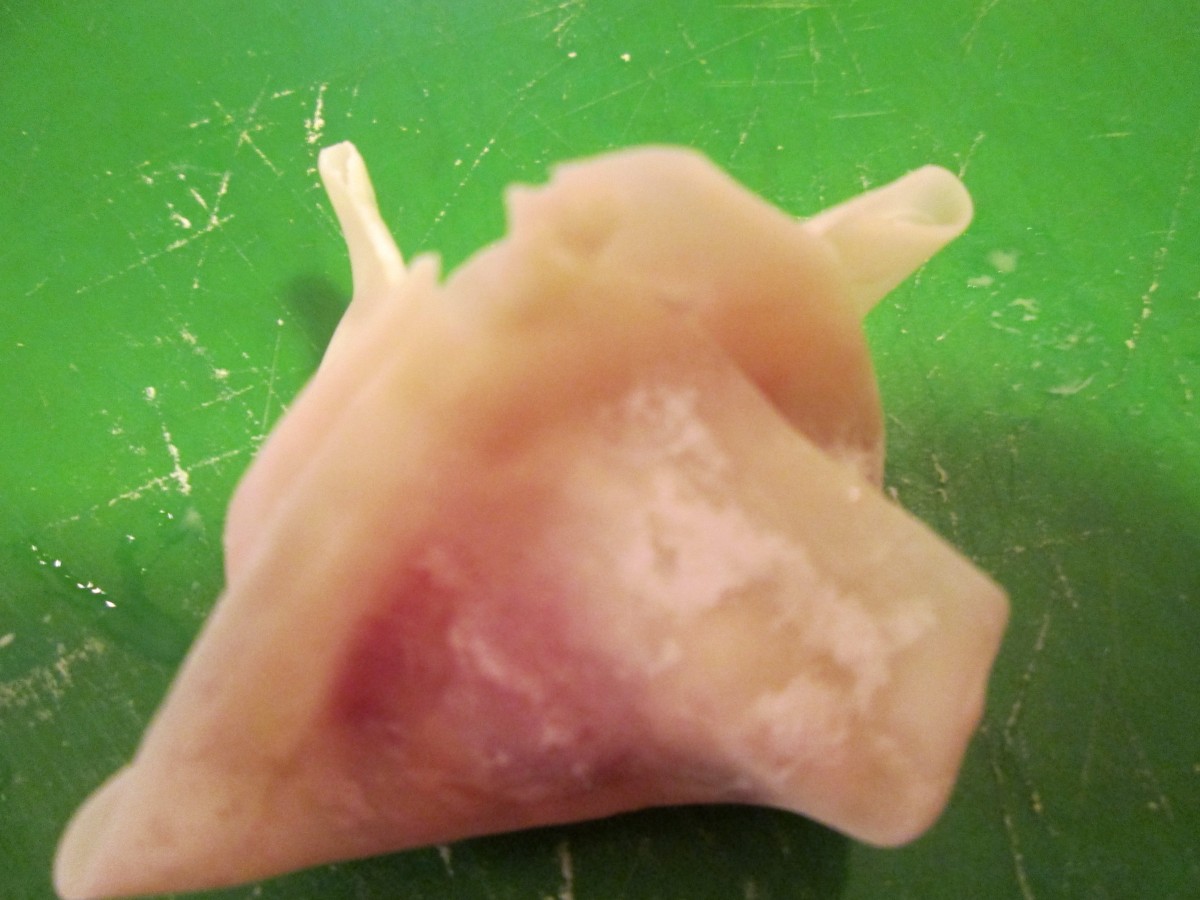
I started by washing the raspberries and then putting them in a small bowl with some sugar. I rolled the raspberries around to coat them. I put a combination of chocolate chips- I had mini ones- and 3 raspberries in the center of each won ton wrapper. I’d say about a teaspoon of chips.
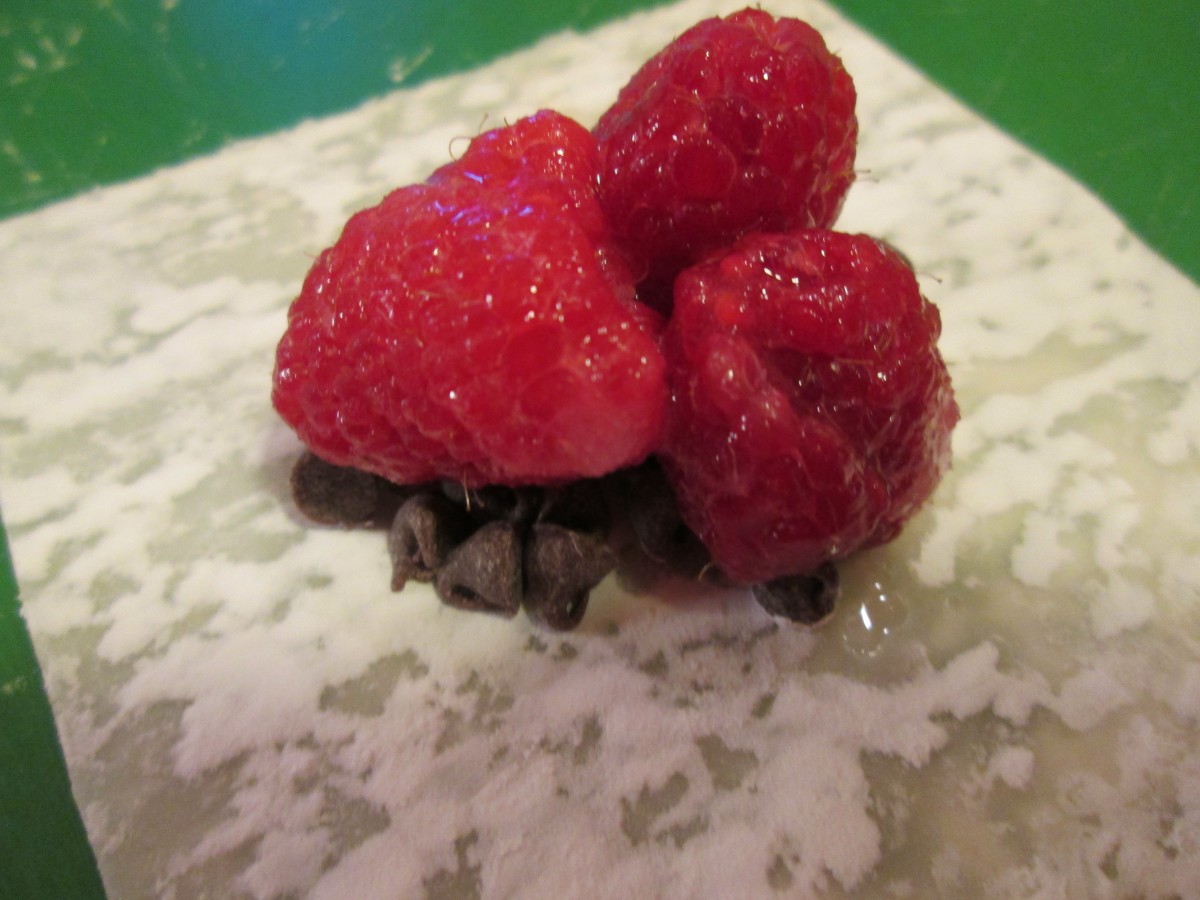
Place chocolate chips and 3 raspberries in the center of each wonton wrapper
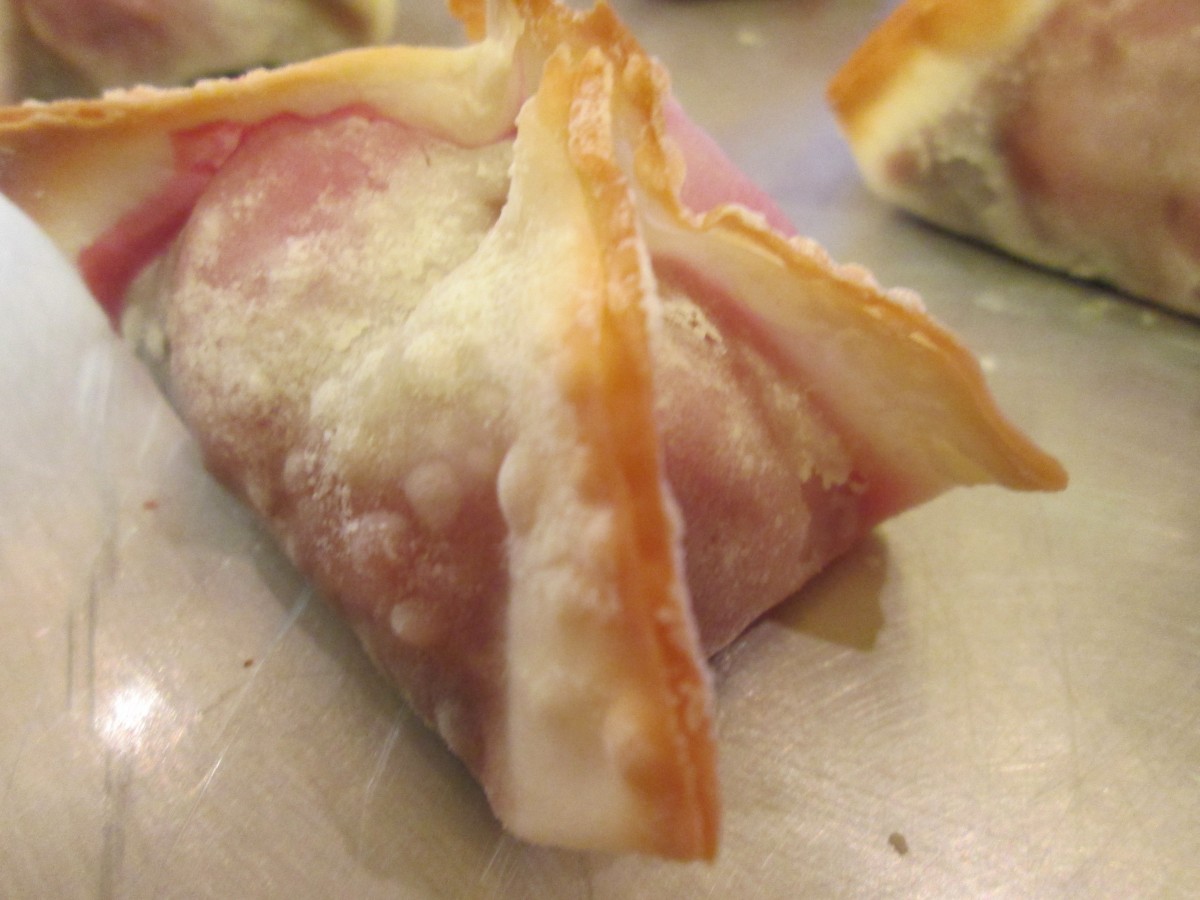
I used water to moisten the edges of the wrapper and brought 2 points together to form and triangle. Then I brought the other 2 points up to create a cute little bundle. I pressed all the edges together to minimize leaks. I put the little bundles on a baking sheet- lined with a silicone baking mat and sprayed them with some non-stick spray. I could have brushed them with oil instead or even used nothing. I baked them in a 400 degree oven for 10 minutes. They were crispy and golden brown. They could have even cooked a minute or two longer. I placed them on a tray to cool and dusted them with powdered sugar. They came out quite nice.
I wasn’t sure how much moisture the raspberries would create when they got hot. I tried to leave them intact and not crush or bruise them as I placed them in the wrappers. The wrappers I used already had a cornstarch coating on them. I assumed the cornstarch would thicken any juices the raspberries made and that seemed to be the case. While some juices bubbled out of some of the wrappers it was no worse than berries bubbling out of a pie. The next day I tested a couple and they were still pretty crisp.
Bring points together to form a bundle
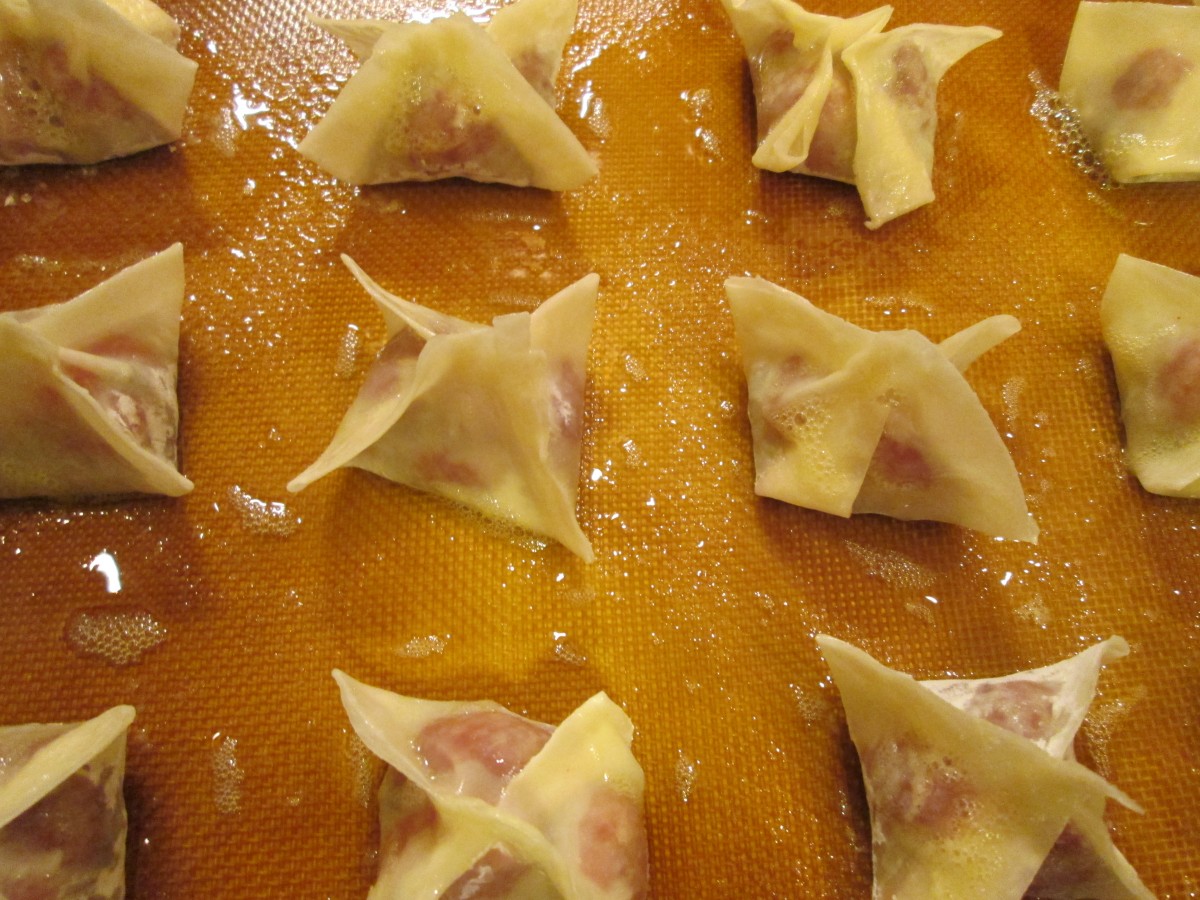
Place on parchment, silicone baking mat or lightly oil a cookie sheet.
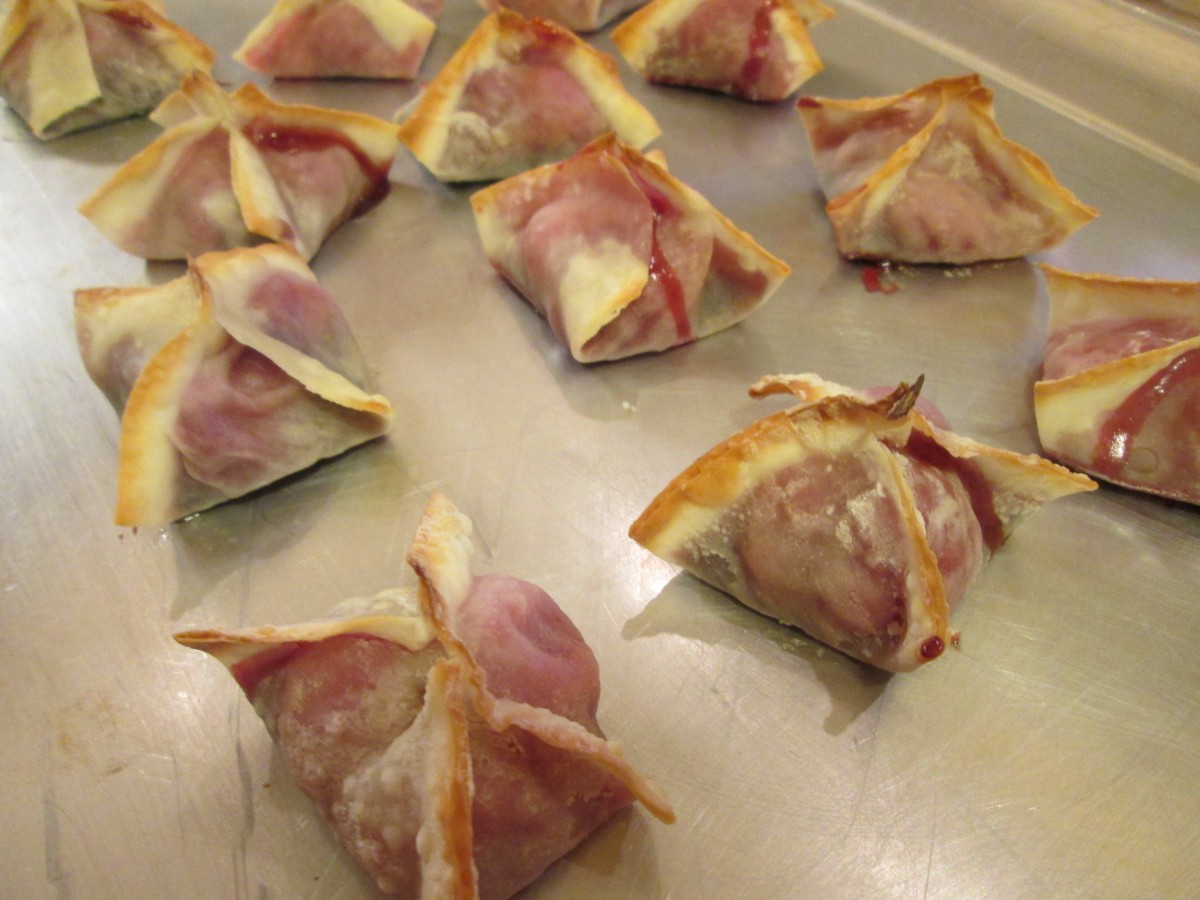
Bake until golden brown
Allow to cool a little before dusting with powdered sugar
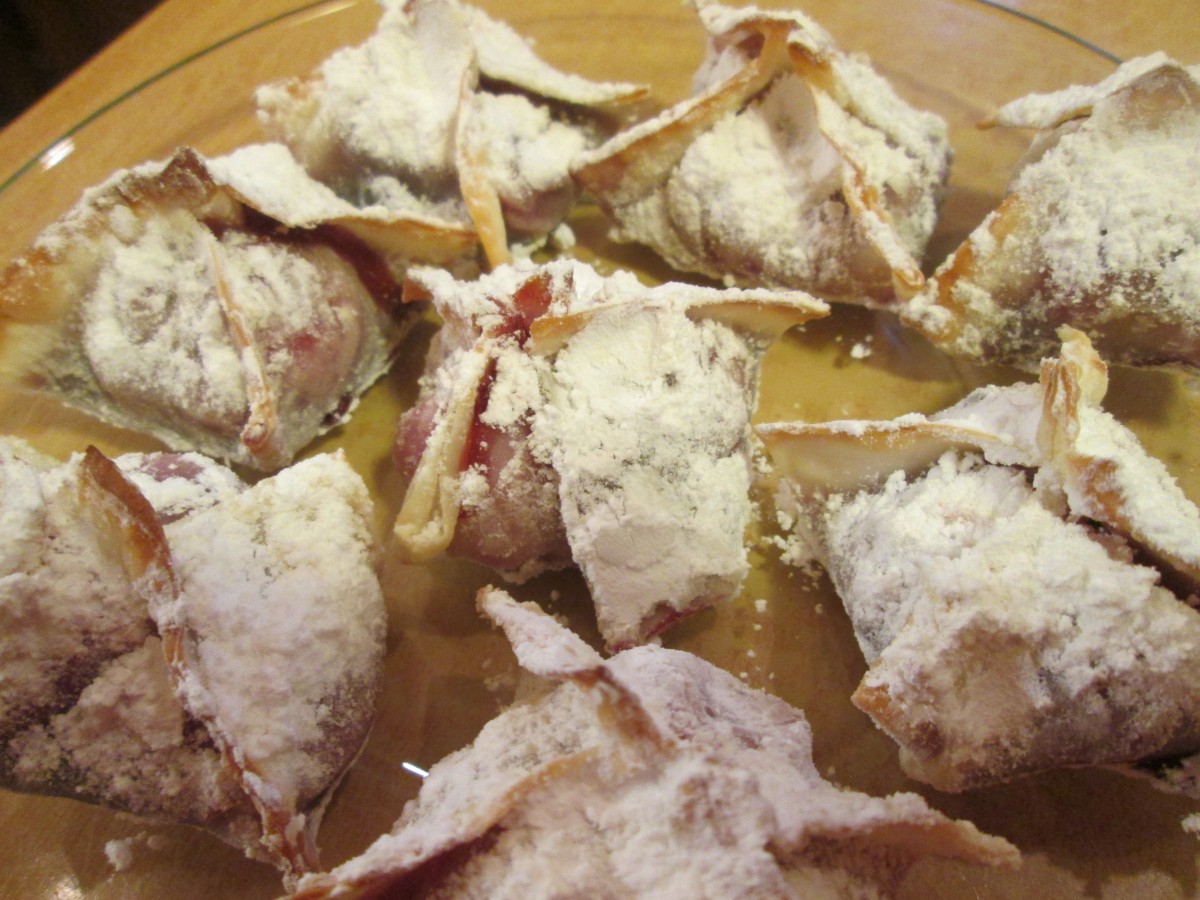
Ready to serve
Cheesy Portobello “Burgers”

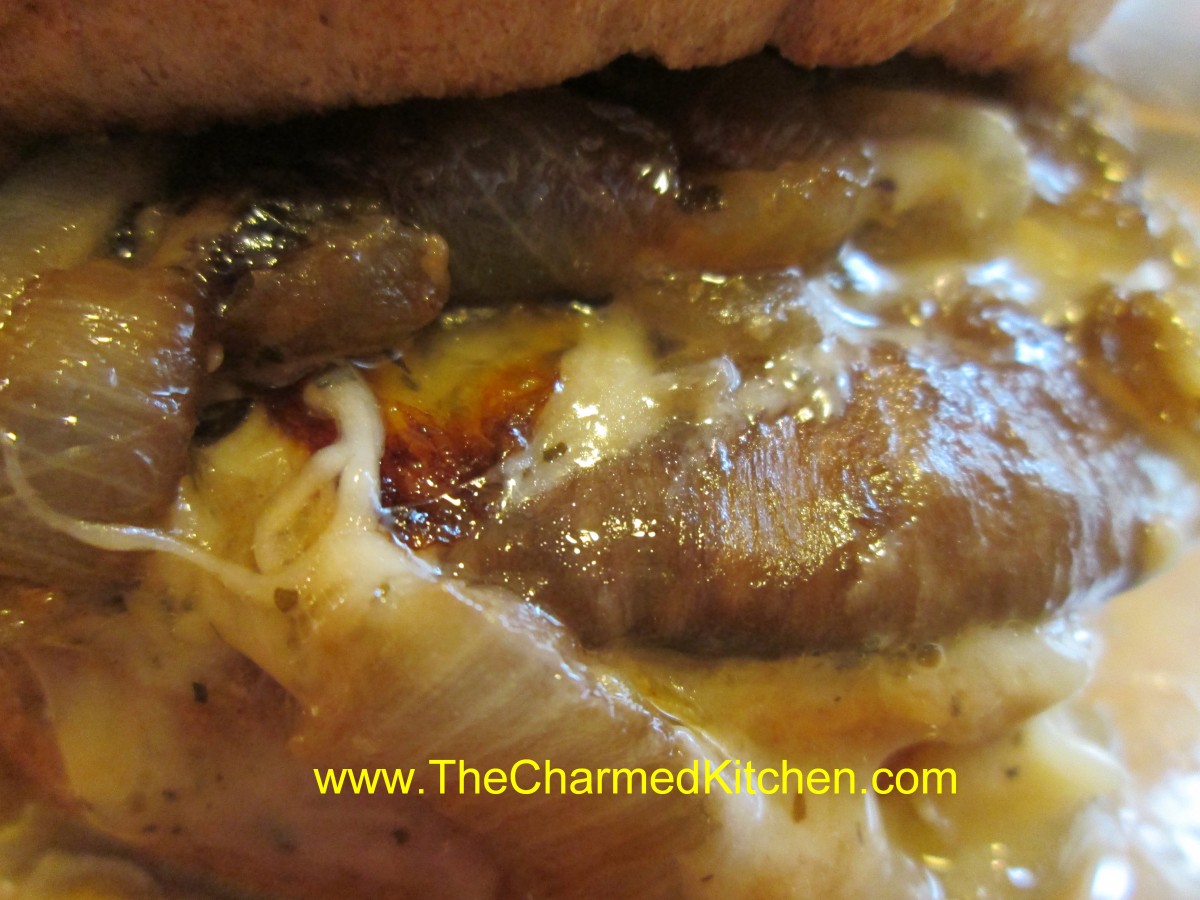
Portobello Mushroom “Burger”
I had a chance to have a friend over for lunch. She is vegetarian. Neither of us had a lot of time so I wanted something fast and easy. I had a couple of portobello mushroom caps in the fridge so I used them as my starting point. I also had some whole wheat buns so a sandwich felt like the right choice. I don’t like to use the word burger. Burgers for me will always be meat, but it did end up pretty close. The flavors, appearance and feeling was pretty burger-like, if not a true burger.
I started by cooking some sliced onion in oil adding salt, pepper and some hot sauce. While the onions were cooking I rinsed the mushroom caps and gave them a drizzle of lemon-infused olive oil and white wine vinegar. Also gave them a dash of salt and some Italian seasoning. I would say I marinaded them, but seriously, it was for 10 minutes while the onions were cooking. Once the onions were getting almost caramelized I added the mushrooms to the pan with the liquids I had been soaking them in. I let them cook, turning a few times, until they were cooked and browning a little. By then most of the liquid in the pan was gone.
The biggest challenge with cooking any mushroom is water. They are full of it. To get a truly strong mushroom flavor you need to get that water out and intensify the mushroom’s flavor. Don’t be afraid to let them cook long enough for that to happen.
I finished the mushrooms off with a couple of slices of sharp white cheddar cheese. I also toasted the buns. To serve it I placed the cheesy mushrooms on the buns and topped each with some of the onions. It was a lunch I would make again, even for my non-vegetarian friends.
Crab Rangoons – Baked!!


Crab Rangoons
I love crab rangoons but I don’t always feel like frying them. You don’t have to. You can bake them and still end up with crispy wontons filled with creamy, crabby goodness. Easier than frying if you have a lot of people or just aren’t in the mood for frying.
Crab Rangoons
1 clove garlic, minced
1 (8 ounce) package cream cheese
1 (6 ounce) can crabmeat, drained and flaked
2 green onions with tops, thinly sliced
2 teaspoons Worcestershire sauce
1 teaspoon soy sauce
48 wonton wrappers
Directions
Preheat an oven to 425 degrees F (220 degrees C). Lightly spray baking sheet with cooking spray. Combine garlic, cream cheese, crab, green onions, Worcestershire sauce, and soy sauce in a bowl. To prevent wonton skins from drying, prepare only 1 or 2 rangoon at a time. Place 1 teaspoon of filling onto the center of each wonton skin. Moisten the edges with water and fold the wonton skin diagonally to form a triangle, pressing edges to seal. Arrange the rangoon on the baking sheet and lightly spray with cooking spray.
Bake in the preheated oven until golden brown, 12 to 15 minutes.
TV Appearance

I was on New Day Cleveland on Friday cooking with sweet potatoes. Here is the clip if you missed it.
Carrot and Cabbage Salad

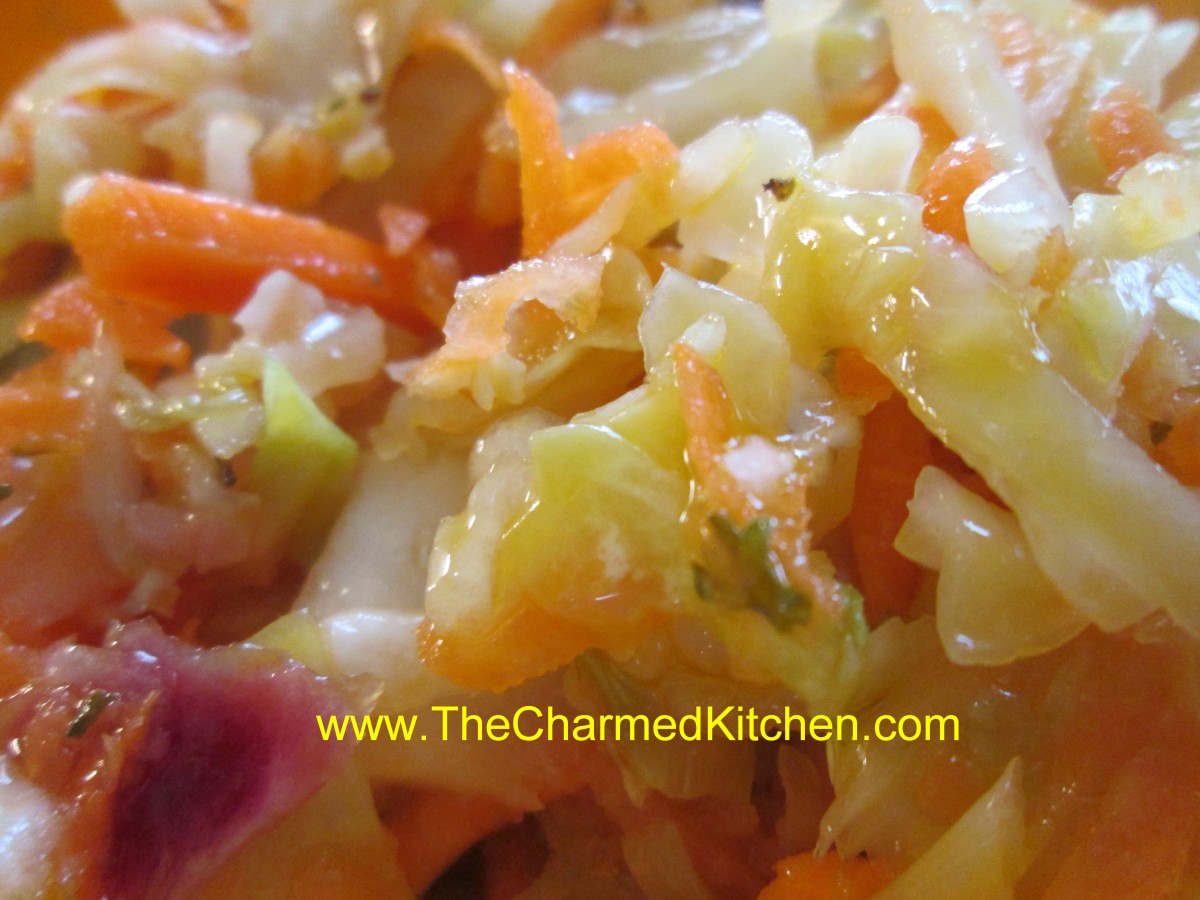
Carrot and Cabbage Salad
I love a good salad. I also like to make dishes that can travel well when I am visiting with friends. After a conversation with a friend the other day about her having to travel for a family event and bring food along I was inspired to come up with this recipe. Similar to a cole slaw this salad has an equal share of carrots and an herb-infused dressing that gives it a great flavor. It can be made a couple of days ahead, if needed, and is better if you make it the night before.
Carrot and Cabbage Salad
1 lb. carrots, peeled and shredded
1 lb. shredded cabbage- you can use the cole slaw mixes sold in stores
Dressing:
2/3 c. apple cider vinegar or herb flavored vinegar
1/2 c. oil
1/4 c. sugar, or to taste
1 T. salad and vegetable seasoning-recipe follows- or 1 T. dried herbs of your choice
Salt and pepper to taste
Combine veggies in a bowl. Combine dressing ingredients in a jar with a tight-fitting lid and shake well to combine. Adjust seasonings. Pour dressing over the veggies and stir to mix well. Cover and chill for several hours or overnight. Serves 10-12.
Salad and Vegetable Seasoning
½ c. dried parsley
¼ c. dried minced onion
1 T. dried thyme
1-T. celery seeds
2 t. dried oregano
1 t. dried marjoram
1-t. dill seeds
Combine all ingredients and store in a cool, dry, dark place. Makes about a cup. Use in salad dressings or on cooked veggies and in soups and stews.
Herbed Focaccia

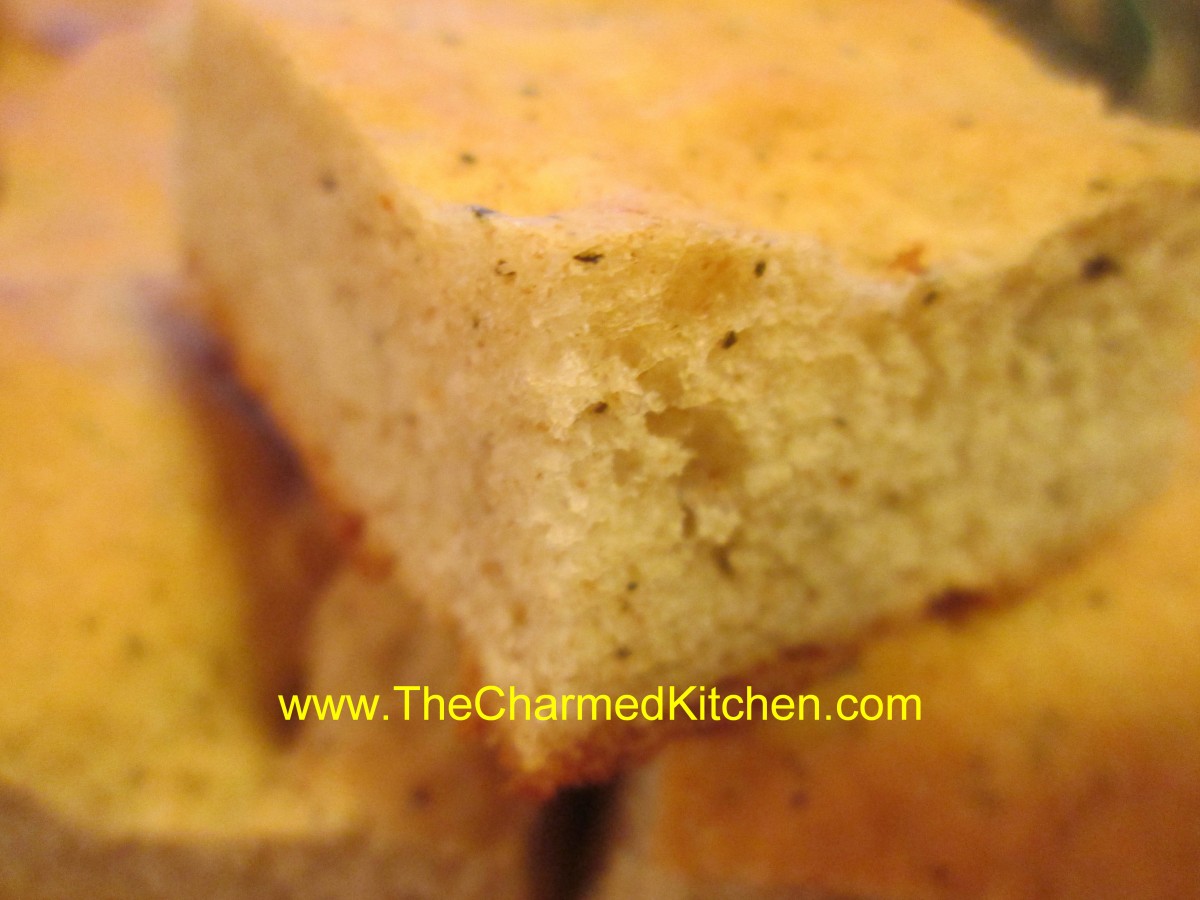
Herbed Focaccia
Focaccia is a tasty Italian flatbread that can be enjoyed as is, or can be topped with cheese, meats and vegetables, like pizza. I made this one with my own pizza seasoning blend of herbs but you can play around with other flavors.
Herbed Focaccia
4-4 1/2 c. flour
1 packet quick-rising yeast
1 T. sugar
1 t. salt
1 3/4 c. hot water
2 T. olive oil
1½ T. Pizza Seasoning*
2 cloves garlic, minced
1/3 c. minced shallots
In a medium bowl combine 2 cups of the flour, yeast, sugar and salt. Add hot water and stir until a smooth batter forms. Stir in the remaining ingredients and enough flour to form a sticky, soft dough. Place dough in a greased bowl, cover with a towel and allow to rise for about 30 minutes. Dough should double. Punch dough down and place on work surface. Cover with the bowl and allow to rest 10 minutes. Grease a jellyroll pan. With oiled fingers press dough into the pan. Dough will have imprints from your fingers. Cover and let rest 10 minutes. Bake in a preheated 400-degree oven for 25-30 minutes. Allow to cool slightly before cutting. Makes 1 loaf.
Pizza Seasoning
3 T. basil
2 T. oregano
1 T. fennel seeds
1 T. crushed red pepper flakes
1 T. dried minced onion
Combine all ingredients and store in a cool, dry place. Use to flavor sauces, breads and more.
1 t. minced garlic


