Mini Fruit Tarts
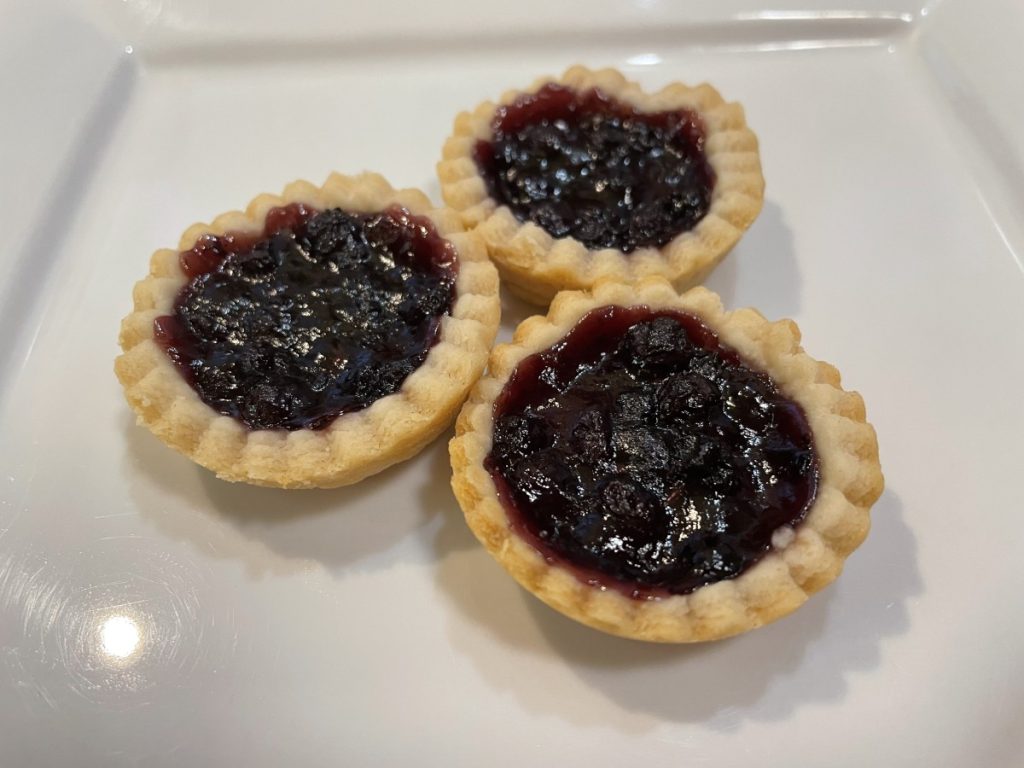
These little tarts are a perfect dessert any time or place. They are a wonderful dessert for picnics. They pack and travel well and make use of seasonal fruit. I used blueberries this time, but cherry or peach pie filling would also work. You can also fill them with jams. I have a nice supply of cherries in the freezer and I think cherry tarts might be next.
I used coconut oil in the crust recipe instead of butter. The crust worked out fine, although it is very crumbly. The texture after baking is amazingly tender, but I found the dough a little harder to handle than when made with butter. It’s a nice choice if you need a vegan dessert.
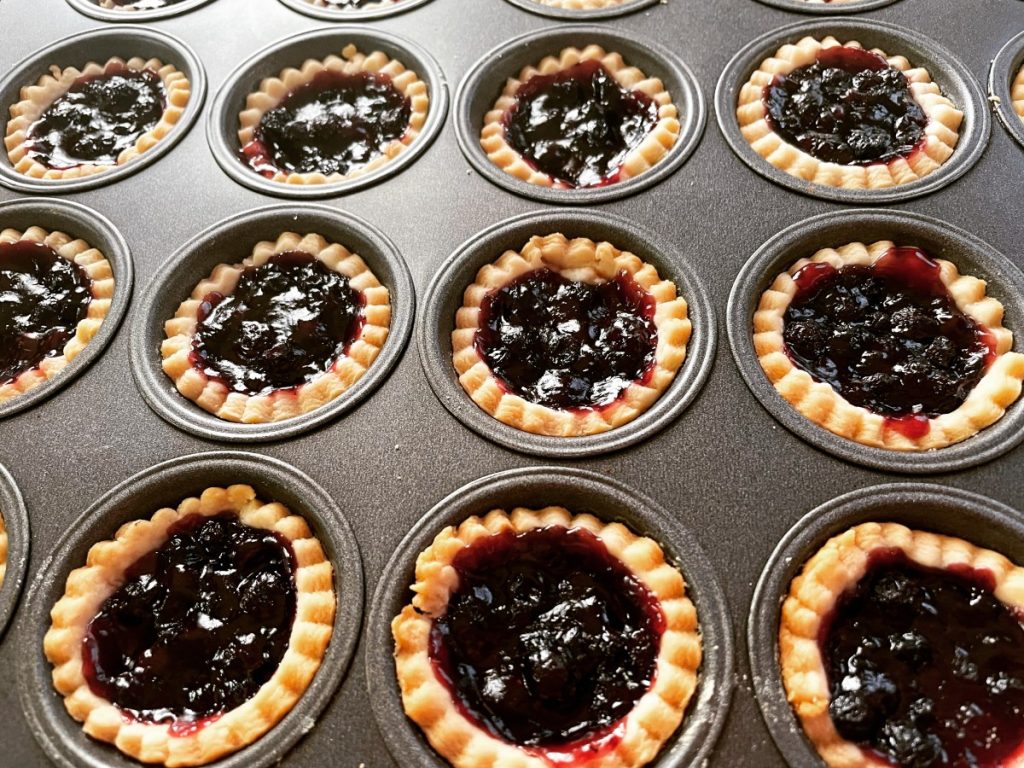
I used a jar of homemade blueberry pie filling made with wild Maine blueberries. You can use store bought, but I include the recipe at the bottom of the post. The recipe makes 4 cups of filling- you can use all the dough and all the filling and have 48 tarts. I didn’t need that many.
I made 24 and used a little over half of the dough recipe. Had I rolled them out a little thinner, half a recipe would be enough. I had a little blueberry filling left over, too.
Blueberry Mini Tarts
dough for 1 pie crust
About 2 cups blueberry pie filling, room temp or chilled
Flaky Pie Crust
2 c. flour
1 t. salt
3/4 c. coconut oil, chilled – you could use butter, lard or shortening
1 T. cider vinegar
4-5 T. cold water
Combine flour and salt in food processor and add coconut oil. Pulse until mixture resembles coarse crumbs. Toss in vinegar and water, 1 tablespoon at a time, pulsing as you add, until dough just holds together. Remove from processor and press dough together to form a ball. Chill at least 30 minutes before using. Makes enough for 2 pie crusts or up to 48 tarts.
Blueberry Pie Filling
3 1/2 c. blueberries, fresh or frozen
3/4 c. sugar, or to taste
1/4 c. cornstarch
1 c. water
1 T. lemon juice
In saucepan, bring blueberries and sugar to a boil, stirring often. Combine cornstarch with water and lemon juice and add to the blueberry mixture. Return to the boil and cook until thickened and bubbly. Makes 4 cups. You will not need the whole batch for the tarts.
Note: This recipe could also be made with blackberries or raspberries.
To make the tarts: Preheat oven to 400 degrees. Roll out the dough to 1/8 inch thickness on lightly floured board. Cut out with 2-inch round cutter and place dough circles in mini muffin tins or mini tart pans. Re-roll scraps and keep cutting out until you have 24 circles. Save the rest of the dough for another use. It can be frozen. Place a rounded teaspoon of filling in each tart. I used fairly shallow pans, you can add more filling if your pans are deeper. Bake for 10 minutes, then turn down the oven to 350 and bake about 15 minutes longer, or until edges of the tarts are golden brown. Cool a little before you remove from the pans. Makes 24.
Mini Picnic Quiches

These tiny quiches pack a lot of flavor. They are also a great take along for picnics and cook outs. Since you can eat them hot or cold, they make a nice food for road trips, too.
The quiche recipe is made up of three parts- the crust, the filling and the custard. They are baked in muffins tins and each recipe makes a dozen. I have two crust recipes- including a gluten-free crust that is made from rice and zucchini. There are three filling choices, but you can get creative and make a number of different variations. The custard is pretty straightforward- half and half, eggs and seasonings. I make a couple of batches at a time and then freeze some for later.
Picnic Quiches
Crust Options:
Rice Zucchini Crust (Gluten free)
1½ c. shredded zucchini
1¼ c. cooked rice (white or brown)
1 egg
¼ c. Parmesan cheese
Crouton Crust
3½ c. garlic-cheese croutons, about 5 oz., ground
1/3 c. melted butter
Fillings:
Mushroom and Onion
1 medium onion, chopped
Oil
8 oz. mushrooms, cleaned and chopped
3-4 oz. cheddar cheese, shredded or cubed fine
In skillet cook onion in oil until lightly browned. Add mushroom and cook until mushrooms are golden. Cool and combine with cheese before using.
Spinach and Bacon
12 oz. bacon, cooked and crumbled
10 oz. package of frozen spinach, thawed and squeezed dry
4 oz. Swiss cheese, shredded
Combine all ingredients. Set aside until ready to use.
Confetti
1 ear corn, cooked and kernel cut off the cob- about ½ cup
½ c. mined fresh sweet pepper
¼ c. chopped green onion
4 oz. shredded cheese- I like a sharp cheddar in this filling
Custard:
1c. half and half
3 eggs
½ t. each basil and salt
1/8 t. each garlic powder, pepper and paprika
Directions
Grease 12 muffin cups (3 inch). Prepare crust of your choice by mixing crust ingredients together. Pat 2 tablespoons of the crust mixture into each muffin cup. Bake in a 350 degree oven for 10-12 minutes. Cool before filling. While baking and cooling crusts, prepare filling of your choice and make the custard.
Spoon 2 tablespoons of filling over each cooled crust. Spoon about 3-4 tablespoons of the custard over the filling. Bake in a 375 degree oven for 15-20 minutes. Cool on wire racks, chill completely before packing for your picnic.
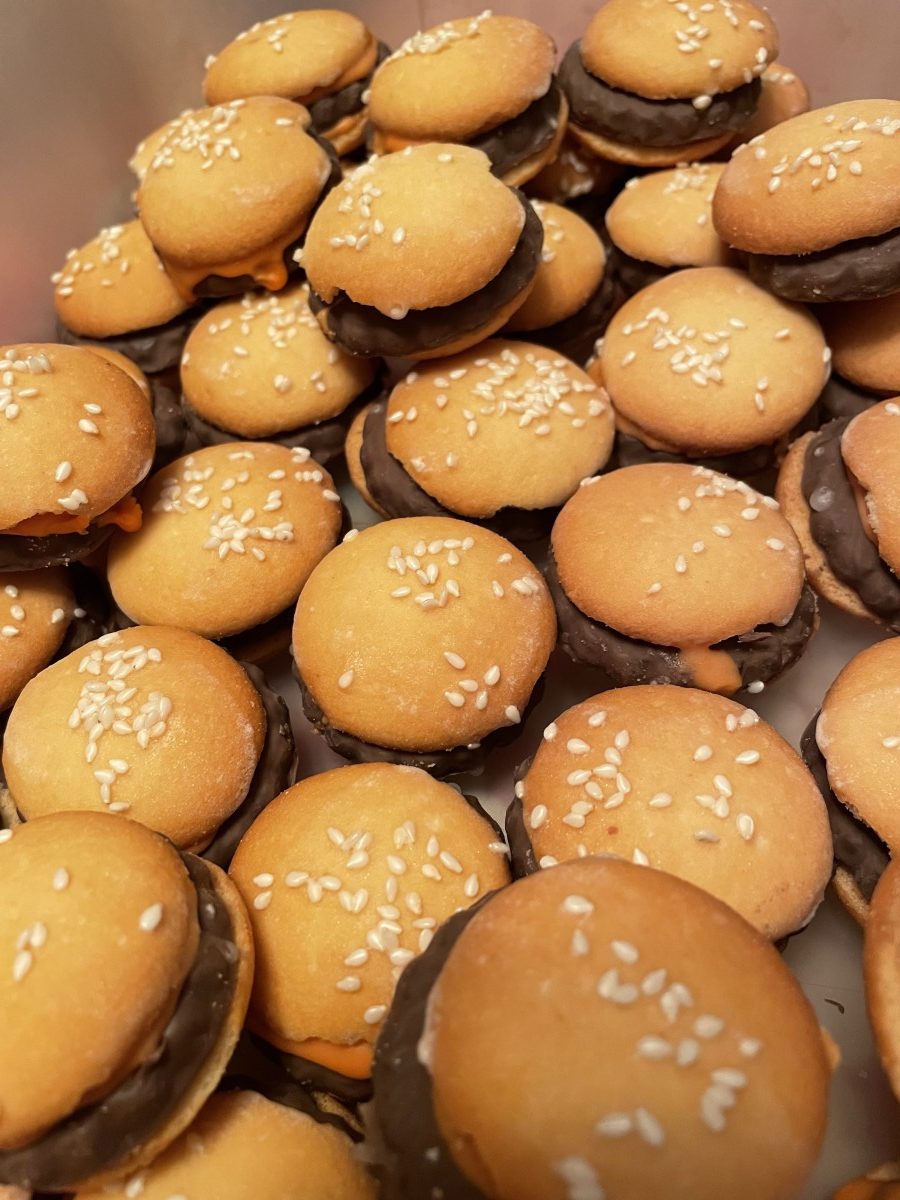
“Cheeseburger” Cookies
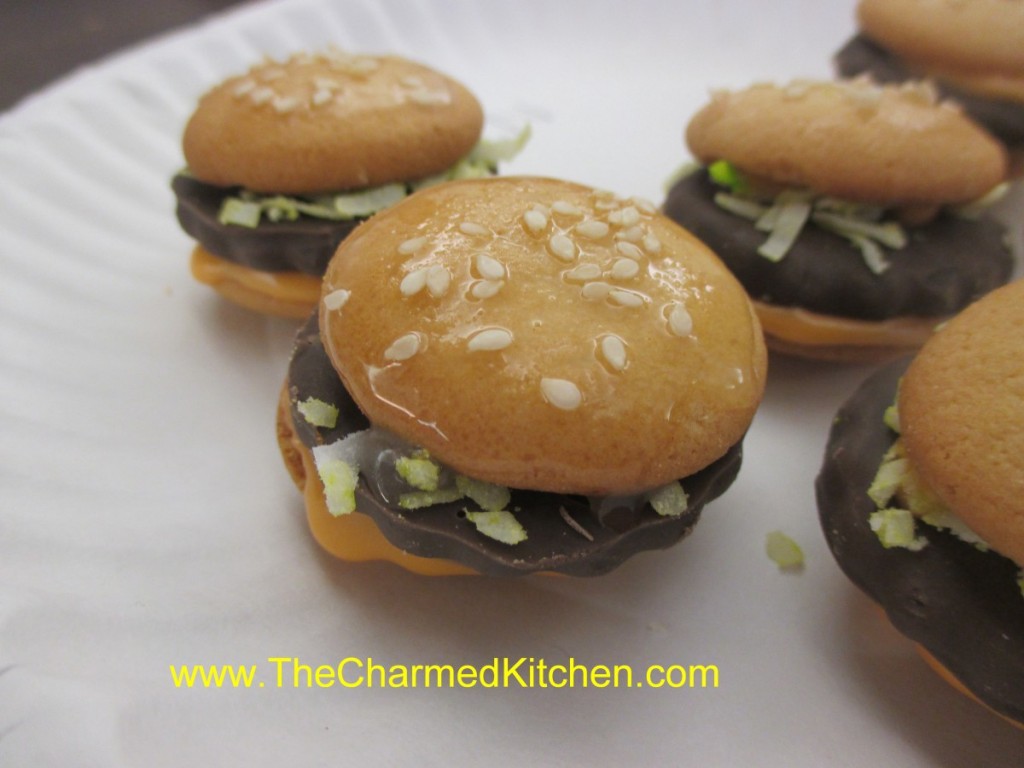
These adorable cookies are fun to take to your next cookout or picnic. I know, I normally cook everything from scratch, but these are so fun. Also a nice thing to make when it is too hot to be baking. They are just assembled, not baked, and even younger kids can make them.
Cheeseburger Cookies
1 package vanilla wafer cookies
1 package Keebler Fudge N Caramel or Grasshopper cookies, or other small chocolate cookies
2 c. powdered sugar
1- 2 T. milk
few drops of yellow and red food coloring
1 c. coconut, optional
several drops of green food coloring, optional
1/4 c. powder sugar
1 T. milk
sesame seeds
Combine 2 cups of powder sugar with the milk and red and yellow food coloring. This should be the color of cheese. Place the coconut in a small bag and add a few drops of green food coloring. Close the bag and shake well to evenly color. This will be the ‘lettuce’.
To assemble cookies use 2 vanilla wafers (the bun) and one Keebler cookie (the burger). The orange frosting works as the cheese and glue. The coconut is the lettuce. Place a vanilla wafer flat side up on work surface. Place a little dab of “cheese” on the cookie and then a Keebler cookie. Sprinkle a little coconut on the burger, then some more cheese and the top bun, flat side down. Combine the remaining powder sugar and milk. You should have a thin glaze. Brush this lightly on the top of the finished “burgers” and sprinkle with a few sesame seeds. Makes about 2 dozen cookies.
Mushroom Pastries/Empanadas
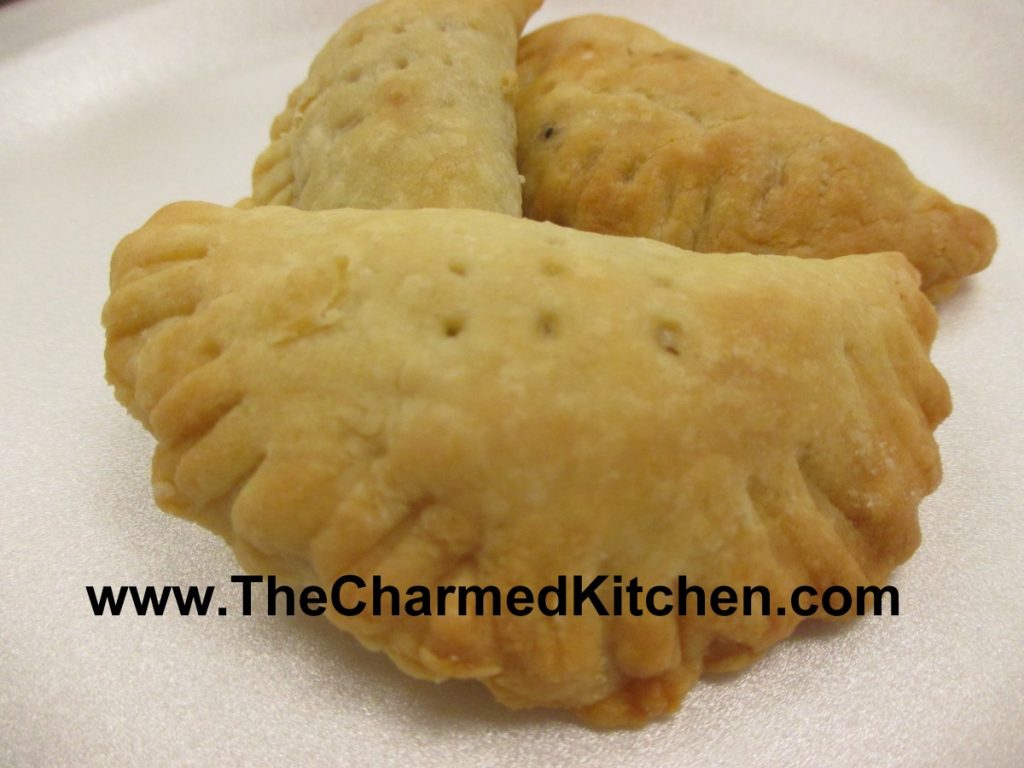
I made a batch of these the other night. I always called them mushroom pastries, but thought empanadas might be a better name for them. They are very tasty, whatever you call them. The filling is a combination of mushrooms with onions, thyme and sour cream. The pastry is a tender, flaky dough.
They are a fun food to take with you. Portable enough for picnics!!
They make great appetizers or can be served as a meal, maybe with a salad. Fun for parties, brunch or lunch!
Mushroom Pastries/Empanadas
1 (8 ounce) package cream cheese
1 cup butter
2 cups all-purpose flour
2 tablespoons butter
3/4 pound fresh mushrooms, finely chopped
1/2 medium onion, chopped
1/8 teaspoon dried thyme
1/4 teaspoon salt
1/2 teaspoon ground black pepper
1 1/2 teaspoons all-purpose flour
1/2 cup sour cream
In a medium bowl, mix together the cream cheese and 1 cup of butter until well blended. Mix in the flour until fully incorporated. Pat into a ball, and refrigerate while you make the filling. Melt 2 tablespoons of butter in a large skillet. Add the mushrooms and onion. Season with thyme, salt and pepper. Cook and stir until tender, about 5 minutes. Sprinkle the flour over everything so it won’t get lumpy, then reduce the heat to low, and stir in the sour cream. Heat just until thickened, then remove from the heat. Cool filling. Preheat the oven to 350 degrees F. On a lightly floured surface, roll the dough out to about 1/4 inch thickness. Cut into 3 inch rounds. Place a small amount of the mushroom mixture on one side of each circle, then fold the dough over and press to seal. Prick the tops with a fork to vent steam, and place the pastries on a baking sheet. (They can also be frozen at this time until needed.) Bake for 15 minutes in the preheated oven, or until golden brown. If baking frozen turnovers, it may take an additional 5 minutes.
Rainbow Salad
When you hear green or yellow split peas- do you think of soup? You probably do. But when cooked until just tender, split peas make a great salad ingredient. I often just add some cooked split peas to a tossed salad. They add flavor, protein and a nice texture to salads. An added bonus is that split peas can be cooked from dry to tender in about 20 minutes. That makes them a great choice when time is tight.
This is one of my favorite salads using both green and yellow split peas. Fresh and colorful, it is a big hit with vegetarian and non-vegetarian friends. If some of you are looking for new meatless meals ideas, this one is a winner.
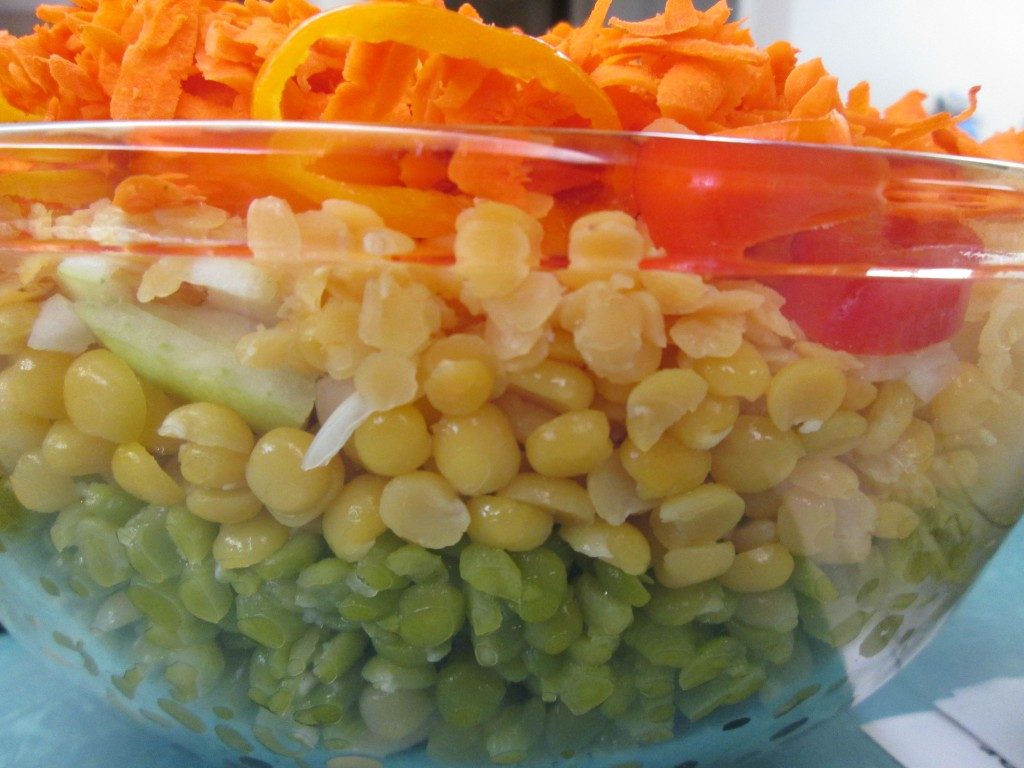
The salad uses both green and yellow split peas, along with black beans, butter beans, red lentils and assorted veggies. It is a great combination of colors and textures. It does make a lot, but you can easily cut the recipe in half.
The dish was inspired by my nephew Danny’s love of sand art when he was a kid. The ingredients are layered in the bowl for a pretty presentation. It is also an homage to the layered salads I remember from my youth. I like this one a whole lot more.
Rainbow Salad
1 c. each green split peas, yellow split peas and red lentils
1 can black beans, rinsed and drained
1 can butter beans, rinsed and drained
1 c. diced sweet onion
1 c. diced sweet pepper
1 c. grated carrot
Cook split peas and lentils separately just until tender. Split peas, both green and yellow will take 20 minutes. Red lentils will take about 8-10 minutes. Drain and rinse each under cold water when done and set aside until ready to use, or you can cook them a day ahead and keep chilled. Each will yield about 2 1/2 c. cooked.
In large glass bowl, place the following ingredients in this order.
Black beans, butter beans, green split peas. yellow split peas. onion, red lentils. carrots and peppers. Pour over dressing and chill several hours or overnight. Serve on a bed of greens. You can also leave the salad plain and serve dressing on the side.
Dressing *
1/2 c. oil
1/2 c. vinegar, I like apple cider vinegar or red wine vinegar
1 (14 oz.) can diced tomatoes, undrained
2-3 T. sugar
1/2 c. parsley or cilantro
1 t. each chili powder, cumin and salt
dash hot sauce
Combine in a blender or food processor until smooth.
*Note: Any fresh or bottled dressing you like can be used. Balsamic works very well. I often serve it with homemade Italian dressing.
Mini Picnic Fruit Tarts
These little tarts are a perfect dessert any time or place. They are a wonderful dessert for picnics. They pack and travel well and make use of seasonal fruit. I used blueberries this time, but cherry or peach pie filling would also work. You can also fill them with jams. I have a nice supply of cherries in the freezer and i think cherry tarts might be next.
I used coconut oil in the crust recipe instead of butter. The crust worked out fine, although it is very crumbly. The texture after baking is amazingly tender, but I found the dough a little harder to handle than when made with butter. It’s a nice choice if you need a vegan dessert.
I used a jar of homemade blueberry pie filling made with wild Maine blueberries. You can use store bought, but I include the recipe at the bottom of the post. The recipe makes 4 cups of filling- you can use all the dough and all the filling and have 48 tarts. I didn’t need that many.
I made 24 and used a little over half of the dough recipe. Had I rolled them out a little thinner, half a recipe would be enough. I had a little blueberry filling left over, too.
Blueberry Mini Picnic Tarts
dough for 1 pie crust
About 2 cups blueberry pie filling, room temp or chilled
Flaky Pie Crust
2 c. flour
1 t. salt
3/4 c. coconut oil, chilled – you could use butter, lard or shortening
1 T. cider vinegar
4-5 T. cold water
Combine flour and salt in food processor and add coconut oil. Pulse until mixture resembles coarse crumbs. Toss in vinegar and water, 1 tablespoon at a time, pulsing as you add, until dough just holds together. Remove from processor and press dough together to form a ball. Chill at least 30 minutes before using. Makes enough for 2 pie crusts or up to 48 tarts.
Blueberry Pie Filling
3 1/2 c. blueberries, fresh or frozen
3/4 c. sugar, or to taste
1/4 c. cornstarch
1 c. water
1 T. lemon juice
In saucepan, bring blueberries and sugar to a boil, stirring often. Combine cornstarch with water and lemon juice and add to the blueberry mixture. Return to the boil and cook until thickened and bubbly. Makes 4 cups. You will not need the whole batch for the tarts.
To make the tarts: Preheat oven to 400 degrees. Roll out the dough to 1/8 inch thickness on lightly floured board. Cut out with 2-inch round cutter and place dough circles in mini muffin tins or mini tart pans. Re-roll scraps and keep cutting out until you have 24 circles. Save the rest of the dough for another use. It can be frozen. Place a rounded teaspoon of filling in each tart. I used fairly shallow pans, you can add more filling if your pans are deeper. Bake for 10 minutes, then turn down the oven to 350 and bake about 15 minutes longer, or until edges of the tarts are golden brown. Cool a little before you remove from the pans. Makes 24.
Picnic Quiches
These tiny quiches pack a lot of flavor. They are also a great take along for picnics and cook outs. Since you can eat them hot or cold, they make a nice food for road trips, too.
The quiche recipe is made up of three parts- the crust, the filling and the custard. They are baked in muffins tins and each recipe makes a dozen. I have two crust recipes- including a gluten free crust that is made from rice and zucchini. There are three filling choices, but you can get creative and make a number of different variations. The custard is pretty straightforward- half and half, eggs and seasonings. I make a couple of batches at a time and then freeze some for later.
Picnic Quiches
Crust Options:
Rice Zucchini Crust (Gluten free)
1½ c. shredded zucchini
1¼ c. cooked rice (white or brown)
1 egg
¼ c. Parmesan cheese
Crouton Crust
3½ c. garlic-cheese croutons, about 5 oz., ground
1/3 c. melted butter
Fillings:
Mushroom and Onion
1 medium onion, chopped
Oil
8 oz. mushrooms, cleaned and chopped
3-4 oz. cheddar cheese, shredded or cubed fine
In skillet cook onion in oil until lightly browned. Add mushroom and cook until mushrooms are golden. Cool and combine with cheese before using.
Spinach and Bacon
12 oz. bacon, cooked and crumbled
10 oz. package of frozen spinach, thawed and squeezed dry
4 oz. Swiss cheese, shredded
Combine all ingredients. Set aside until ready to use.
Confetti
1 ear corn, cooked and kernel cut off the cob- about ½ cup
½ c. mined fresh sweet pepper
¼ c. chopped green onion
4 oz. shredded cheese- I like a sharp cheddar in this filling
Custard:
1c. half and half
3 eggs
½ t. each basil and salt
1/8 t. each garlic powder, pepper and paprika
Directions
Grease 12 muffin cups (3 inch). Prepare crust of your choice by mixing crust ingredients together. Pat 2 tablespoons of the crust mixture into each muffin cup. Bake in a 350 degree oven for 10-12 minutes. Cool before filling. While baking and cooling crusts, prepare filling of your choice and make the custard.
Spoon 2 tablespoons of filling over each cooled crust. Spoon about 3-4 tablespoons of the custard over the filling. Bake in a 375 degree oven for 15-20 minutes. Cool on wire racks, chill completely before packing for your picnic.


