Cabbage and noodles is not a glamorous dish and it never will be.
That’s fine with me. It is a dish that will always remind me of my
childhood.
My Mother would make cabbage and noodles as a side dish, at least a
couple of times a month. I loved it. I think of her every time I make
it. It is, for me, a favorite comfort food.
One reason it tasted so good, is that Mom took the time to caramelize
the onions and to let the cabbage brown some, too. That added another
layer of flavor to the dish. Simple and very tasty.
A lot of people I know will be having pork for New Year’s Day. That
pork is often served with sauerkraut. I like sauerkraut, but I like
cabbage and noodles even more.
I used green cabbage this time, but you can use red cabbage, or a
combination. Cabbage and noodles can be a side dish or even a main dish.
You can play around with adding other ingredients. Sometimes I add
cooked bacon, or leftover ham.
So here is my Mom’s recipe for cabbage and noodles.
Happy New Year to all.
Cabbage and Noodles
1 onion, chopped Oil 4-6 cups chopped cabbage 4 c. cooked noodles Salt and pepper to taste Fresh or frozen chopped parsley Heat oil in skillet and cook onion until wilted and a little brown. Add cabbage and stir fry until cabbage in tender and starts to turn a little brown. Stir in noodles and cook until heated through. Season to taste and toss in parsley. Serves 4-6.
You can enjoy brunch all year long, but I really like brunches for the holidays. If you want to plan a special brunch for New Year’s Day- or any day- I’ve assembled some of my favorite brunch recipes.
I like to include both sweet and savory dishes. I also have coffee, tea and juices for drinking. Mimosas are always a good idea, too.
Amaretto Pear Blintzes with
Candied Almonds
Blintzes:
4 (8-inch) flour tortillas, I used whole wheat
2 oz. milk
2 T. butter
Filling:
4 pears, peeled, cored and sliced
½ c. brown sugar
2 T. butter
2 T. Amaretto
1 t. cinnamon
1 t. vanilla
Pinch of salt
Almonds:
¾ c. sliced almonds
½ c. sugar
¼ c. water
½ t. cinnamon
Place tortillas in shallow dish and drizzle the milk over
them. Try to get some milk on each of the tortillas to soften them. While the
tortillas are softening, prepare the filling. In medium skillet, combine pears
with the rest of the filling ingredients and bring to a simmer. Cook on low
heat for 3-4 minutes. Set aside. Combine almonds with the sugar, water and
cinnamon in medium skillet. Bring mixture to a boil, stirring often. Cook until
liquid is evaporated, about 5 minutes. Pour almonds onto a baking sheet lined
with a silicone baking sheet or foil. Spread out and allow nuts to cool.
Place butter in skillet and start to heat up the pan.
While pan is heating, divide pear filling among the 4 tortillas. Place filling
along center of tortilla and fold up edges over, to cover the filling. Heat the
tortillas, seam side down, in the pan until golden, turning to toast evenly on
both sides. Remove from pan and place on serving plate. Top with some of the
candied almonds. Serves 4.
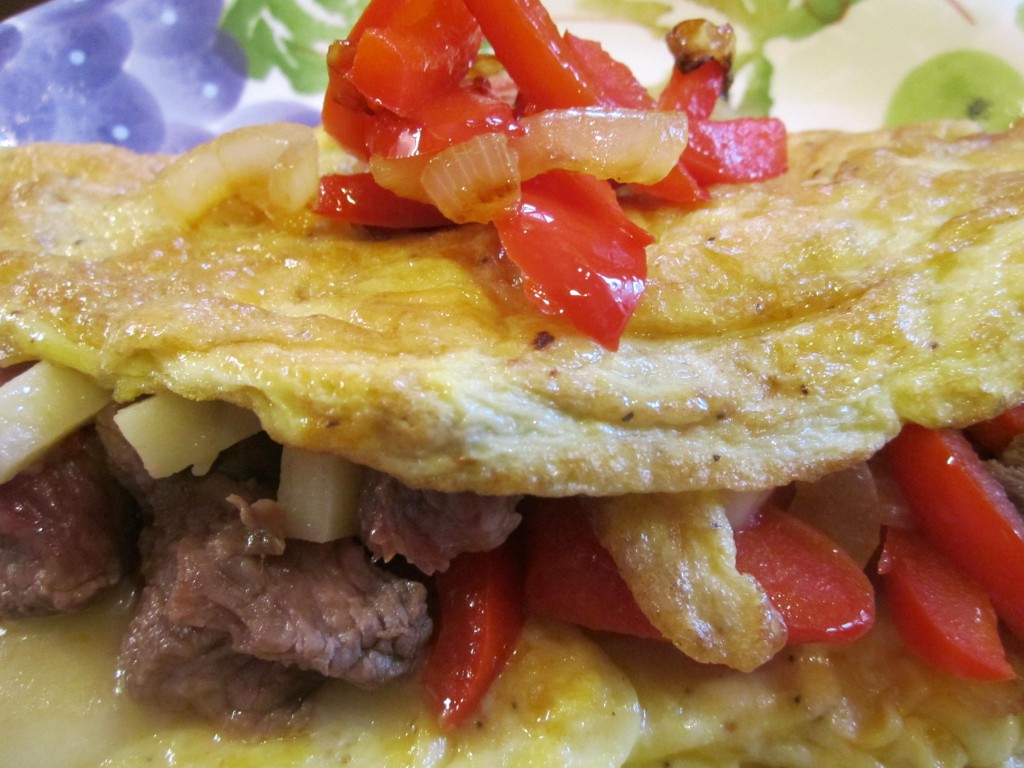
Steak and Pepper Omelet
oil
1 small onion, sliced
1 small red pepper, seeded and sliced
1 c. cubed cooked steak
3-4 eggs
2 oz. cheese- cut in small pieces or shredded*
salt and pepper to taste
dash hot pepper sauce
Heat oil in skillet and cook onion until golden. Add a
little salt to the onions while they are cooking. Add pepper and cook until
tender-crisp. Remove from pan and set aside. Heat same pan adding more oil, if needed.
Beat eggs in a small bowl and season with salt and pepper and hot sauce to your
taste. Pour eggs into hot skillet and swirl to coat bottom of skillet. Using a
spatula lift eggs a little and tip pan to allow uncooked egg to get to surface
of the pan. Once omelet is almost set place some of the pepper mixture on one
half. Top with the steak and cheese. Using a spatula gently fold the empty half
of the omelet over the fillings. Allow to cook one more minute and slide onto a
serving plate. Top with the remaining pepper mixture. Serves 2.
* I used Pepper Jack cheese because that is what I
happened to have. Use any cheese you like.
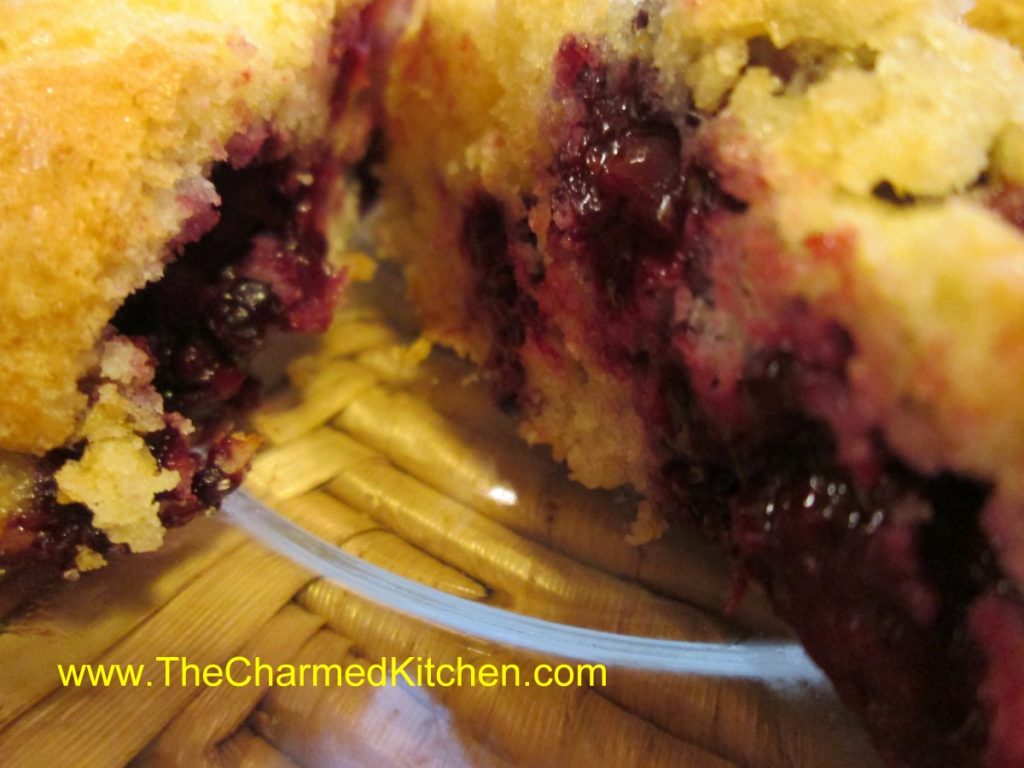
Fresh Blackberry Scones
2 c. flour
1/3 c. sugar
1 T. baking powder
¾ t. salt
6 T. chilled butter
2 c. blackberries, fresh preferred, but you could use
frozen
1 t. orange zest
2 large eggs
1/3 c. heavy cream or half and half
Mix dry ingredients together in bowl and cut in butter to
resemble coarse crumbs. Toss in berries and zest. Beat together eggs and cream
and stir into flour mixture. Mix very gently to avoid bruising berries. Use 1/2
cup ice cream scoop to scoop batter onto a baking sheet. Sprinkle with a
little extra sugar, if you like. Bake in a preheated 375-degree oven for 22-24
minutes. Makes 10-12.
Blueberry Sweet Rolls
3-3 1/2 c. bread flour
1 package active dry yeast
1 1/3 c. evaporated milk
6 T. butter
1/4 c. sugar
1 t. salt
1 egg
6 T. butter, melted
1/2 c. sugar
2 t. cinnamon
1 t. grated lemon or orange peel
2 c. fresh or frozen blueberries
In bowl combine 1 1/2 c. of the flour with the yeast,
sugar and salt. Heat together the milk and 2T. of the butter until warm and add
to the flour mixture, beating 2 minutes. Add egg and beat 2 minutes longer. By
hand stir in enough of the remaining flour to make a soft dough. Turn dough
onto a lightly floured surface and knead, adding flour as needed until dough
becomes moderately stiff. Place in greased bowl, turning once to coat and
cover. Allow to double in bulk, about 1 1/2 hours. Punch dough down, cover, and
let rest 10 minutes. Divide dough in half. Roll each half into a 14×8 inch
rectangle. Brush dough with the melted butter. Combine the remaining sugar,
peel and cinnamon and sprinkle over the dough. Top with the blueberries and
press the berries into the dough. Starting at the long side roll up dough jelly
roll fashion and seal edge by pinching. Repeat with second roll. Cut each roll
into 12 slices and place 12 rolls in greased 9 inch round pans. Cover pans and
allow to rise until doubled, about 30 minutes. Bake in a 375 degree oven for
20-25 minutes. While rolls are warm, you can top with a powder sugar glaze, if
desired. Makes 24.
Ham and Asparagus Quiche
1 (9-inch) unbaked pie crust
1½ c. shredded cheese – I used Havarti
4 t. flour
1½ c. diced cooked ham
12 oz. asparagus, trimmed, cut in ½- inch pieces and
steamed 3 minutes
4 eggs
1 c. milk or half and half
2 T. fresh chopped parsley or 2 teaspoons dried
¼ t. salt
1T. Dijon mustard
1 t. hot sauce
Toss cheese with flour in a bowl and place in pie crust.
Sprinkle the ham and asparagus over the cheese and set aside. Combine remaining
ingredients in a small bowl beating well to combine. Pour over the ham and
asparagus mixture and bake in a preheated 400-degree oven for 15 minutes. Turn
down heat to 350-degrees and bake until knife inserted off-center comes out
clean, about 30 minutes more. Makes 1.
Note: This quiche freezes well. After adding the fillings
just wrap in heavy foil and freeze solid until ready to bake. When ready to
bake unwrap and allow to sit at room temperature for 30-60 minutes. Bake as
with the fresh version, but add another 10-15 minutes to the baking time. If
you don’t want to freeze the pie pan, you can line the pie pan with foil before
you add the crust. Once it is frozen you can remove the frozen quiche from the
pie pan and wrap, returning to freezer. When ready to use unwrap and put the quiche
back in the pie pan before baking. Or, if you are planning on freezing it, you
can use a foil pie pan.
Scotch Eggs
6 hard-cooked eggs, well chilled
1 pound breakfast sausage
1/2 cup flour
2 eggs, beaten
3/4 cup fine bread crumbs
Vegetable oil for frying
Peel eggs and set aside. Divide sausage into 6 portions.
Roll each egg in flour and with hands press a portion of the sausage around
each egg. If the sausage sticks to your hands, dip your hands in a little water
to make pressing the sausage easier. Dip sausage-wrapped eggs into beaten eggs
and roll in bread crumbs. Heat vegetable oil to 350 degrees. Cook each egg in oil about 4-5 minutes or
until sausage is cooked and browned. Drain on paper toweling. Serve warm. Makes
6.
Reuben Strata
12 slices rye bread
6 slices Swiss cheese
12 oz. thinned sliced corned beef- or 2 cups chopped
corned beef
1 c. sauerkraut, squeezed dry
½ c. Thousand Island dressing*
3 eggs
2 c. milk
½ t. salt
½ t. hot pepper sauce, or to taste
Lightly grease a 9×13-inch baking dish. Place six slices
of bread on bottom of the dish. You might have to trim the bread to fit. Top
each slice of bread with a slice of cheese. Top cheese with the corned beef and
sauerkraut. You can use a little more or less sauerkraut, depending on your
taste. Spoon about a tablespoon of the
dressing over each “sandwich”. Top with remaining six slices of bread, trimmed
to fit pan, if needed. Combine remaining ingredients and pour over sandwiches.
Cover dish and let stand in the fridge, several hours or overnight. Bake,
uncovered, in a 350-degree oven for 40-45 minutes, or until puffed and set. Let
sit a few minutes before serving. Serves 6.
Orange and Oatmeal Scones
2 1/2 cups flour
2 cups rolled oats
1 cup sugar
1 teaspoon salt
1 tablespoon baking powder
1/2 teaspoon baking soda
1/2 cup very cold, unsalted butter – cut into chunks
1 egg
1/2 cup orange juice
2 t. grated orange peel
1 cup raisins – plumped and well dried
Glaze
milk, sugar, orange zest
Line a large baking sheet with parchment paper (double
two sheets if you have them – one inside the other). Preheat oven to 425 F. In
a large bowl, place flour, oatmeal, sugar, salt, baking powder, baking soda and
mix together. Cut or rub in butter to make a mealy mixture. Stir in egg and
orange juice. Add orange peel and raisins. Mix to make a soft dough. Turn out
onto a lightly floured board and knead for a few minutes. Roll or pat out into
a thickness of 1/2 inch. Using a serrated cookie cutter cut into disks or
rounds. Brush with milk and sprinkle with sugar and orange zest. Bake until
nicely browned – about 14 minutes. Makes about 24.
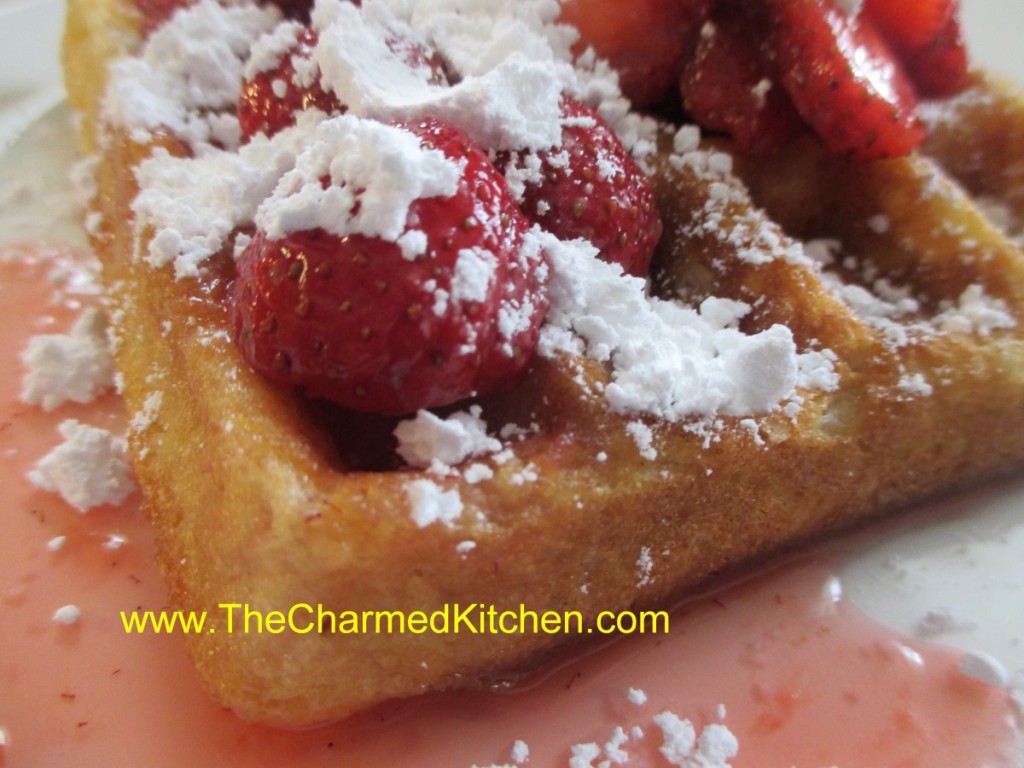
Cinnamon-Vanilla Belgian Waffles
2 c. all-purpose flour
3/4 cup sugar
3-1/2 teaspoons baking powder
2 t. cinnamon
2 eggs, separated
1-1/2 cups half and half- or milk
1 cup butter, melted
2 t. vanilla extract
Sliced fresh strawberries, powdered sugar or syrup
In a bowl, combine dry ingredients. In another bowl, lightly beat egg yolks. Add milk, butter and vanilla; mix well. Stir into dry ingredients just until combined. Beat egg whites until stiff peaks form; fold into batter. Bake in a preheated waffle iron according to manufacturer’s directions until golden brown. Serve with strawberries, powdered sugar or syrup. Yield: 10 waffles (about 4-1/2 inches).
Stuffed French Toast
1 (8 oz.) package cream cheese, softened
1 t. vanilla
1/2 c. chopped nuts
1 16-oz. loaf French bread
4 eggs
1 c. whipping cream or half and half
1 t. vanilla
1/2 t. ground nutmeg
Mix together cream cheese, vanilla and nuts. Set aside. Cut bread
into 10-12 1 1/2 inch slices. Cut pocket in each slice and fill with 1
1/2 T. filling. Combine eggs and whipping cream with remaining vanilla
and nutmeg. Use tongs to dip the bread, taking care not to squeeze out
the filling. Cook toast on lightly greased griddle until browned on both
sides. Keep toast warm in oven until ready to serve. Serve with maple
syrup, warmed preserves or powdered sugar. Makes 10-12 slices.
This might be one of my favorite soups. So much flavor and easy to make, too. It warms you up on even the coldest days.
The soup is a meal all on its own, or it can be served with crusty bread. Loaded with an assortment of veggies, the flavor is enhanced by the addition of smoked sausage. It would be a nice soup to make for New Year’s Day.
The recipe came to me through my Mother, who got it from my Aunt Josie. While I normally make it in a soup pot, it can be make in a crock pot- after the onions and sausage have been browned a little.
Ready in no time, it is a great solution when you want homemade soup but don’t have a lot of time.
Aunt Josie’s Cabbage Soup
1 T. oil
1 c. chopped onion
1 clove minced garlic
1 ½ lbs. Cooked smoked sausage, sliced or diced, I use turkey sausage
3 carrots, peeled and cubed
8 cups coarsely chopped cabbage, a small head
1 sweet pepper, seeded and chopped
1 c. tomato sauce
2 qts. Water
1-t. salt or paste-type soup base
pepper to taste
3 medium potatoes, cubed
2 T. oil
1/3 c. flour
1 t. paprika
Sauté onion in oil until browned. Add garlic and sausage and cook until sausage is browned. Add vegetables, sauce water and seasonings and cook, covered 15 minutes. Add potatoes and cook, covered, 15 minutes more. In bowl combine oil, flour and paprika and stir until smooth. Ladle some hot soup into flour mixture and whisk until smooth. Repeat a few more times, until flour forms a paste. Pour this mixture into soup and simmer 2 minutes, until thickened. Serves 10-12.
This is dedicated to my Aunt Josie. Will love you and miss you . RIP
Since so many people are making a pork roast of some sort for the New
Year, I thought I would re-post this recipe. I’ve had several requests
for it in the last few days.
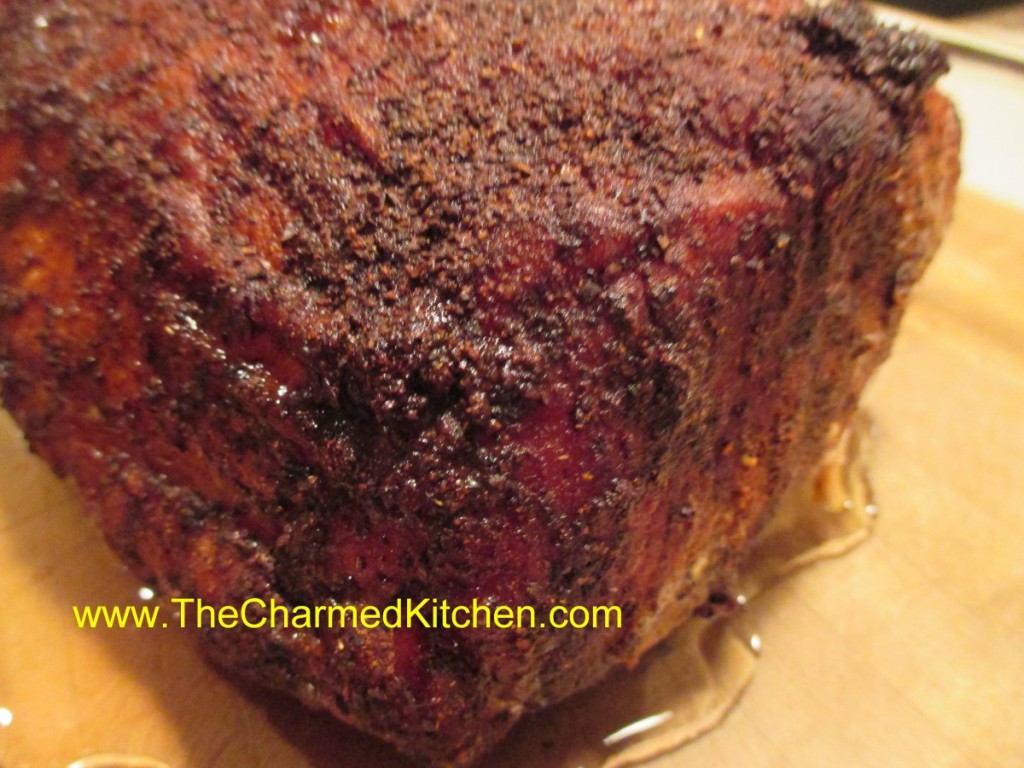
It is really good- with a rich blend of spices and coffee. The spice rub would also be great on lamb or beef. The rub can also be used on pork chops.
I am thinking of trying it on duck soon. Enjoy and Happy New Year!!
Coffee and Spice Rub
¼ c. ground coffee
¼ c. brown sugar
2 T. paprika
2 t. each cayenne pepper, cumin, garlic powder, salt and ginger
1 t. allspice
½ t. cinnamon
Combine all ingredients and stir to mix well. Store in a cool place,
preferably in the refrigerator. Rub can be used on roasts or on chops,
steaks and smaller cuts of meat. If using on chops that are being pan
fried watch carefully as the sugar in the recipe could burn.
To use the rub: several hours before cooking place the roast in a
shallow pan and sprinkle heavily with the rub. Use your hands to spread
it evenly and cover completely. Place plastic wrap on clean surface and
transfer roast to the wrap. Fold plastic wrap to cover roast , using
more plastic wrap as needed so meat is sealed well. Return to fridge for
at least a couple of hours, or overnight. When ready to cook, bring
roast out and allow to stand 30 minutes. Remove plastic wrap and place
roast in a roasting pan on a wire rack.
For the pork roast allow about 20 minutes per pound. Larger roasts need a little less time per pound. You want an internal temp of 145. Check with a thermometer, to be sure. You don’t want to overcook the pork. When the roast is finished- remove from oven and let stand 10 minutes, or a little longer, before slicing.
If you are looking to serve appetizers for New Year’s Eve, or for
other parties, here are some easy ones that your guests will love.
Some can be made ahead of time, saving you time the day of the party.
The won ton appetizers pictured here are from left to right- Crab
Rangoons, Sesame Spinach Triangles and Honey Ginger Chicken Won Tons.
Sesame Spinach Triangles
oil
1 small onion, chopped fine
12 oz. fresh spinach, cooked, chopped and drained or 1 (10 oz.) box frozen spinach, thawed, cooked and drained
1/2 c. chopped water chestnuts
2 T. oyster sauce
2 t. sesame oil
1 t. hot sauce
won ton wrappers
Heat oil in skillet and cook onion until tender. Remove from the heat
and stir in the remaining ingredients, except won ton wrappers. Adjust
seasonings, if needed. Allow mixture to cool. Place 1 tablespoon of the
filling in the center of a won ton wrapper. Moisten edges with a little
water and fold over to form a triangle. Press to seal edges. Place
filled triangles in 375 degree oil and fry for about 2 minutes or until
golden.
Honey Ginger Chicken Won Tons
1 c. cooked diced chicken- I used thighs
1/4 c. minced celery
1/4 c. mayo
2 T. honey
2 T. dried minced onion
1 T. hoisen sauce
1 t. fresh grated ginger
salt and hot sauce to taste
won ton wrappers
Combine all ingredients, except the wrappers, and mix well. Place 2
teaspoons of filling in the center of each won ton wrapper. Moisten
edges with a little water. Fold in 2 corners to meet in the middle.
Starting at one of the remaining corners fold up and over and form into a
roll. Press to seal edges. Fry in hot oil ( 375 degrees) for 1-2
minutes or until golden brown.
Crab Rangoons
1 clove garlic, minced
1 (8 ounce) package cream cheese
1 (6 ounce) can crab meat, drained and flaked
2 green onions with tops, thinly sliced
2 teaspoons Worcestershire sauce
1/2 teaspoon light soy sauce
won ton wrappers
Combine all filling ingredients and chill until ready to use. Place 2
teaspoons of filling onto the center of each wonton skin. Moisten the
edges with water and bring 2 corners together. Bring the other 2 corners
up and press all together to seal. Press all seams to seal. It should
look like a little bundle. Fry in hot oil until golden brown, about 1-2
minutes.
Hot Crab Dip
8 oz. crab meat or faux crab, if you prefer
8 oz. cream cheese
1/2 c. mayo
1 T. chopped chives or green onion, optional
1 heaping teaspoon horseradish
1/2 t. Worcestershire sauce
1/4 t. hot pepper sauce, or to taste
Combine all ingredients in ovenproof bowl and mix until smooth. Bake
in a 300-degree oven for 25-30 minutes or until hot and bubbly. You can
also heat mixture in microwave for 90 seconds or until hot. You can mix
the ingredients ahead of time and chill until ready to heat and serve.
Serve with crackers, crusty breads or veggies. You can also spoon
mixture into hollowed out tomatoes and broil until crab dip is hot and
bubbly.
Pineapple Glazed Chicken Wings
12 chicken wings, cut into 2 pieces, save tips for another use
1 medium onion, chopped
1 can (or jar) of pineapple chunks, drained, reserving liquid- I used a pint jar- if using store bought use the 20 oz. can.
salt and pepper
Sauce:
1/2 c. apple cider vinegar
1/2 c. sugar
3 T. ketchup
3 T. sherry
2 T. soy sauce
1 t. minced garlic
1 t. red pepper flakes
reserved pineapple juice
3 T. cornstarch
Preheat oven to 400 degrees. Place wings in pan and season with salt
and pepper. Bake chicken wings in roasting pan for 30 minutes. Add the
onions and pineapple chunks to the pan with the chicken wings and return
to the oven for 30 minutes longer. While chicken is cooking combine the
first seven sauce ingredients in a small pot and bring to a boil.
Check baking pan for any juices- Spoon them out and add to the sauce.
Combine pineapple juice and cornstarch in small bowl, stirring until
smooth and add to the sauce. Return to boil and stir until sauce is
thickened and bubbly. Pour hot sauce over chicken and return to the oven
to bake 20-30 minutes longer or until wings look nicely glazed and
sauce has started to brown. Makes 24.
Brie Truffles
8 oz. brie, room temperature- I remove the rind from the brie for a smoother texture.
8 oz. cream cheese, softened
1 stick ( 4 0z.) butter, softened
2 c. fresh pumpernickel bread crumbs*
In food processor combine cheeses with butter until smooth. Chill
mixture 30 minutes or longer. With a small cookie scoop or teaspoon form
mixture into small balls. Place crumbs in a bowl and roll the balls of
cheese in the crumbs to coat. Place in small paper cups and chill until
ready to serve. Makes 3-4 dozen.
* To make the crumbs just place torn
Caramelized Onions “Toasts”
2 lbs. Onions, chopped
3 T. oil
1 t. salt
2 T. brown sugar
¼ c. balsamic vinegar
Dash red hot pepper sauce
Paprika
Sauté onions in oil with salt over low heat for 25-30 minutes. Onions
should begin to caramelize and brown without burning. Add remaining
ingredients and cook slowly another 15 minutes. Adjust seasonings, if
needed and serve warm with crusty bread, crackers or smoked meats. Keeps
in fridge for a couple of weeks or can be frozen. To make the toasts I
placed a little of the onions on Wheat crackers and topped with squares
of sliced Swiss cheese. Placed in a 400 degree oven until the cheese
melted.
Brie with Pesto and Sun-Dried Tomatoes
2 c. basil leaves
3 T. Pine nuts, walnuts or pecans
2 T. olive oil
2 cloves garlic
3 T. Parmesan cheese
salt and pepper to taste
½ c. sun-dried tomatoes, soaked in water and chilled overnight
1 T. oil
1 t. oregano
small wheel of Brie 1-2#
Combine first five ingredients in a blender or processor until
smooth. Add salt and pepper to taste. Drain tomatoes and chop coarsely.
Combine with remaining oil and oregano and season to taste. Split Brie
horizontally into 3 pieces. Spread
One layer with pesto and top with a piece of Brie. Spread with tomato
mixture and top with remaining Brie. Wrap and chill overnight. Serve at
room temperature or warm slightly. I warmed it wrapped in foil at 400
degrees for 10 minutes.Wanted it to brown a bit. Goes best with crusty
breads.
Caponata
2 small eggplants, unpeeled and cut into 1/2-inch pieces, about 5-6 cups
1 large onion, chopped
1/2 c. olive oil, or a little more
4 celery ribs, sliced
2 sweet peppers, seeded and chopped
1 heaping tablespoon chopped garlic
3 tomatoes, chopped- or 1 (14.5) can diced tomatoes- undrained
1 c. sliced black olives
3-4 T. red wine vinegar
salt and pepper to taste*
Soak eggplant in salted water for at least 15 minutes. Rinse, drain
and pat dry. Set aside. Meanwhile in skillet cook onion in 2 tablespoons
of the oil until tender. Add the celery and cook until the celery is
tender-crisp. Place mixture in a mixing bowl and set aside. Heat 2
tablespoons more of the oil and cook the peppers until tender. Add
garlic and cook 1 minute longer. Add the tomatoes and cook 1 minute
longer. Add this mixture to onion mixture and return skillet to the
heat. Add remaining oil to skillet and cook eggplant until golden brown
and tender. You may have to do this in 2 batches. Add remaining
ingredients to bowl while eggplant is cooking. When eggplant is done add
it to the bowl and mix well., Season to taste. Serve with crusty breads
cold, hot or at room temperature. Serves 10-12.
* While I don’t have any herbs listed in the ingredients I often add
oregano and basil or an Italian or Tuscan seasoning blend. I also like
to add capers.
Mushroom Spread
½ lb. mushrooms, trimmed, washed and chopped
2 T. butter or oil
1 medium onion, chopped
½ t. salt
Fresh ground pepper
Dash of nutmeg
1 t. lemon juice
2 t. flour
½ c. sour cream or strained yogurt
½-1 t. dill weed
Sauté onions and mushrooms in butter or oil for 4 minutes. Add
seasonings, lemon juice and flour and cook 3 minutes more. Remove from
heat and stir in sour cream or yogurt and dill. Serve with pumpernickel
bread, crackers or in mini cream puff shells.
If you are looking for a special holiday breakfast, Eggs Benedict would be a top choice for me.
Eggs Benedict are English muffins, split and toasted, topped with some lightly browned slices of ham, or more traditionally, Canadian bacon. That is topped with poached eggs and then the Hollandaise sauce. There are a lot of variations. You can add wilted spinach, bacon, crab or even lobster, if you really want to splurge. I have a vegetarian friend who subs out the meat with some asparagus or cauliflower. Whatever makes you happy, works for me.
Here are the directions for making a classic Eggs Benedict.
Eggs Benedict
English Muffins allow one per serving Eggs – for poaching – you’ll need 2 for each serving Ham or Canadian bacon Hollandaise Sauce- recipes follow
Get all your ingredients ready. You’ll need a skillet with water boiling in it to poach the eggs. Add a couple of teaspoons of vinegar- it helps hold the eggs together better. Slice the ham, if needed, and brown it in a skillet. Keep warm until needed. I put the split English muffins in the toaster oven, so I could start toasting them when I started poaching the eggs. Next, make the Hollandaise sauce. I have included two ways to make your Hollandaise. One version is made in the microwave, the other with a traditional double boiler. Both come out great. For traditional Hollandaise you’ll need either a double boiler, or a pot with simmering water for this, so get it ready with hot water. For the microwave, just a glass bowl and a whisk. Recipes and directions for both versions follow.
Microwave Hollandaise
1 stick butter ( 1/2 cup)
3 egg yolks
1/2 T. lemon juice
pinch of salt
fresh ground pepper, optional
In microwave safe bowl, soften butter. This will take 10-15 seconds.
Don’t melt the butter, just soften it. Watch carefully. It may take less
time if the butter is already room temperature, longer if butter is
cold. I often make a double batch, so allow a few more seconds for
larger quantities. Whisk together the egg yolks and lemon juice. Whisk
the yolk mixture into the softened butter. Let stand on the counter a
minute or two. Place in microwave and cook on high heat for 15 seconds.
Be careful- only 15 seconds at a time. Whisk the mixture and return to
the microwave, cooking 15 seconds. Repeat this process until sauce is
thickened, smooth and shiny. It should take 3-4 of these 15 second
cooking sessions, but ovens vary. It takes a little longer if you double
the batch. Don’t worry if the sauce doesn’t look smooth the first time
you whisk all the ingredients together. It gets smoother upon further
cooking/whisking. Season with salt and pepper to your own taste. Enjoy
with Eggs Benedict or as a sauce for steamed veggies.
Classic Hollandaise Sauce
4 egg yolks
1 T. lemon juice
½ cup butter, melted
Salt and cayenne to taste- just a pinch of each will do.
Since I used a bowl over a pot with
simmering water, I put the egg yolks in a stainless steel bowl with the
lemon juice and whisked until kind of frothy. If you are using a double
boiler- do that in the pot from the double boiler. Once the mixture
looked thick, I placed the bowl over the pot of simmering water and
whisked it for a couple of minutes to warm the eggs. The simmering water
in the pot should not be deep enough to touch the bottom of the bowl.
While whisking, slowly drizzle in the melted butter. Keep whisking so
the mixture stays smooth. If you don’t, the eggs scramble and get all
lumpy. Once all the butter is in, cook about a minute longer- or until
sauce is thick and smooth. Remove from the heat, season to taste, and
keep warm until ready to use. Don’t wait too long. Hollandaise is best
used pretty soon after you make it. If it gets too thick, add a little
warm water to thin it out.
To poach the eggs, place eggs, gently, in
the simmering water- the stuff in the skillet that you added vinegar to.
Some people like to have the water swirling when they do this by
stirring it just before adding the eggs. I just put the eggs in gently,
and it seems to work just fine. Use a slotted spoon to sort of fold the
whites up over the eggs. Poach for about 3½ minutes. Whites should be
set, but yolks will be runny. Remove from the pan with a slotted spoon
and place on a folded towel to get off some of the water.
To assemble the eggs Benedict, place toasted English muffins halves
on a plate. Top with a slice, or two, of the ham. Then gently add a
poached egg on top of the ham. Spoon over the Hollandaise and serve. A
little more work than most egg dishes, but worth the effort.
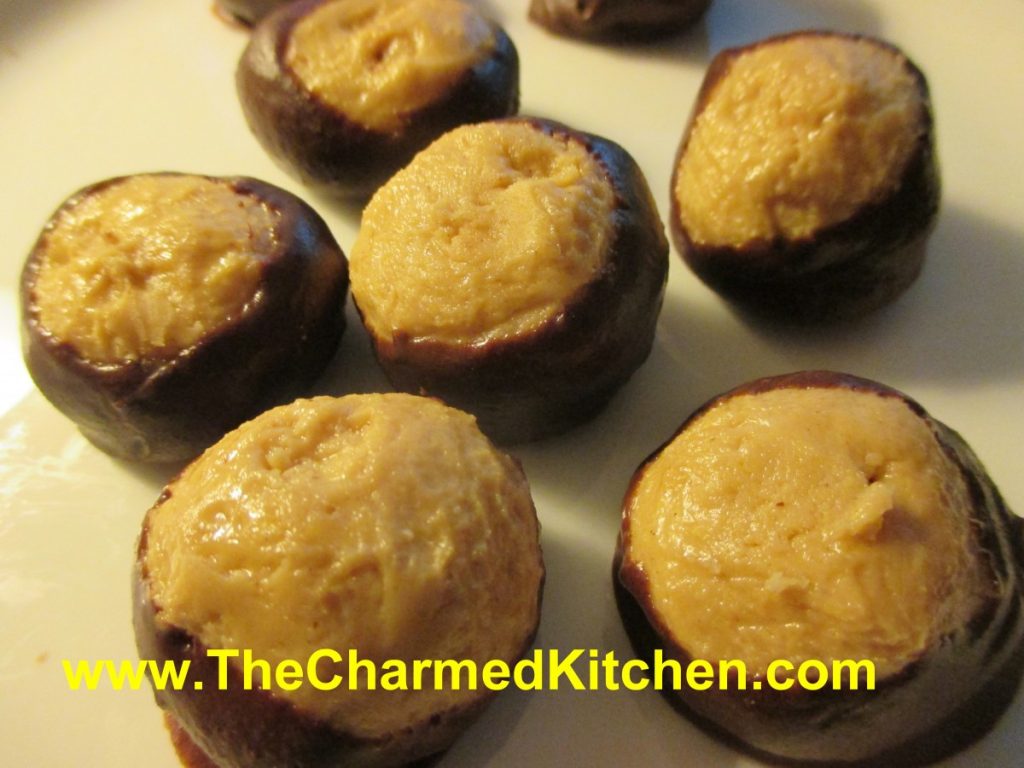
Buckeyes were the first candy I learned to make. A peanut butter filling is rolled into balls, then dipped in melted chocolate. Lovely flavor combination and very easy to make.
When I was a kid, I didn’t see them outside of Ohio much. Today everyone seems to know what buckeyes are.
Buckeyes are simple to make. Fast, too. And a great kid-friendly recipe. If you need some last minute gifts, or you just want them for your holiday party, you still have time to make a batch of buckeyes.
Here is the recipe I use. There are variations of this recipe out there, including one with crispy rice cereal in the mix. This one is still my favorite. Enjoy!!
Buckeyes
1 ½ lb. powdered sugar 1 ½ c. peanut butter 2 sticks softened butter 12 oz. chocolate chips- or dark chocolate 2 T. coconut oil or shortening
Mix together sugar, peanut butter and butter. Chill. Roll into balls, flatten slightly. Melt together, chocolate and coconut oil. Dip the peanut butter balls in melted chocolate to cover about ¾ of the surface. Use a toothpick or fondue fork to hold the balls. It makes the job of dipping a lot easier. Allow to harden on wax paper. Store in a cool place. Can be frozen.
These cut-out cookies are a classic, and
always part of my holiday cookie baking. I will confess to having an
enormous assortment of cookie cutters, so there is almost no end to the
shapes I might use. This time of year I am making trees, stars, snowmen
and more.
These cookies are crisp and sturdy enough to stand up to frosting,
without being too hard. They also hold their shape well when baking.
I use royal icing to frost them, and an assortment of sprinkles and
other candies. Royal icing is made with egg whites or powdered egg
whites. The advantage over a butter cream, is that royal icing hardens,
making the cookies easy to pack and stack. You don’t need much- just a
thin layer. Tinting the frosting different colors is a big part of the
fun. Depending on how much time you have, you can get really creative
with decorating.
Old-Fashioned Sugar Cookies
1 c. butter
1 c. sugar
1 egg
1 t. vanilla
3 c. flour
2 t. baking powder
3 T. milk
Extra sugar for sprinkling, if desired
Beat butter and sugar until fluffy. Beat in egg and vanilla. Combine dry
ingredients and add to butter mixture. Beat in milk. Heat oven to
375-degrees. Roll dough on lightly floured surface to about 1/3- inch
thickness. Cut out with lightly floured cutters and sprinkle with sugar
or colored sugar if you like and if you are not going to frost them.
Bake on an ungreased baking sheet for 10-12 minutes. Cool on baking
sheet 3 minutes before placing on wire rack to cool completely. Frost
when cooled. Makes about 4 dozen.
Decorating your cookies:
You can use a buttercream frosting, if you like, however the topping I
prefer is royal icing. Because royal icing contains egg whites it gets
hard. Cookies have a smooth appearance and can be stacked. When making
royal icing, use pasteurized egg whites or powdered egg whites. Raw egg
whites pose a risk of salmonella.
You can also use colored sugar and sprinkles and mini chocolate chips for eyes.
Royal Icing
1 lb. powdered sugar ½ t. cream of tartar 5¼ t. egg white powder 6 T. water ½ t. vanilla, optional Assorted food coloring In large mixing bowl combine dry ingredients and mix well. Add water and vanilla and beat until light and fluffy, about 10 minutes. Divide into small bowls and tint each batch as needed. Keep bowl covered with a damp towel while waiting to use so frosting will not dry out.
It seems I am always making variations on shortbread cookies. I love shortbread. I am not alone- so many friends and family have told me the same thing. There is something about the crumbly texture of shortbread that makes them a favorite for a lot of people.
This recipe is a classic shortbread, topped with cinnamon and pecans. They are really good. You just make a batch of dough, press into a pan, top with a cinnamon – pecan mixture, and bake. Could not be simpler.
As soon as they come out of the oven cut them into little strips or squares. I got nearly 100 out of one batch. It depends on the size you cut them. If you are looking for a simple, yet wonderful cookie, you might want to try these.
Cinnamon Pecan Shortbread Cookies
1 c. butter
1 c. sugar
1 egg, separated
2 c. flour
1 T. water
½ c. finely chopped pecans
3 T. sugar
2 t. cinnamon
Lightly grease jellyroll pan (10×15). Mix butter, sugar and egg yolk
then stir in flour. Pat into pan. Beat egg white with water until frothy
and spread over dough. Combine pecans, sugar and cinnamon. Sprinkle
nut mixture over the dough and bake in a 350-degree oven for 20-25
minutes or until lightly browned. Cut immediately into tiny strips,
makes 50- 100.
If you are looking for a truly tender cookie, this may be it. These
cookies are so delicate, they just melt in your mouth!! We made them in
class the other night, and everyone loved them.
The secret ingredient might surprise you. It is oil. Yes, I know I
said butter cookies – they also contain butter. But the combination of
oil and butter makes them soft and delicate, even days after baking.
They also contain both granulated and powdered sugar. Not your
typical cookie recipe, for sure. This just may be my “go to” butter
cookie recipe from now on.
I found a sheet of paper with the ingredients written on it. No
directions, just ingredients listed and a notation about cooking time
and oven temperature. I wish I knew where I got the recipe. I would
certainly give the source credit. I did increase the amount of vanilla a
little. You don’t have to chill the dough and they roll very easily,
without sticking to your fingers. You could chill the dough, but let it
warm up a little before rolling. The dough can also be made ahead and
frozen- I tested it.
I dipped the tops of the raw cookies in sprinkles, then baked them.
You could leave them plain, then roll in powder sugar, once baked and
cooled, or drizzle with melted chocolate.
Soft Butter Cookies
1 c. butter
1 c. oil, I used avocado oil
1 c. sugar
1 c. powdered sugar
2 eggs
1 T. vanilla
1 t. baking soda
1 t. cream of tartar
½ t. salt
4 ½ c. flour
In mixing bowl, beat together butter, oil, sugars and vanilla. Once
well blended, beat in eggs. Stir in the baking soda, cream of tartar and
salt, then add the flour, mixing until well combined. Heat oven to 350
degrees. Roll dough into one inch balls and press tops of cookies in
sprinkles or colored sugar, if desired. Place one inch apart on
ungreased baking sheets. Bake for 12 minutes, or until light golden on
bottom. Leave cookies on baking sheets 3 minutes before placing on
cooling rack. Makes about 6 dozen cookies.