Creamy Peach Sorbet

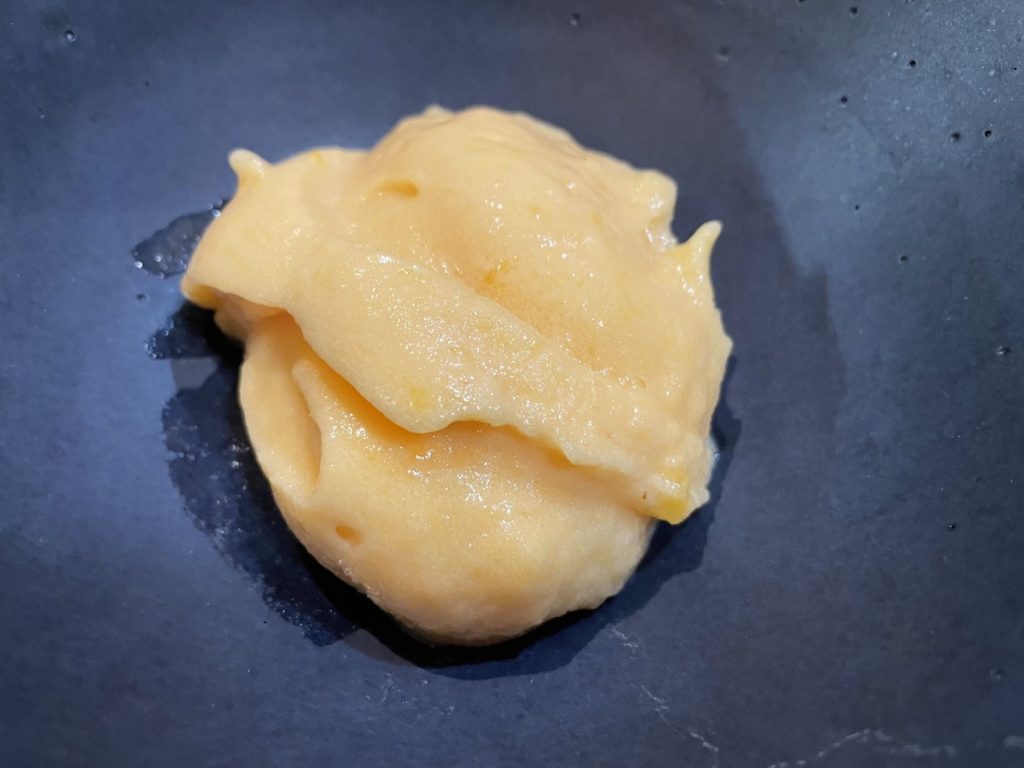
This is an easy and refreshing dessert. Perfect for summer. It has a thick, creamy texture and deep peach flavor. Even better- no cooking and no ice cream machine required. You will need a food processor, though. After I made the sorbet, I realized that I love it and don’t make it enough. I seem to freeze lots of strawberries and blueberries, but don’t freeze many peaches. That is changing. I will most definitely be freezing more peaches.
There are two steps to this recipe and you will need to allow freezing time. Actual prep time is pretty minimal. I have made this before and added vanilla of cinnamon. I didn’t this time, but feel free to play with flavors. Here is the recipe. Enjoy!!
Creamy Peach Sorbet
6 ripe peaces
2/3 c. sugar , or to taste – you can use honey or other sweeteners of your choice.
Peel peaches and remove the pits. You don’t need to remove every last bit of peel. Throw away the pits or plant them. Dice the peaches. Combine peaches with sugar and stir together. Freeze in shallow pan. Remove peaches from freezer and allow to soften enough to break into chunks. This should only take a couple of minutes. Place in processor and blend until very smooth. Serve immediately or return to freezer until ready to serve. Makes about 1 quart.
Note: When it works out perfectly, the peach sorbet looks sort of creamy. You might think there is dairy in it. Having the peach mixture as frozen as possible before putting in the processor is the secret. Only soften enough to break up, but don’t let the peach mixture get too melty. If you think your sorbet isn’t creamy enough, you can freeze it again, then process in the food processor a second time.
Zucchini Brownies – Gluten Free

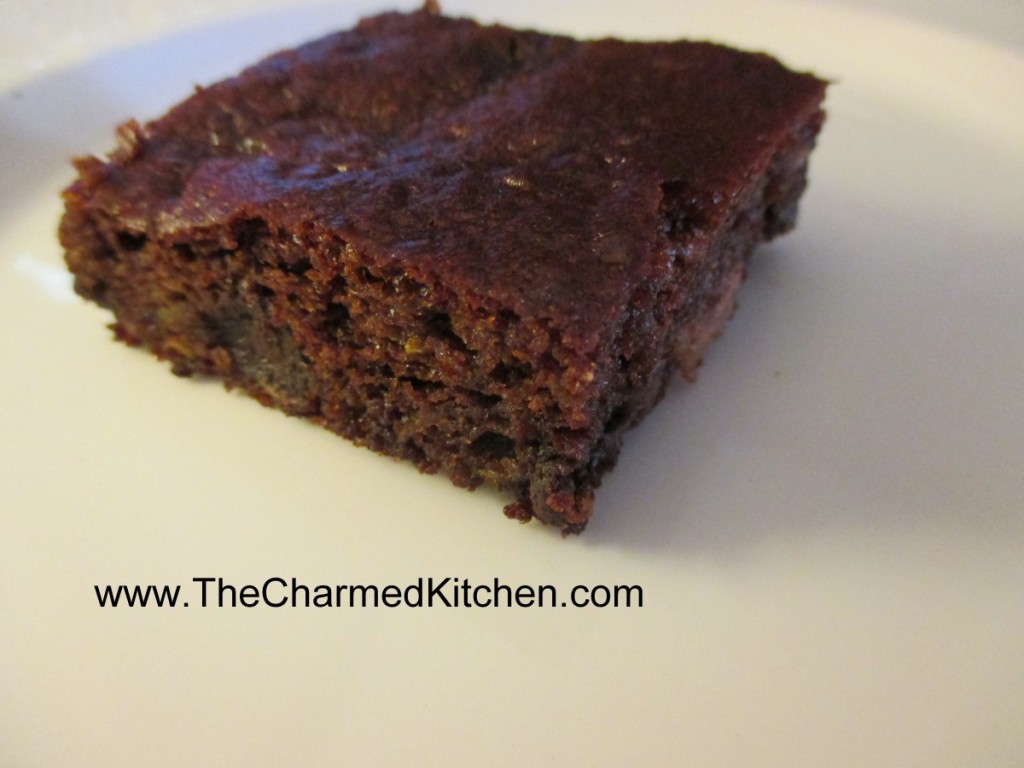
These brownies are everything you want in a brownie. Sweet, moist and very tender. The fact they are also flour and gluten-free is a nice bonus for those who can’t have gluten.
You might think, when you read the ingredients, that I left something out. I didn’t. They baked up beautifully and had a wonderful texture. I think the next time I make them, I might also add some chopped nuts.
Gluten-Free Zucchini Brownies
1½ c. shredded zucchini
1 c. almond butter- but you could use peanut butter instead
1 c. chocolate chips
1/3 c. honey – but you can use 1/2 cup if you want a sweeter brownie
¼ c. unsweetened cocoa powder
1 egg
1 t. vanilla
1 t. baking soda
1 t. cinnamon
½ t. allspice
Preheat oven to 350 degrees. Grease a 9×9 inch pan, set aside. Combine all ingredients in a medium bowl and stir until well blended. Pour batter into pan and spread evenly. Bake 25-30 minutes, or until toothpick inserted comes out clean. Cool before cutting. Makes 16.
Peach Salsa


This salsa makes a great topper for grilled meats or fish. It is also fun to serve with chips. While salsa may traditionally be made with tomatoes, there are other options. The peaches give the salsa a great natural sweetness. It is so colorful.
I used really ripe peaches, which are tough to peel. To help peel them, I placed the peaches in boiling water for a minute. Then I put them in cold water. Once they were cool enough to handle, they peeled easily.
I used 5 peaches and ended up with almost 2 cups of prepared fruit. You might need more or less, depending on the size of the fruit.
You can make the salsa as spicy as you like. I added a jalapeno pepper and some hot sauce. I tasted the salsa 30 minutes after I made it and added a little more hot sauce.
Fresh Peach Salsa
4-5 ripe peaches, peeled, pitted and diced
½ c. minced sweet onion
½ c. minced sweet pepper
1 jalapeno, seeded and minced
2-3 T. chopped fresh cilantro
1t. hot sauce, or to taste
zest and juice from 1 lemon, you could use a lime instead
salt and pepper to taste, don’t be afraid to give this dish a good bit of salt
Combine all ingredients in a bowl and stir until mixed. Check seasonings. Chill for at least 30 minutes and taste again- you will likely add more seasoning. Serve over grilled meats or with chips.
Homemade Blueberry Liqueur


I always stock up on blueberries when they are in season. I end up with a lot of frozen berries to enjoy throughout the year. I was cleaning out the freezer awhile ago, and decided to use some of my frozen berries to make blueberry liqueur.
After steeping for several months, I strained out the blueberries last night. I ended up making two different liqueurs. One is unsweetened- just blueberries, vodka, lemon zest and a clove. It is sometimes called an eau de vie- French for water of life- or blueberry vodka. It is one of my favorites for making all sorts of cocktails.
The other was sweetened a little with a sugar syrup- but you could use honey. That is blueberry liqueur or blueberry cordial. It will be allowed to mature for a couple of weeks.
Both are wonderful.
The color is so pretty and they can be sipped, as is, or used in cocktails. You can use other berries, if you prefer.
I look forward to enjoying these with friends and family. Soon!!
Blueberry Liqueur
4-c. fresh or frozen blueberries
Sliced and scraped peel of one lemon, optional
1 clove, optional
3-c. vodka or 2 c. vodka and 1 c. brandy
1 c. sugar syrup, optional, recipe follows
Lightly crush berries with a fork. Combine with peels and clove and vodka and steep 3 months. Strain and filter and add sugar syrup. Mature 4-6 weeks.
Sugar Syrup
Simple syrup is made from 1 cup of sugar and ½ cup of water. Bring to a boil, then cool. You will have 1 cup of syrup. Some recipes call for plain sugar and others for honey. Watch when you substitute honey for sugar, as it is sweeter and stronger flavored. Better to use orange or clover honey.
Cherry and Blueberry Clafoutis

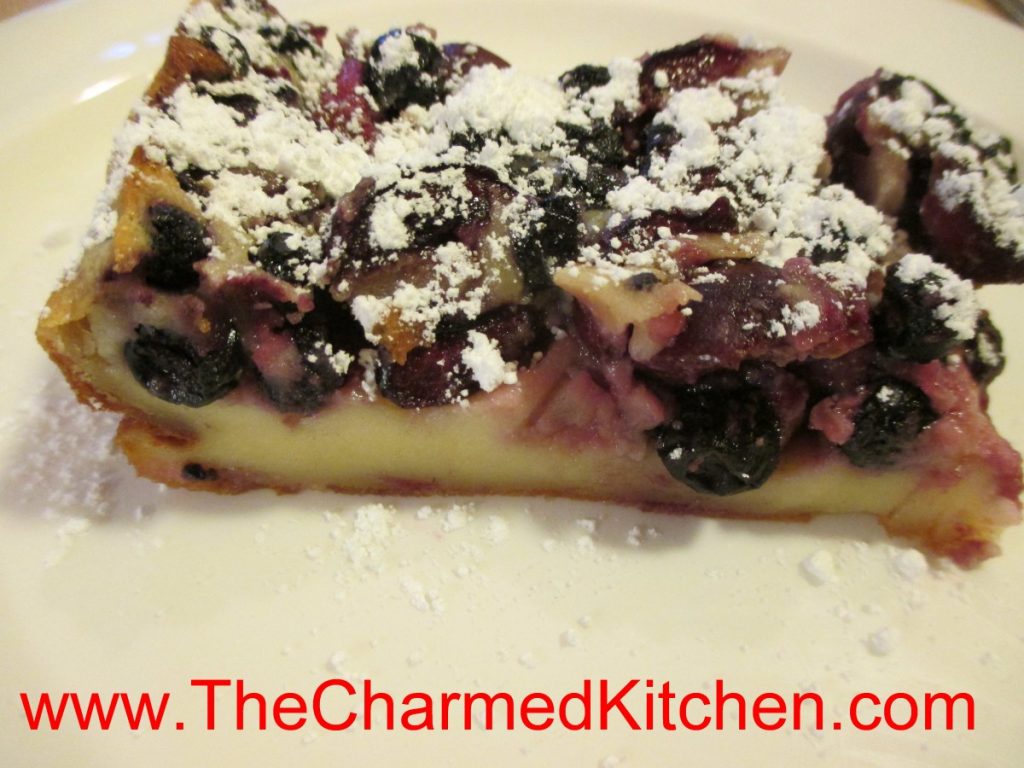
So what is clafoutis? Clafoutis is a sort of pancake, sort of custard, sort of quiche. It is a lovely dessert for fresh fruit, for sure.
You can serve clafoutis plain, or topped with powdered sugar or whipped cream. On a hot day, I like to serve it with a scoop of ice cream.
Clafoutis is really simple to make, too. You start by putting the fruit in a prepared pan. The batter is made in a blender, and takes just a couple of minutes to prepare. You pour the batter over the fruit- and bake.
I used cherries and blueberries in this one, but you can use all sorts of fruits- peaches, plums, raspberries…..
Most people enjoy it as a dessert, but it is also nice with that morning cup of coffee.
I used a combination I thought would make a nice dessert for summer.
Cherry and Blueberry Clafoutis
2 c. pitted cherries, I cut them in half, but you can leave whole
1 c. blueberries
3 eggs
1 c. sugar
3 T. melted butter
½ c. flour
2 t. vanilla extract
1 t. almond extract
pinch of salt
1 c. half and half
powdered sugar, optional
Grease a 9×9-inch baking dish or pie pan. Preheat oven to 350 degrees. Place cherries and blueberries in the prepared pan. In blender, combine eggs, sugar, butter, flour, flavorings and salt.* Blend until smooth. Add half and half and blend again until smooth. Pour batter over the cherries and blueberries. Bake for 45-50 minutes or until clafoutis is browned around edges and puffed up. Allow to cool and dust with powdered sugar, if you like. It will deflate as it cools. Serves 6.
* You can whisk the ingredients together by hand, if you prefer.
Cheesy Cherry Blueberry Coffee Cake

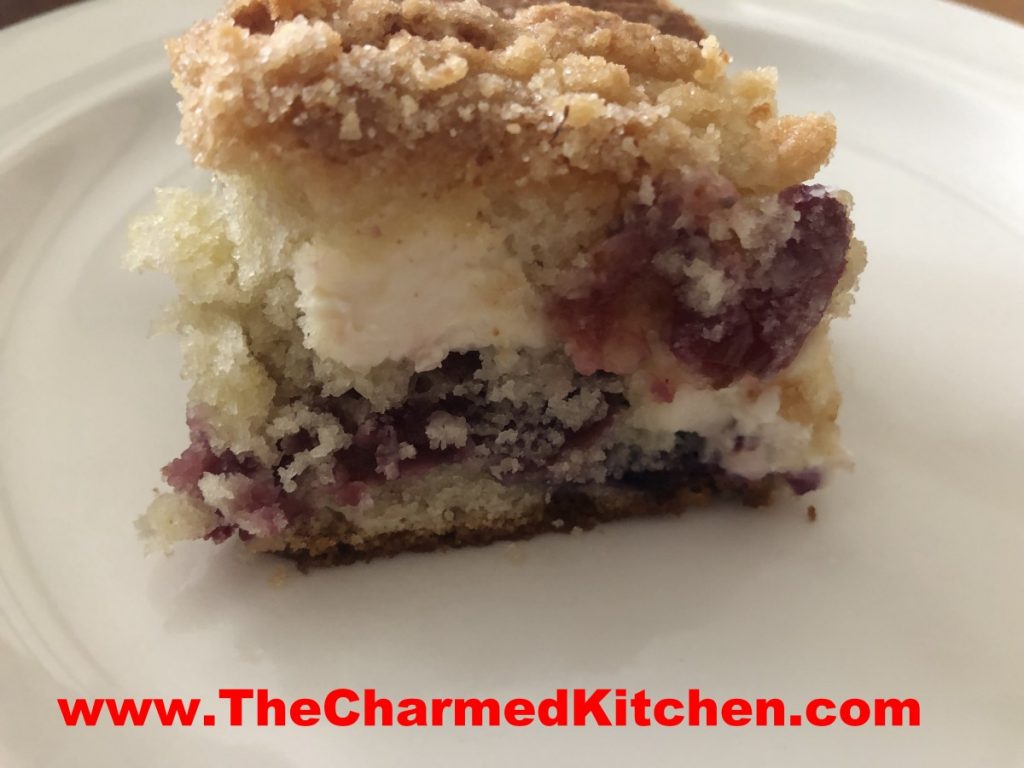
If you need a really special dessert for your next party or cookout, consider making this cheesy cherry-blueberry coffee cake. It is one of my favorite coffee cake recipes ever. The cake is not too sweet, and the combination of cream cheese, with the fruit reminds me of a cherry-blueberry blintz.
The streusal topping adds a nice little crunch.
It is fine served all on its own. You can also serve it with ice cream or whipped cream. You can also top with more blueberries and cherries.
While I think of this cake as a wonderful dessert, it can be served as a breakfast or brunch dish.
As if this weren’t enough- this cake freezes great. Who are we kidding? There won’t be any leftovers – but you could freeze them, if you had some.
So here is the recipe. Enjoy!!
Cheesy Cherry-Blueberry Coffee Cake
1 1/4 c. sugar
1/2 c. butter
2 eggs
2 1/4 c. flour
1 T. baking powder
1 t. salt
1 c. milk
1 c. fresh or frozen blueberries
1 c. pitted and coarsely chopped cherries
8 oz. cream cheese, cubed
1 t. grated lemon peel
Topping:
1/4 c. sugar
1/4 c. flour
1 t. grated lemon peel
2 T. butter
Preheat oven to 375. Grease and flour a 13×9 inch baking dish. Cream together sugar and butter until fluffy. Beat in eggs. Combine 2 cups of the flour with baking powder and salt and beat into batter alternately with the milk. Toss fruit with the remaining flour and fold into the batter along with the cheese and lemon rind. Pour batter into prepared pan. Combine sugar, flour and lemon peel for topping and cut in butter to resemble coarse crumbs. Sprinkle over batter and bake for about 45 minutes. Use toothpick to test for doneness. Serves 12.

Canning Tomatoes

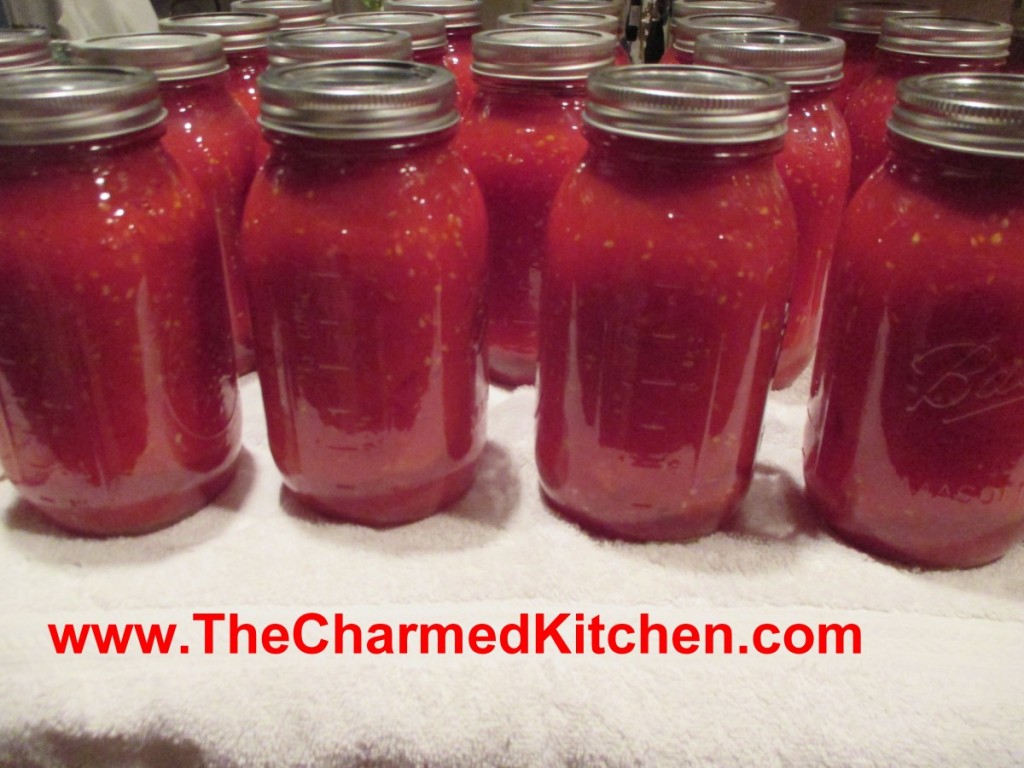
I love my home-canned tomatoes. They taste so much better than anything than comes in a can. Worth the effort.
You have options when canning tomatoes- crushed, juice, sauce- and more. The one option you won’t see for home- canned tomatoes is diced. There is a reason for that. When tomatoes are canned commercially, calcium is added to keep them firm. That is why commercially canned diced tomatoes hold their shape. Home canned diced tomatoes will just cook down, get very soft and not hold their shape. Canning tomatoes whole will give you a firmer end product, if that is what you want.
I have been asked several times in canning classes, if it is safe to can yellow or orange tomatoes. We have all heard that yellow and orange tomatoes are lower in acid, so are they still safe to can? The answer is yes, they are safe to can.
Why?
In spite of you might have been told, orange and yellow tomatoes are not acid free or low acid.
Truth is, that yellow and orange tomatoes have just as much acid as red tomatoes.
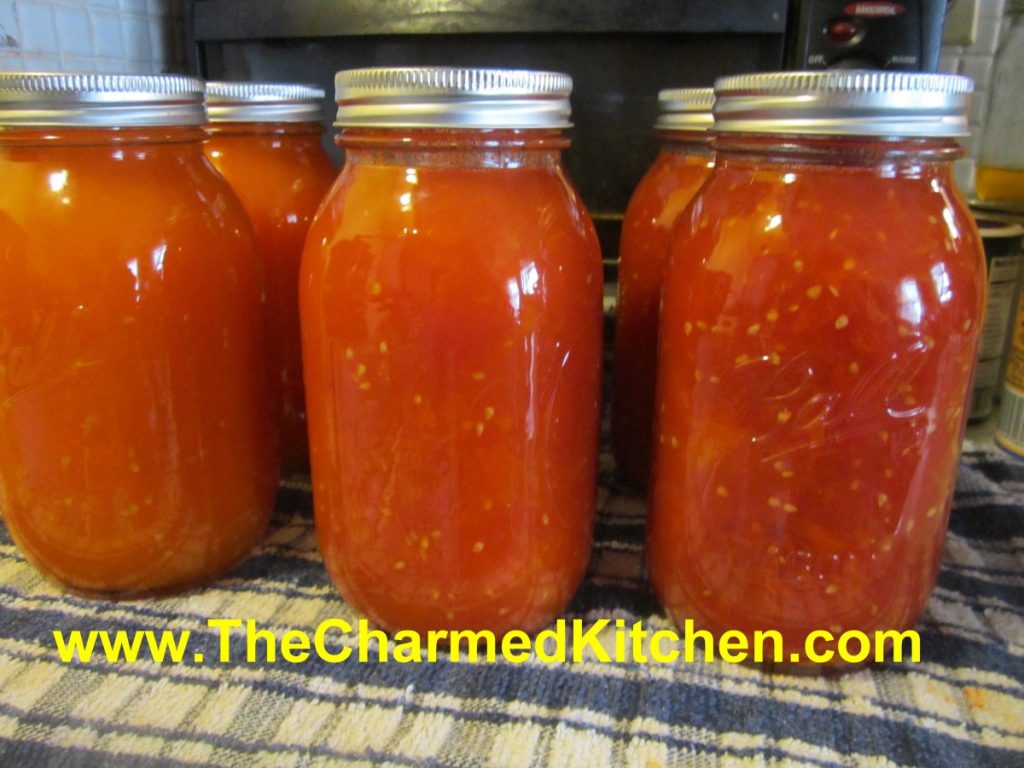
Well, for the most part at least. In terms of acidity or Ph, yellow and orange tomatoes are about average. Some cultivars have more, some less. Bottom line is that all tomatoes are safe to can- as long as you acidify them.
Adding salt is optional, and is for flavor only. Use canning/pickling salt or non-iodized salt when canning.
Here are some popular canning recipes to get you started.
All follow the NCHFP (National Center for Home Food Preservation) recommended procedures.
Crushed Tomatoes
Peel and core tomatoes , trim off any bad spots and quarter. Place about 1/4 of your prepared tomatoes in the kettle and cook, stirring constantly over high heat. Use a potato masher to crush tomatoes and extract juices. Once they are boiling add remaining tomatoes, stirring constantly. You don’t need to crush these tomatoes. Bring to a boil and boil for 5 minutes. In clean, hot jars add needed acidity listed below. You can also add 1 teaspoon of canning salt per quart if desired. Ladle in hot tomatoes, leaving 1/2-inch headspace. Wipe jar rims clean and adjust lids. Process in boiling water bath. Pints 35 minutes, quarts, 45 minutes. 1,000-3000 ft over sea level add 5 minutes. Twenty-two pounds of tomatoes will yield about 7 quarts of tomatoes.
Whole Tomatoes in Juice
Use any extra tomatoes to make juice. I use tomatoes that are too big to can whole, or those that have blemishes that need to be trimmed. Cut up clean, unpeeled tomatoes in a kettle and cook, stirring often until tomatoes are mushy. Strain mixture, pressing on solids or run through a food mill or tomato juice extractor. Set aside,. Place peeled, whole tomatoes in kettle and add enough tomato juice to cover them. Heat to a simmer and simmer gently 5 minutes. Add lemon juice or citric acid to jars, using amounts listed below. Add salt, if desired. Add tomatoes and cover with hot juice, leaving 1/2 -inch headspace. Wipe rims and adjust lids. Process both pints and quarts 85 minutes in a boiling water bath.
Tomato Juice
Wash, stem and trim bruises off tomatoes. Cut into chunks. Add about 1 pound of tomatoes to kettle and bring to a boil while crushing. Continue to add additional cut up tomatoes slowly, keeping mixture boiling. This will keep the juice from separating later. Simmer an additional 5 minutes once the tomatoes have all been added. Press mixture through a strainer , sieve or food mill to remove seeds and skins. Add lemon juice or citric acid to jars according to directions listed below. Add salt if desired. Return juice to boil and add to prepared jars leaving 1/2-inch headspace. Wipe rims and adjust lids. Process n a boiling water bath pints 35 minutes and quarts 40 minutes. Add 5 minutes processing time at elevations between 1,001 and 3,000 ft.
Tomato Sauce
Prepare as for juice. After juice is made return to pot and start cooking down to desired thickness. You’ll lose about 1/3 of the volume for thin sauce and 1/2 of the volume for thick. Add lemon juice or citric acid to prepared jars as described below. Add salt if desired. Add boiling sauce leaving 1/4 -inch headspace. Wipe rims and adjust lids. Process in a boiling water bath 35 minutes for pints and 40 minutes for quarts. Add five minutes at 1,001-3,000 ft. elevation.
Acidity and Tomatoes
Tomatoes must be acidified before canning. When canning either whole, crushed or juiced tomatoes you must add either 2 T. bottled lemon juice per quart or 1/2 t. citric acid . For pint use 1 T. lemon juice or 1/4 t. citric acid. You can also use 4 T. (5%) vinegar per quart, but it will alter the flavor and is not recommended. You can add a little sugar to offset the flavor, if you like.
Pepperoni Pizza Bread


We made this recipe in cooking camp yesterday. The kids did a great job of mixing and kneading the dough. Even though a humid day is not the most comfortable for cooking, the dough loved it. The kids opted to not add the pepperoni, so in the end they made cheese pizza breads. Still very tasty.
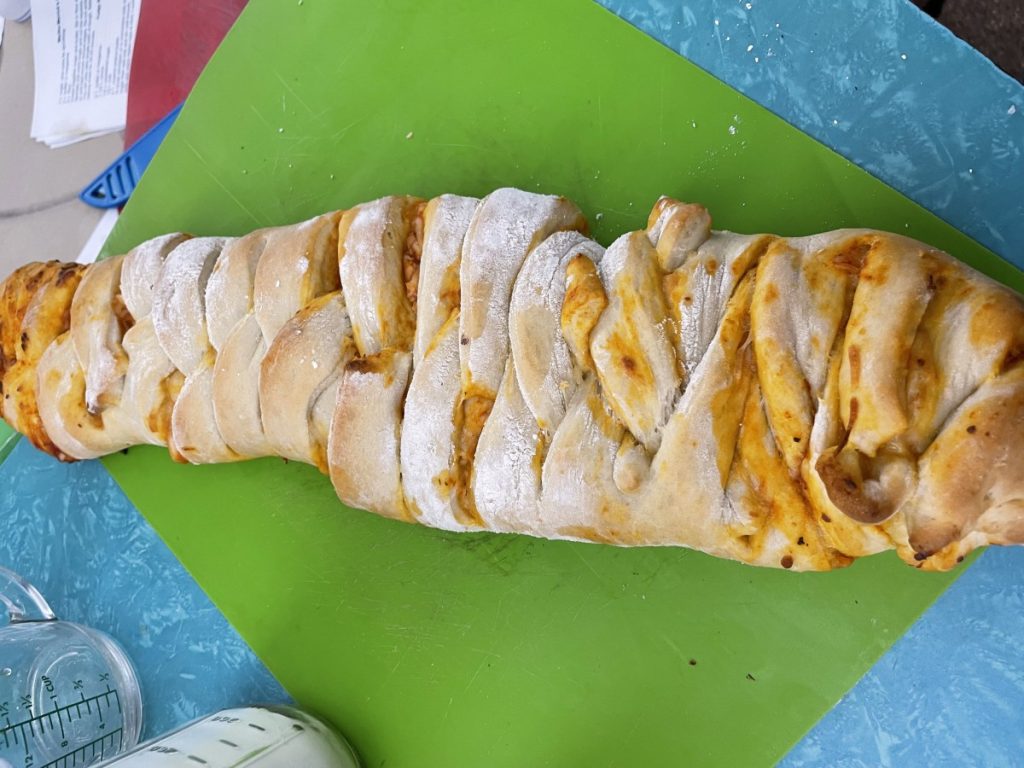
The pizza fillings are always popular with my friends and family. You could certainly add other favorite pizza toppings to your fillings. Pictured is a double batch- which made two loaves. The recipe below makes one bread, but feel free to double the recipe.
Here is the recipe for one loaf.
Pepperoni Pizza Bread
3 ¼ c. flour
1 T. sugar
1 t. salt
1 package quick-rising yeast
1 c. hot water
1 T. oil
Extra oil for brushing on the dough
1/2 c. marinara sauce
6 oz. mozzarella or provolone cheese
2 oz. sliced pepperoni, about
Set aside 1 cup of the flour. Combine remaining flour with the other dry ingredients in a medium bowl. Stir in water and oil and gradually stir in enough flour to make a soft dough. Turn onto lightly floured surface and knead until dough is smooth and elastic, about 5 minutes. Roll dough into a rectangle about 16 x 8. Brush with oil down center middle of dough. Top with sauce, cheese and pepperoni. Cut one-inch wide strips of dough from filling to edge on both sides. It will sort of look like fringe. Alternating sides, fold strips up and over the filling at an angle. Carefully lift loaf onto greased baking sheet and place at an angle. Cover with a towel and place sheet on top of a roasting pan half-filled with simmering water for 15 minutes. Bake in a preheated 400-degree for 20-25 minutes or until golden brown. Cool slightly before slicing. Serve warm and refrigerate leftovers. Makes one loaf.
Note: The variations for this bread are almost endless. Some favorite combinations are ham and Swiss with mustard, roast beef and cheddar, chicken, broccoli and cheese, spinach with ricotta or feta and onions, curried veggies. You get the idea. Use your imagination and have fun. Just be careful not to overfill, or the bread will be hard to move, use fillings that aren’t too runny and always use cold fillings.
If you want to use regular yeast, use warm, rather than hot water. After kneading cover dough and let rise 45 minutes. Punch down and assemble as in original recipe. Cover with a towel and let rise until dough looks puffy, about 40 minutes. Bake as directed above. These breads can also be frozen.
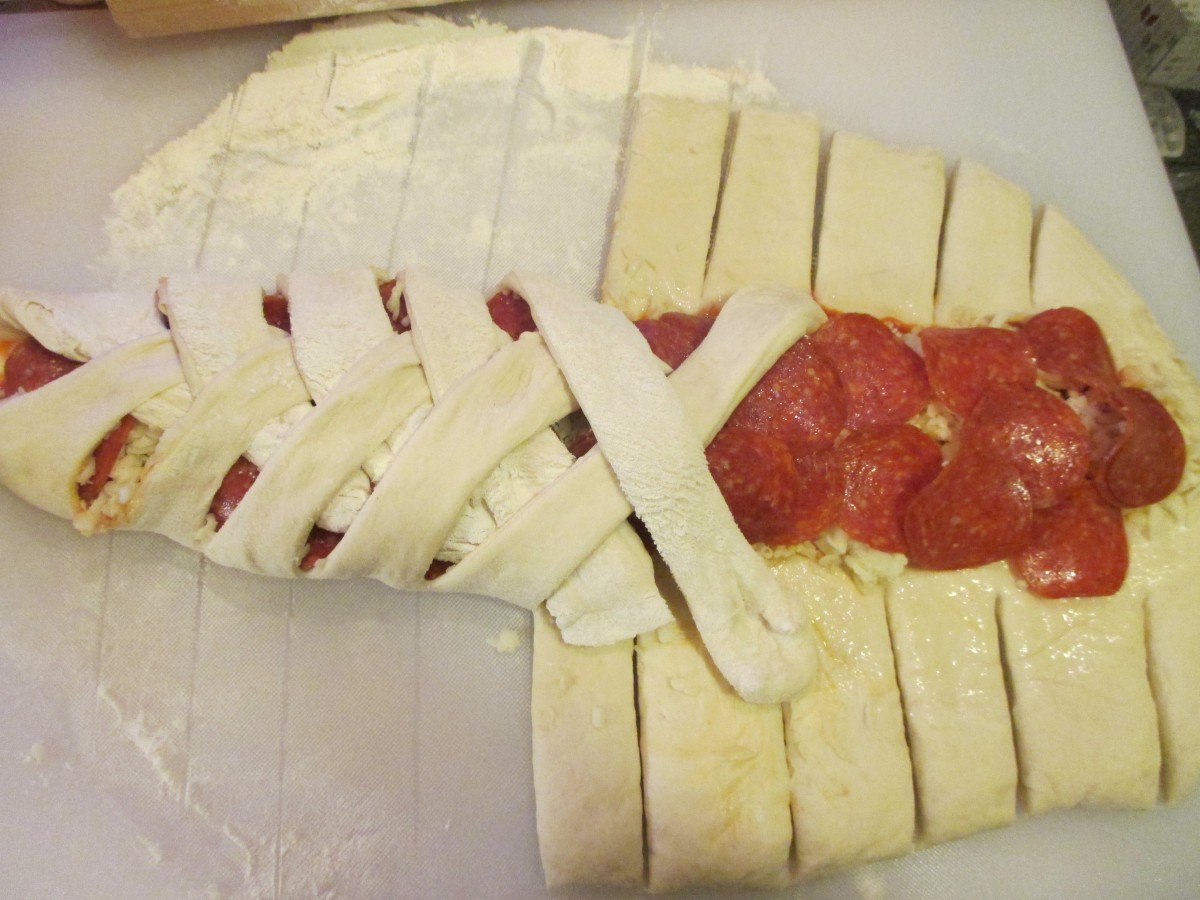
Cut strips of dough and fold over the filling
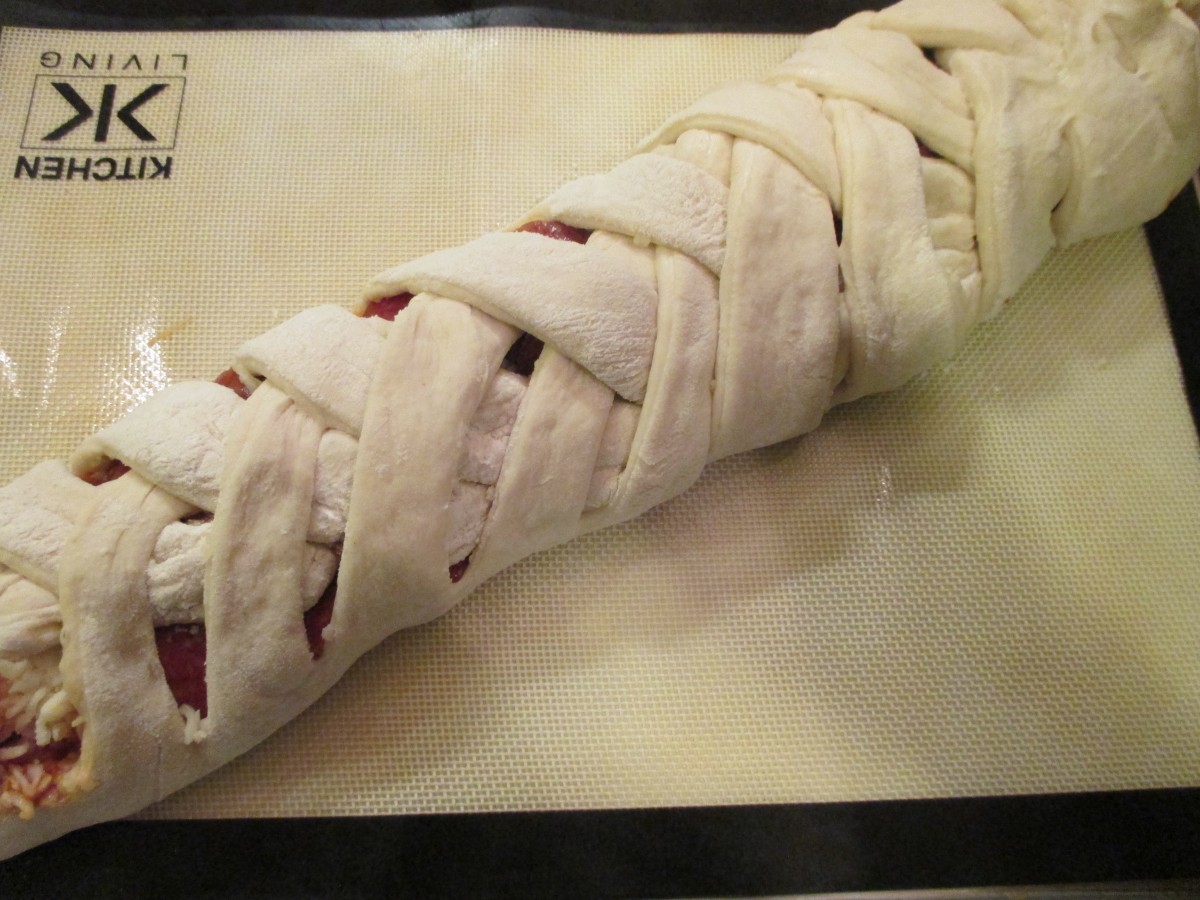
Transfer to baking sheet to rise.
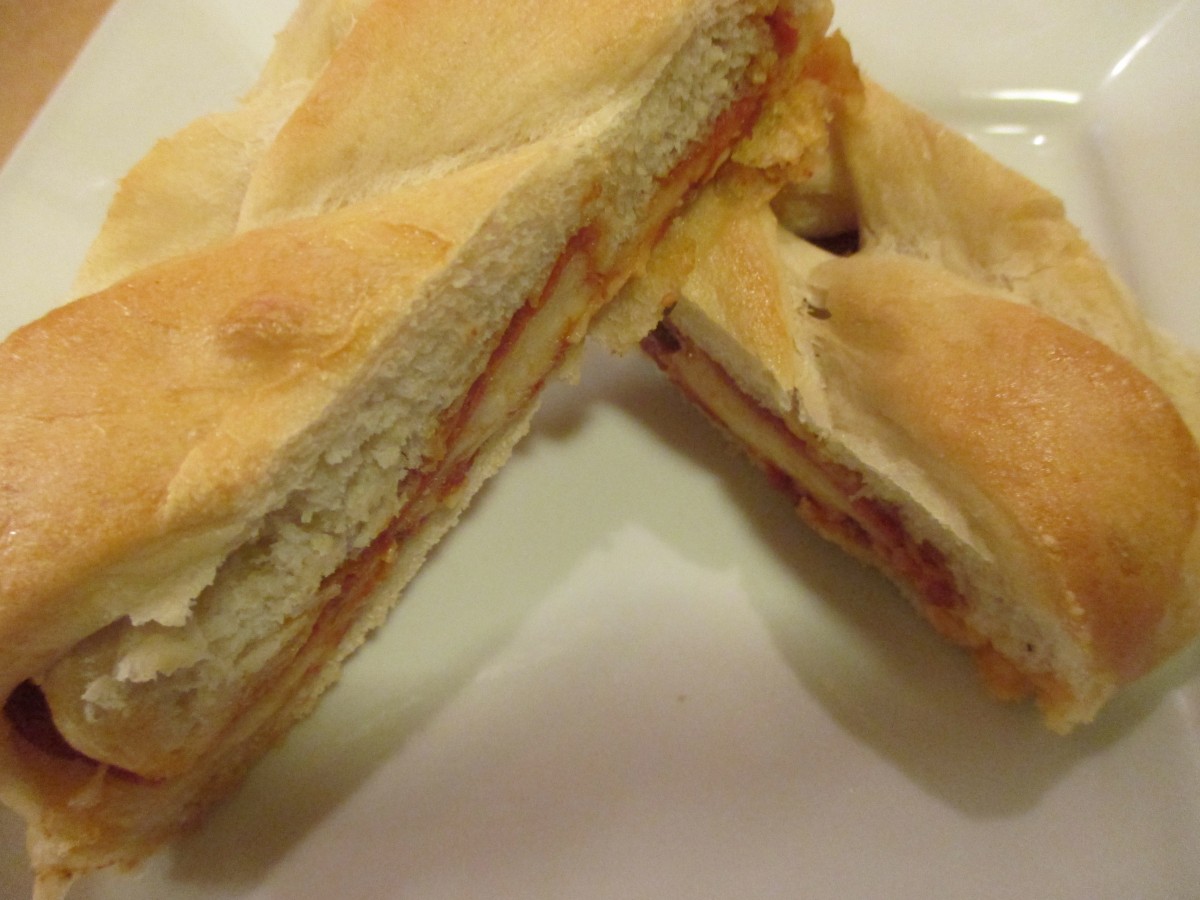
Cool a few minutes before slicing

Fresh Tomato Salads

Tomato season is too short around here. I can never get enough of what my mom called “real tomatoes”. The first few tomatoes never made it in the house. Warm from the sun, they were too tempting. We would pick them right off the plant and eat them. Deer have made it pretty impossible for me to grow tomatoes right now. Luckily, local farm markets have many beautiful tomatoes.
I am enjoying eating fresh tomatoes right now. Later in the season, I will purchase enough tomatoes to can and dehydrate to enjoy once the season is over.
I thought I would share a few of my favorite tomato salad recipes with you.
They are pretty simple. I think that is how it should be. When you have something as close to perfection as a ripe tomato, little more is needed.
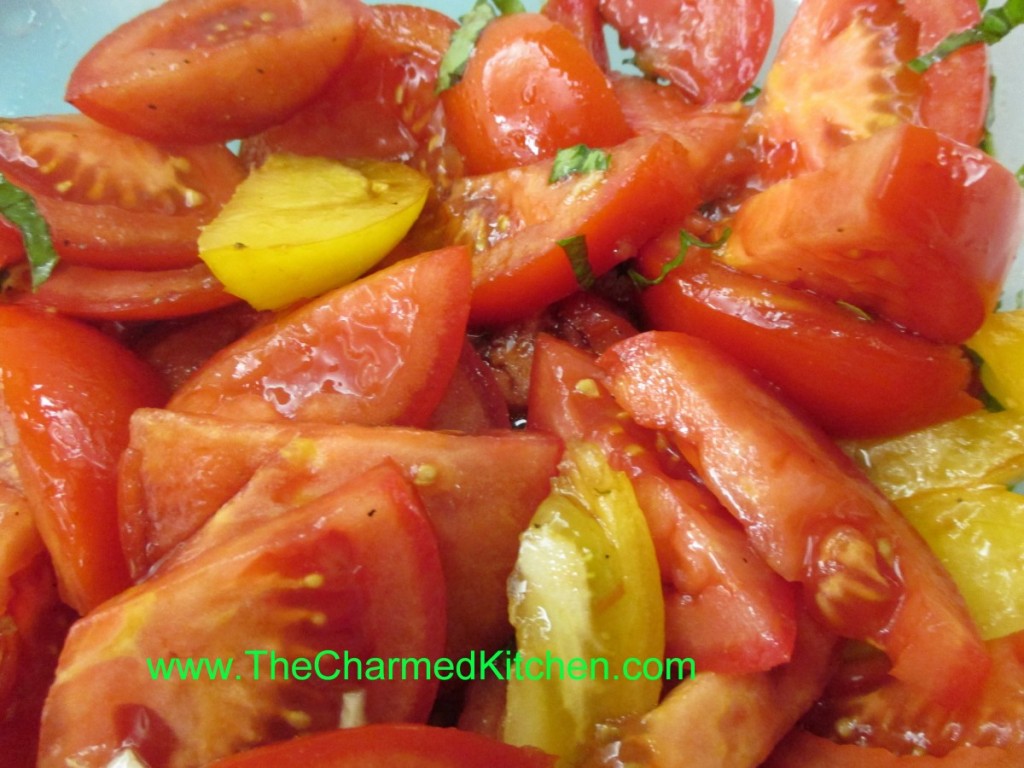
Marinated Tomato Salad
3 large tomatoes, cut in wedges, or 2 pints cherry tomatoes, halved
1 T. olive oil
1 clove garlic, minced
2-3 basil leaves, cut into thin strips
2 T. balsamic vinegar
salt and pepper to taste
Combine ingredients and serve at room temperature. Serves 4-6.
Tomato and Feta Salad
3 tablespoons crumbled feta cheese
12 cherry tomatoes, thinly sliced
1/2 sweet onion, diced
1 tablespoon olive oil -I used a lemon infused olive oil
1 tablespoon lemon juice
Salt and pepper to taste
In a bowl, mix the feta cheese, cherry tomatoes, onion, olive oil, and lemon juice. Add salt and pepper to taste. Serve immediately. Serves 2.
Warm Pasta Salad
1 lb. Plum tomatoes, chopped
1 medium sweet onion, chopped
4 oz. Fresh mushrooms, sliced
2 cloves garlic, minced
¼ c. fresh parsley, chopped
1 T. dried basil or 1/4 c. chopped fresh basil
1 T. capers, optional
1 t. dried oregano
½ c. olive oil
¼ c. red wine vinegar
3 T. balsamic vinegar
Dash of hot red pepper flakes
Salt to taste
1 lb. Uncooked pasta
Combine all ingredients, except pasta and chill overnight. Cook pasta, drain and toss with tomato mixture. Mixture should be served right away . Serves 6.
BLT Salad
6-8 slices bacon
2 slices rye bread
2 slices Swiss cheese
5 c. torn up lettuce or mixed greens
3 T. olive oil
2 T. apple cider vinegar
1 T. balsamic vinegar
Salt and fresh ground pepper
2-3 tomatoes, diced
Cook bacon until crisp. Remove from pan, drain and crumble. Remove most of the bacon grease from the pan. Make a sandwich with the rye bread and the Swiss cheese. Toast in the skillet over medium heat until golden brown and cheese is melted. Set aside. Place lettuce in bowl and toss with the oil to coat the leaves. Toss with the vinegars and season with salt and pepper to taste. Add the tomatoes and the bacon and toss. Cut the sandwich into cubes and place on the top of the salad. Serves 2.
Note: you can make two sandwiches if you want more bread and cheese in the salad.
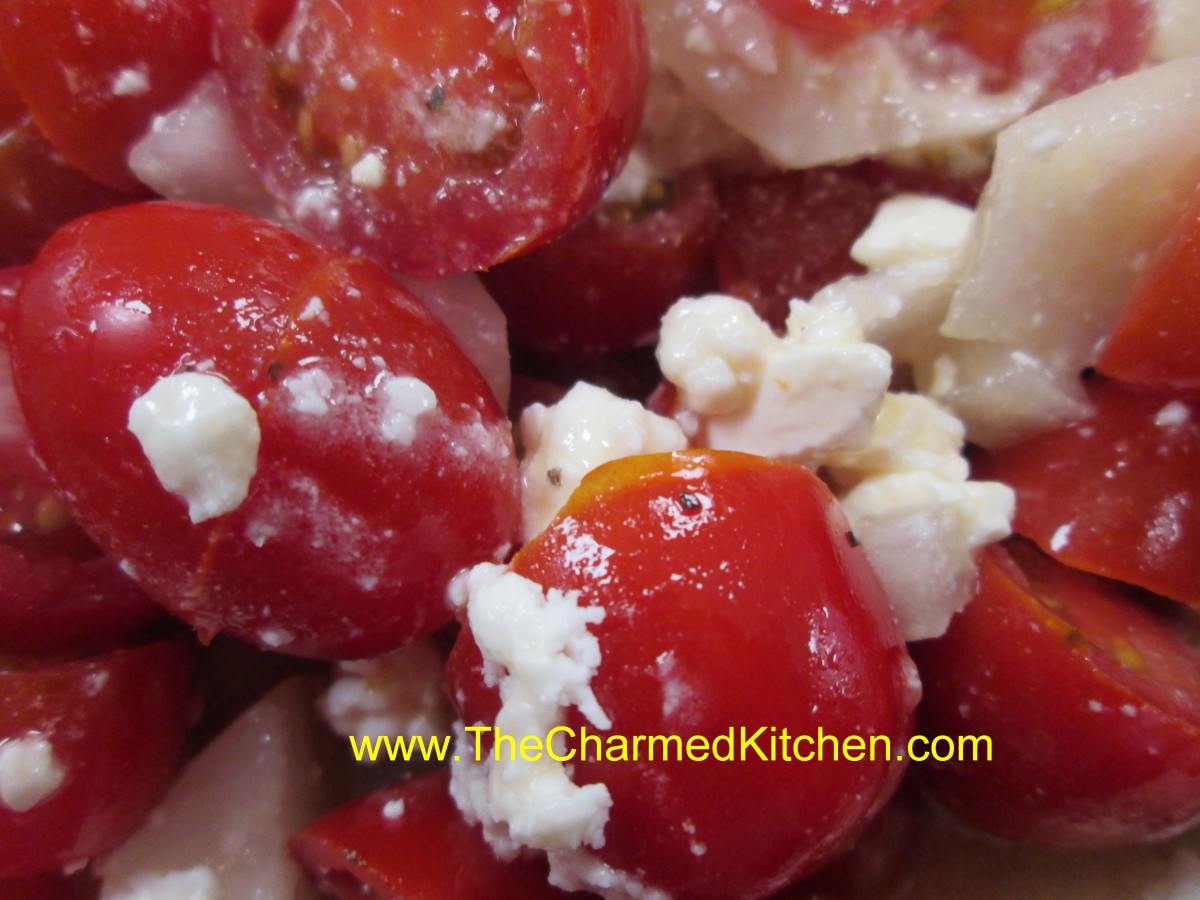
Tomato Feta Salad
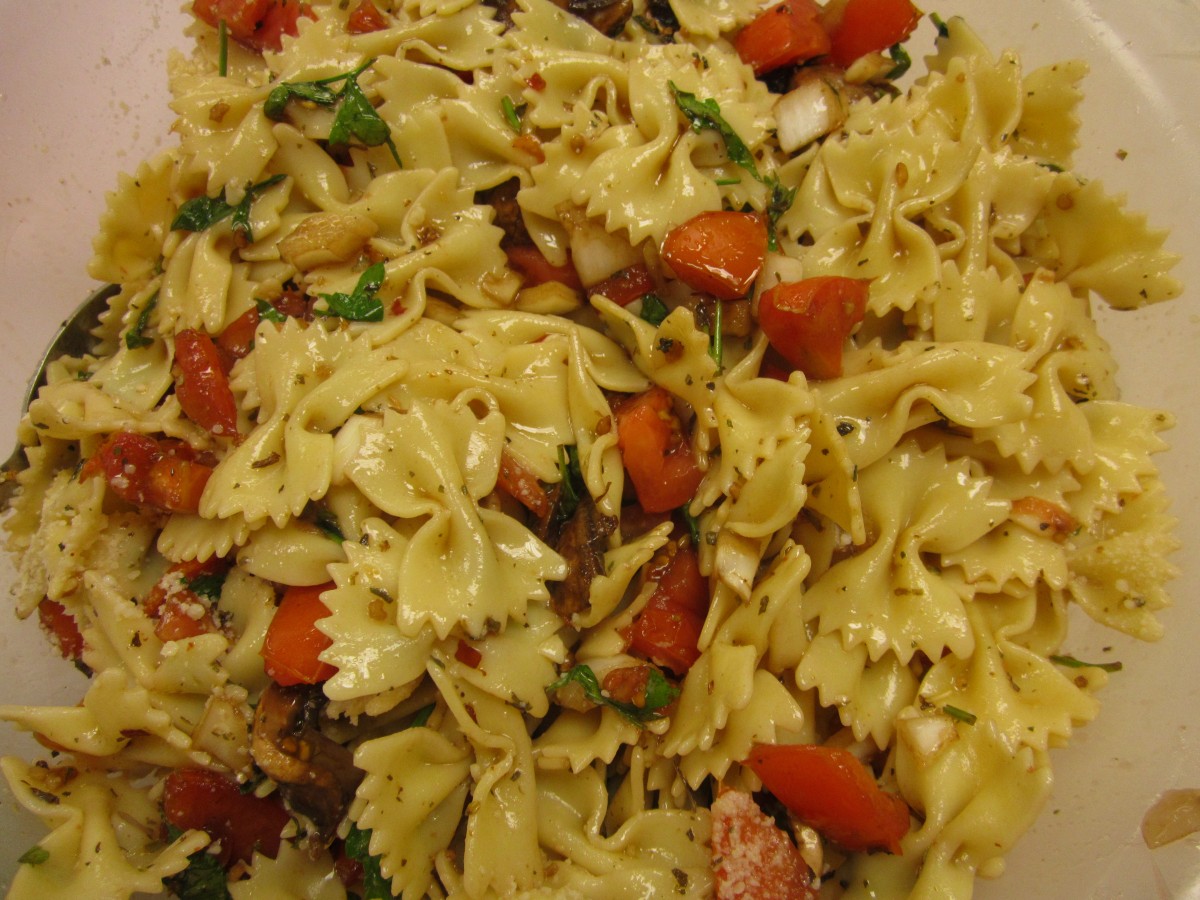
Warm Pasta Salad

BLT Salad
Artichoke Dip

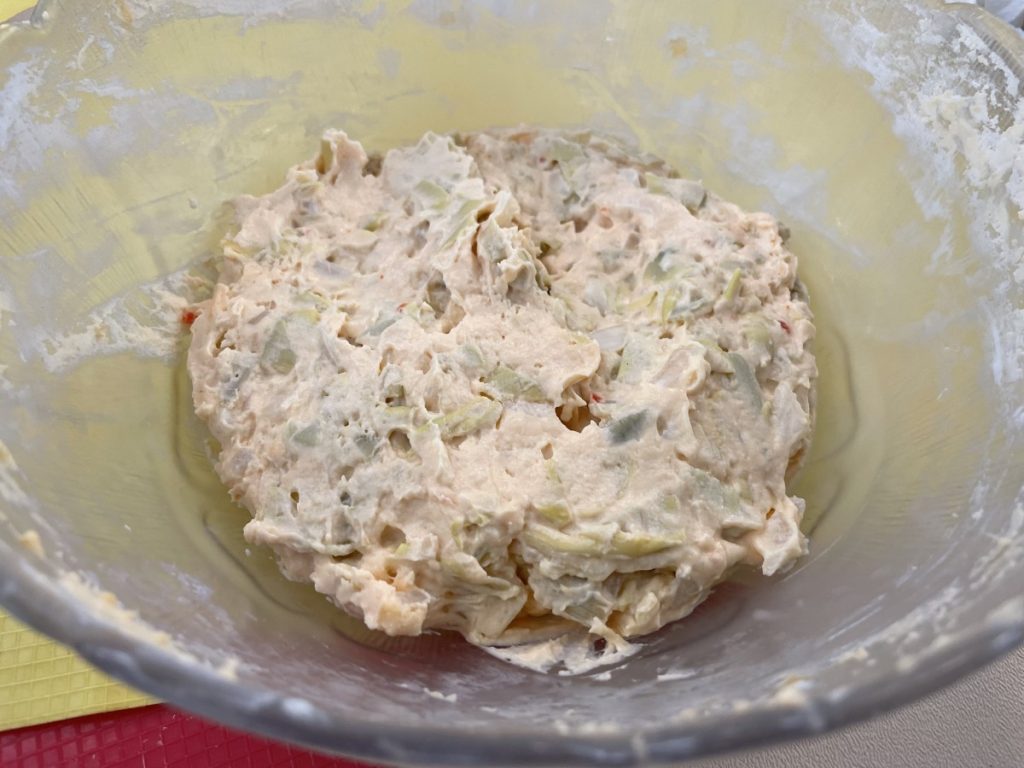
This dip is fast and easy to make. The kids mad it in camp and ate is up quickly. I love recipes that are simple and still taste good. we did the original recipe, but you can add spinach for a spinach artichoke dip.
Artichoke Dip
1 (12-14 oz.) can artichoke hearts, drained and coarsely chopped
8 oz. cream cheese, cubed
4 oz. shredded cheddar cheese
½ c. diced onion
¼ c. Italian dressing
Dash of hot sauce
Combine all ingredients in microwave safe dish and heat on high for 4-5 minutes. Stir and return to microwave, heating 2-4 minutes more. Serve with breads or crackers. You can also add a 10 oz. box of frozen spinach, thawed and drained well to make a spinach-artichoke dip.


