Busha’s Beet Soup


This colorful, tasty soup, was first made for me by my Busha, my Polish grandmother. Beets are a big ingredient in Eastern European culture. My Mom cooked with them, too.
I have fond memories of spending time with my Busha. I stayed with her on weekends a few times. One of those weekends, she taught me how to make a wonderful coffee cake. I still have the index card where I wrote down the recipe as she went along making it. Busha didn’t write her recipes down much.
Another time, she made beet soup. I loved it. I think the color is what pulled me in. I was a big fan of pink back then. I still am, especially when it comes to this soup.
I love to use fresh, raw beets, when possible. You can use cooked beets, or even canned, if you like. Some time I use frozen beets.
I make homemade spaetzle, but other pasta or cooked, diced potatoes are good, too.
So here is the recipe for the soup and the spaetzle. I always think of Busha when I make it.
Busha’s Beet Soup
1 large onion, sliced thin
oil
5-6 medium beets, about 2 pounds
5-6 cups beef, chicken or vegetable stock
1 c. dairy sour cream
1 t. dill weed
cooked spaetzle, recipe follows
In soup pot, sauté onion in oil until starting to brown. Meanwhile, peel and dice the beets. You should end up with 5-6 cups of cubed beets. Add beets and stock to pot and bring to boil. Cover and turn down to a simmer. Cook until beets are tender, about 20- 25 minutes. Place sour cream in small bowl and ladle in a little of the hot soup, whisking until smooth. Add another ladle of soup and whisk again. Pour this mixture into pot of soup along with the dill weed. Serve with the spaetzle. Serves 4-5.
Note: You can also pre-cook the beets or use canned beets. Trim off leaves of beets, leaving 2 inches of stem. Leave roots intact. Boil beets in water until tender, which can take as little as 20 minutes for tiny beets or 45 minutes for the large ones. Cool in bowl of ice water and then slip off the skins. Dice and add to soup as if the beets were canned. You don’t need the long cook of fresh beets. Just bring soup up to a simmer.
If you prefer, serve the soup with diced boiled potatoes or kluski, rather than the spaetzle.
You can serve the sour cream on the side, rather than incorporating it into the soup, then allow people to add a dollop of sour cream to individual bowls. Polish beet soup usually adds the sour cream and Russian style is to dollop on the top. Both versions taste good.
Spaetzle
3 eggs
1/2 c. half and half or evaporated milk
1/2 t. salt
1 1/2 c. flour
Combine all ingredients and let rest 30 minutes. Drop by small spoonfuls into boiling water. Cook until they float and puff up, about 5 minutes. Drain and serve with soups, stews, sauces or buttered.
Pear Coffee Cake

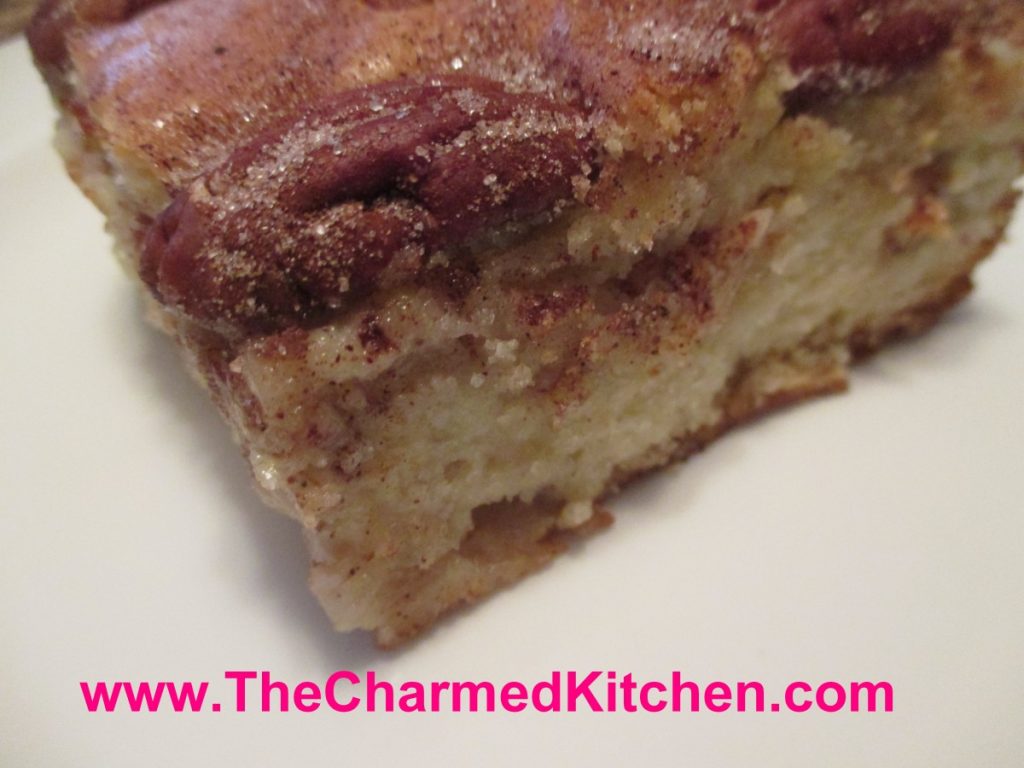
This may be one of my favorite pear desserts. I combined ripe pears with pecans and cinnamon sugar to create this moist and flavorful cake. I had Bartlett pears, but use whatever pears you have on hand. They should be ripe, but still firm. In the recipe directions I say to have the pears peeled and sliced, and ready to go in the cake. I actually made the batter first, then prepped the fruit. Mostly because I was distracted and forgot. It worked out just fine. The upside was that the pears did not have a chance to discolor, and I didn’t have to put them in lemon water until ready to use.
The cake is wonderful served all on its own, but I also enjoy topping it with a scoop of ice cream or whipped cream.
Pear Coffee Cake
1 c. oil- I like to use olive oil or avocado oil
4 eggs
1 t. vanilla
1/3 c. orange or lemon juice
3 c. flour
2 c. sugar
3 t. baking powder
¼ t. salt
3-4 pears, peeled, cored and sliced
½ c. sugar
1 T. cinnamon
¾ c. toasted pecan halves or pieces, optional
Grease a 9×13 inch pan. Preheat oven to 350-degrees. Combine oil with eggs, vanilla and juice until well blended. In a separate bowl, mix dry ingredients and add to egg mixture. Beat together until batter is smooth. Batter will be thick. Combine the ½ cup sugar with the cinnamon. Set aside. Place ½ of batter in prepared pan. Arrange pear slices on batter and sprinkle on ½ of the cinnamon mixture. Pour on remaining batter and top with the pecans, if using. Sprinkle with remaining sugar mixture. Bake 50- 60 minutes or until toothpick inserted in cake comes out clean. Cool before slicing. Serves 10-12.
Pink Applesauce

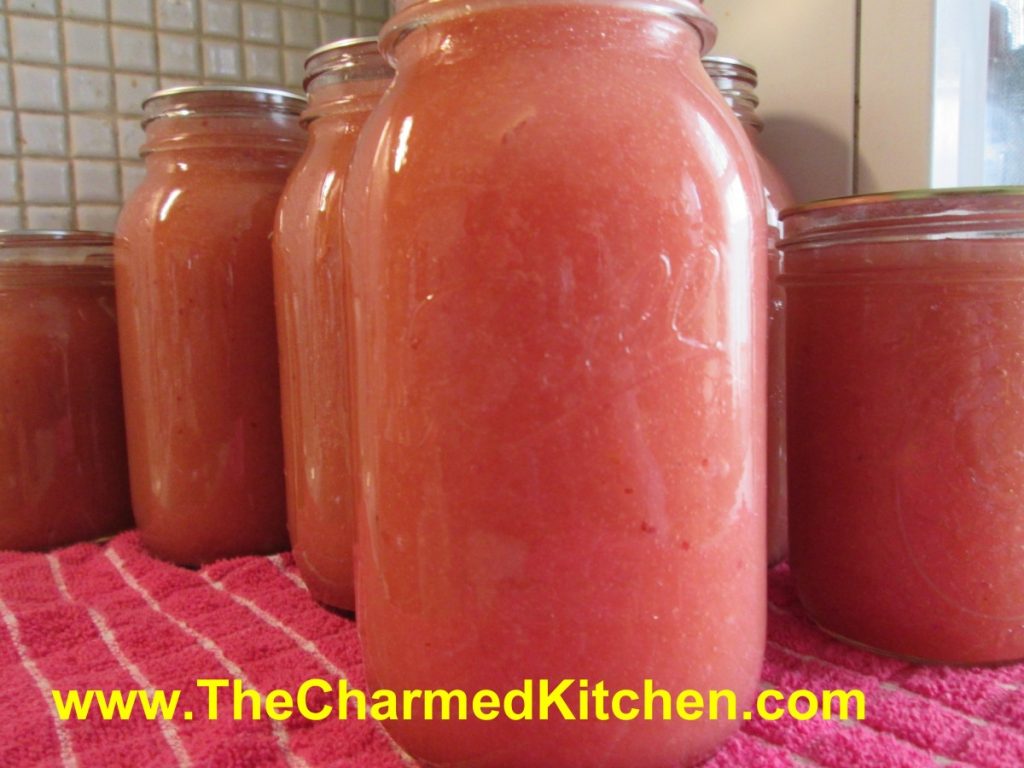
I really enjoy the flavor of homemade applesauce. I try to can at least a few batches this time of year.
I decided to mix things up a little by making a batch of applesauce with cranberries. It came out a pretty shade of pink. The cranberries also added a nice tartness to the mix.
You don’t have to add sugar, if you don’t want to. You add the amount of sugar you like, or leave it out completely. I like to mix different varieties of apples, for different flavor in your sauce.
You can also freeze the mixture if you don’t want to can it.
Pink Applesauce
60 medium apples, I used mostly Melrose and some Jonathans
12 oz. cranberries
water*
1 c. lemon juice
sugar to taste
Peel and core apples. Put in water with some ascorbic acid, citric acid or lemon juice to prevent discoloration. Place apples in a pot with enough water* to prevent sticking and add the cranberries and lemon juice. Cook over medium high heat until soft. I wanted smooth applesauce, so I ran the cooked apple mixture through a food mill on the medium blade. Return apple mixture to pan and bring to a boil. Sweeten with sugar, if you like, or leave unsweetened. Have water bath full of boiling water and have hot, clean canning jars and lids and rings ready. Ladle hot applesauce into hot jars, leaving 1/2 inch of headspace. Wipe rims and apply lids. Process in a boiling water bath for 20 minutes for pints or quarts. Turn off heat and let jars stand in water bath 5 minutes before removing. Set in a draft free area to cool down. Yield: 8 quarts or 16 pints.
*rather than add water, to prevent the apples from sticking, you can use cider or apple juice instead.
Homemade Caramel Apples


Making caramel apples is a wonderful childhood memory for me. Every Autumn, we would make a batch. We used those little store-bought caramels. I was often the one tasked with unwrapping them. I can remember unwrapping one after the other. It seemed to take forever.
I wanted to make my own caramel, so that is what I did. It is so much better than the store-bought version. Still, in the end, use what works for you.
Caramel is not that hard to make. You do need to keep an eye on it. Stir constantly. Just a hint, be sure your candy thermometer is really secure. Mine was a little slippy on the pan I was using. At one point the thermometer slid into the caramel. Not what you want to have happen!!!
Once dipped in the caramel, you can dip the bottom of the apples in nuts, pumpkin seeds, sprinkles, cereal, or even popcorn.
Homemade Caramel Apples
1/2 c. butter, cut in cubes
2 c. packed brown sugar
1 c. corn syrup*
pinch of salt
1 can sweetened condensed milk
2 t. vanilla
8-12 apples
chopped nuts, pumpkin seeds, cereal, sprinkles, popcorn for dipping the bottoms of the caramel apples, optional
In heavy saucepan, combine the butter, sugar, syrup and salt. Bring mixture to a boil, stirring constantly. This will take about 10 minutes. Add milk and bring mixture up to 248 degrees. Remove from heat. Stir in vanilla. Place a Popsicle stick, skewer or chopstick down the center of each apple. Dip apples in the caramel, allowing excess to drip off- or not. Dip bottoms of apples into nuts, seeds, sprinkles or whatever ingredient you picked. Place on wax paper and allow to set up. If you don’t want to dip the bottoms in anything, place the dipped apples on lightly buttered wax paper. Cool before serving. Makes 8-12 caramel apples.
Note: You could also use pears in the recipe.
*If you don’t have corn syrup- or don’t want to use it here is a way to make a substitute for it.
Sugar Syrup- corn syrup substitute
3 cups granulated sugar
1 cup Water
1/2 tsp. Cream of Tartar
1/4 t. salt
Combine ingredients in a large saucepan. Bring to a boil and cover the pot. Reduce to a simmer and cook covered for 5 minutes. Uncover and cook to soft-ball stage. Stir frequently.
Soft ball stage occurs at 235-245 degrees. This stage can be determined by dropping a spoonful of hot syrup into a bowl of very cold water. In the water, use your fingers to gather the cooled syrup into a ball. If it has reached soft-ball stage, the syrup easily forms a ball while in the cold water, but flattens once removed from the water.
Remove from heat. Cool and store at room temperature. It will keep well for a month or two.
Bacon, Spinach and Mushroom Quiche


There seems to be an almost endless number of fillings for quiche. My most recent combination of bacon, spinach and mushrooms might be a new favorite. I think what made this one special is that I cooked the mushrooms in the bacon fat, after cooking the bacon. It really infused the whole quiche with that wonderful, smoky bacon flavor.
I defrosted a package of frozen spinach, but didn’t use all of it in the quiche. Not sure why not, but I would use it all the next time.
I baked my bacon and the mushrooms, but you can cook them both in a skillet, if you prefer. I had just washed my stove and didn’t want to get it dirty. Plus, I really like to bake bacon.
Here is the recipe. Enjoy.
Bacon, Spinach and Mushroom Quiche
1 unbaked pie crust – enough for a deep dish pie
4 oz. diced or shredded cheese – I like a sharp cheddar
2 T. flour
½ lb. bacon
1½ cup sliced fresh mushrooms
1 (10oz.) package frozen spinach, thawed and squeezed dry
1 c. milk or half and half
3 eggs, beaten
2 T. fresh chopped parsley
Hot pepper sauce to taste
salt and pepper to taste
Place bacon slices on a jelly roll pan and bake in a 350-degree oven until crisp, about 15 minutes. Remove bacon from pan and drain on paper towels. Place the mushrooms in the same pan you just cooked the bacon in and return to the oven. Cook about 15-20 minutes, or until mushrooms are cooked and even a little brown. Drain mushrooms on paper towels. Turn oven up to 400 degrees.
While mushrooms are cooking, crumble bacon. Start to prep quiche while mushrooms cook. In 9-inch (deep dish) pie pan place the crust. Toss cheese with the flour and place in crust. Add the bacon and spinach to the crust. Add the mushrooms. Combine milk with the eggs and add seasonings to taste. Pour over the bacon-spinach mixture. Place pan on a baking sheet to collect any drips and place in a preheated 400 degree oven. Bake for 30 minutes then turn down oven to 325 and continue baking until quiche is firm near the middle, about 25-30 minutes more. To test for “doneness” insert a butter knife about an inch from the center of the quiche. If it comes out clean, the quiche is done. Serves 4-6. Freezes well.

Sweet Potato Muffins – Gluten Free

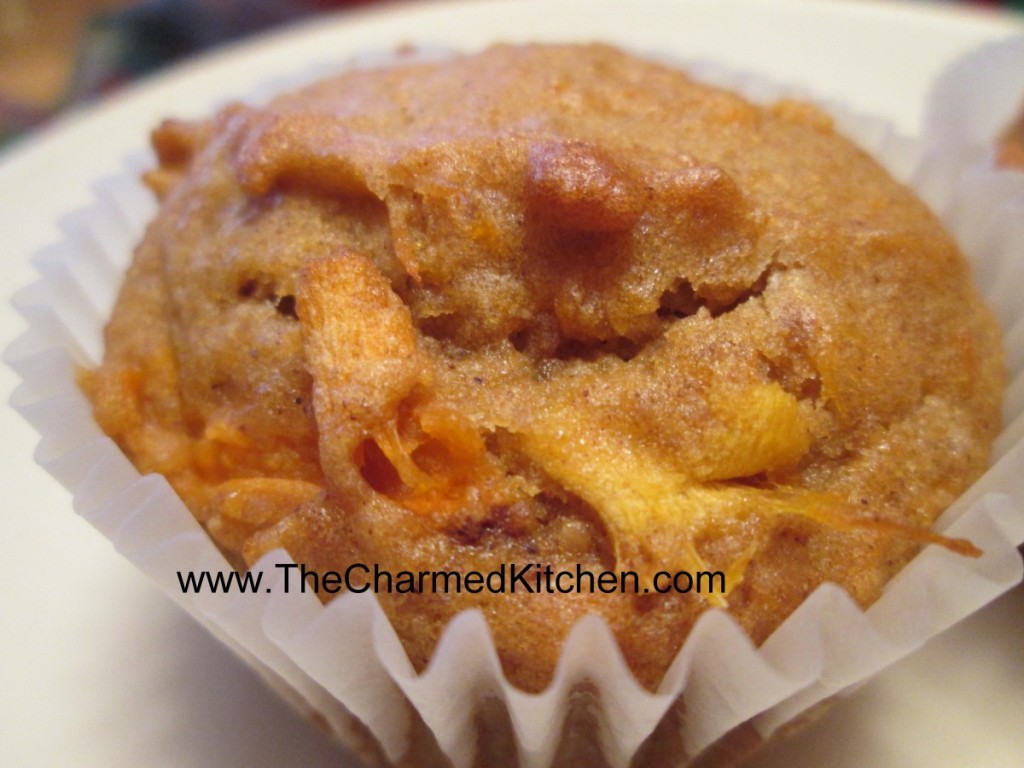
When a family member was diagnosed with Celiac disease years ago, the selection of gluten free foods was pretty limited. Happily, today going gluten free is much easier. I buy a gluten free flour at Costco that can be used in any recipe that calls for all purpose flour. Gluten free flour is available in many grocery stores, too.
Gluten free flour seems to bake, or at least brown, a little faster, so you have to keep an eye on what you use it in. It doesn’t get much easier than that. In this recipe you could also use all purpose flour, if that is what you prefer. Just increase baking time 3-5 minutes.
The muffins are moist and not too sweet. They are great for breakfast, snacks or even as a dessert. They could also be served with lunch or dinner in places of rolls.
They freeze well so you can make a batch and freeze the extras for later. Wonderful for busy days when you don’t have time to make them.
Sweet Potato Muffins- Gluten Free
4 eggs, slightly beaten
3/4 c. oil
1 c. sugar
2 c. cooked sweet potatoes, mashed
1 3/4 c. gluten-free flour
1 T. cinnamon
1 t. nutmeg
2 t. baking powder
1 t. baking soda
3/4 t. salt
Blend together in large bowl eggs, sugar, sweet potatoes and oil and set aside. In another bowl combine dry ingredients. Add dry ingredients to egg mixture and stir until well blended. Pour into paper-lined muffin tins, filling about 2/3 full. Bake in a preheated 350-degree oven for 20-25 minutes or until muffins spring bake when touched lightly. Makes 30-36.
These freeze well.
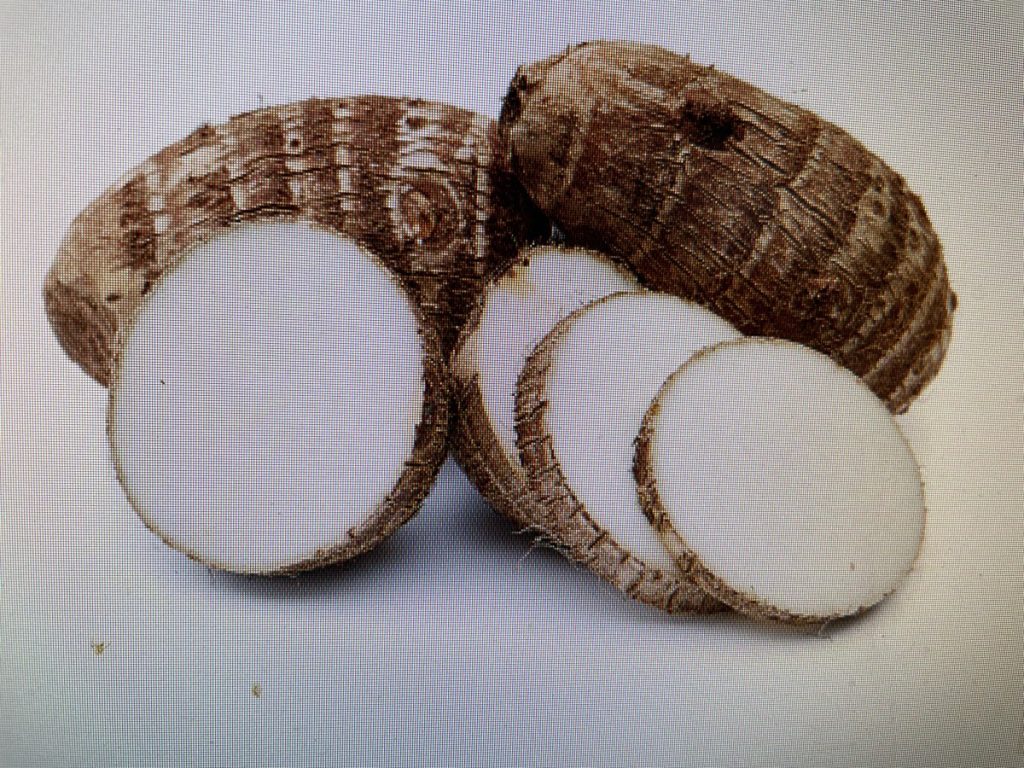
Sweet Potatoes or Yams?


I just wanted to clear something up. With all the sweet potato and “yam” recipes circulating, it seemed like a good time for this post. Are you eating sweet potatoes or yams?
Well, if you live in North America, you are having sweet potatoes. No matter what the produce department labels them, everything in the store is, botanically speaking, a sweet potato. Red, orange and yellow, big and small – all are sweet potatoes.
So where did the yam thing start? Well, many years ago the state of Louisiana had an abundant crop of sweet potatoes. They wanted to sell them in a competitive marketplace, so they decided to call them yams. Just a name change in an effort to give their product an edge over the competition. You’ll often still see them sold as Louisiana Yams. They aren’t yams, though. Louisiana Yams are, in fact, just sweet potatoes with a name change.
There are real yams- they are larger than sweet potatoes and quite starchy. They might be found at South American restaurants, or in specialty markets in the States, but they are NOT in your local grocery store.
A sweet potato by other name will taste as sweet.
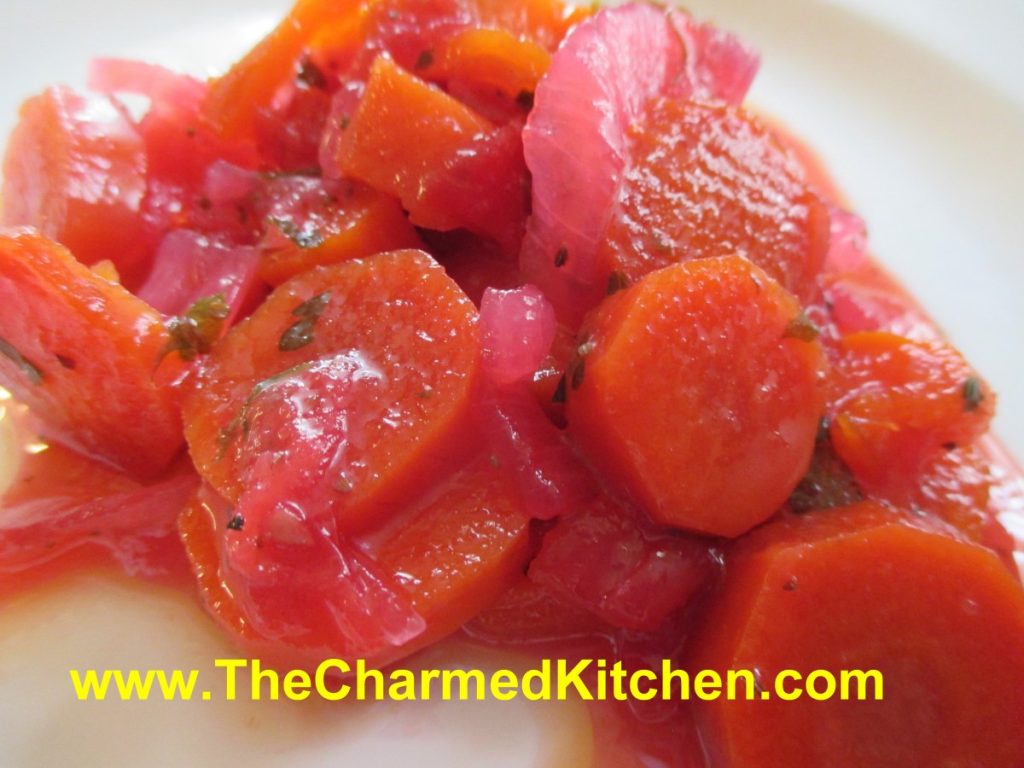
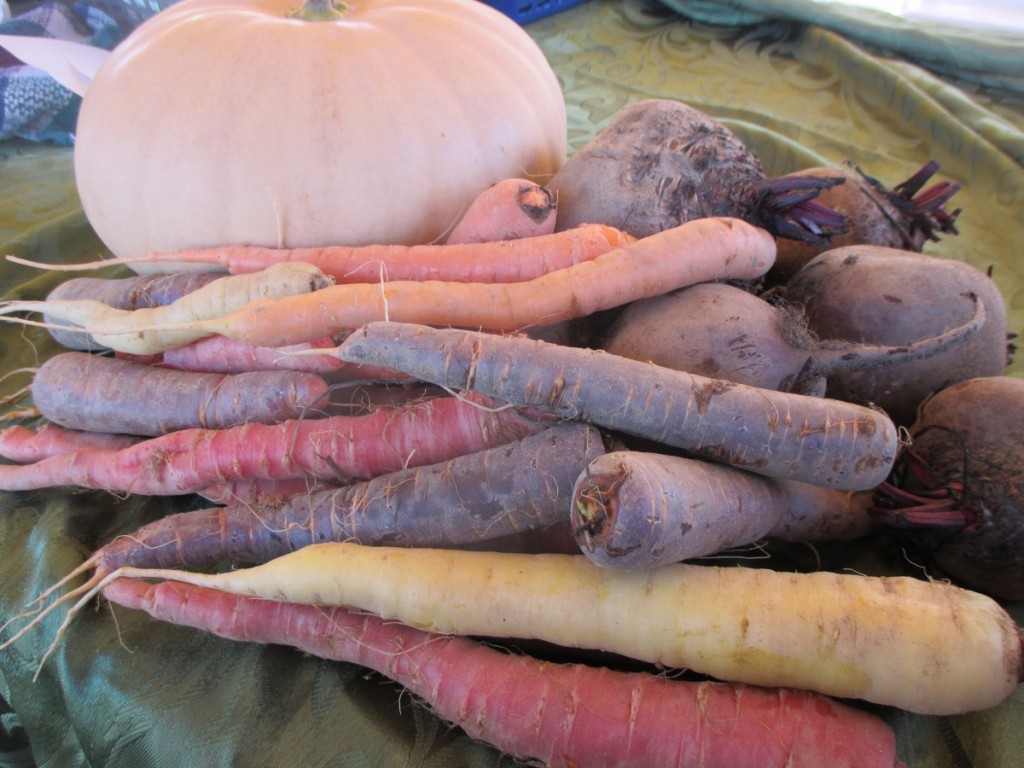
Pickled Rainbow Carrot Salad

This was one of those dishes where it came out great, but was not what I had planned in the beginning. Let me explain.
I had picked up some beautiful rainbow carrots at a local market. They come in colors ranging from yellow to purplish red. I wanted to make something special with them, highlighting their vibrant colors. I liked the idea of a kind of pickled carrot. Made up the recipe as I went along. I knew the flavors would go well with the rest of the dinner that was planned. The carrot salad worked out so well. Great flavors- but there was a problem.
I had used a red wine vinegar and by the time everything was done cooking, the color of the carrots had changed. They all looked, well, like regular carrots. No one knew the difference, except me. I felt bad that I had cooked all the color out of the rainbow carrots, but the flavor was good. I guess, in the end, that is what really matters.
So here is the recipe. Feel free to use what ever color carrots you like- it won’t matter in the end!!
Pickled Rainbow Carrot Salad
2 medium onions, peeled and sliced
3-4 cloves garlic, peeled
1 c. vinegar- red wine or cider vinegar preferred
1 c. water
1 ½ lbs. carrots, peeled and sliced
1 sweet pepper, seeded and chopped
2 small tomatoes, seeded and chopped
½ c. sugar
1/4 c. chopped fresh parsley
2 t. salt, or to taste
Fresh ground pepper to taste
1 t. ground ginger
Hot sauce to taste
1 bay leaf
In saucepan, combine onions and garlic with the water and vinegar and bring to a boil. Prepare other veggies while onions simmer for 10 minutes. Add remaining ingredients and simmer, covered about 20 minutes. Adjust seasonings. Let salad cool down, then store in fridge until ready to serve. Best served the next day. Remove bay leaf and garlic cloves before serving.
Martha’s Beets


I had picked up some beets from a produce market the other day. I have made this dish many times and it seemed like a good time to make it again. It is so tasty and easy to make. You just have to give the flavors time to develop.
This is a recipe that my friend Martha, made for us one chilly autumn afternoon, many years ago. The amounts are random for a reason. Just use what you have- more or less – and let the flavors blend together gently. That is what Martha did.
Full of earthiness and great fresh flavors it is always a favorite of mine. I always think of her, with great affection, when I make it. Miss you, my beloved friend.
Martha’s Beets
Oil
2 Onions, chopped
Potatoes, cut in big chunks, peeled, if desired, about 2 lbs.
1 bunch beets, with greens*
Chicken or vegetable stock, 2-4 cups, using as needed
Parsley
Salt and pepper
Cook beets in boiling water for 20 minutes. Cool and slip off skins. Cut up beets into chunks. In large pot, cook onions in oil until tender. Add potatoes and prepared beets with just enough stock to keep them from sticking. Cover and cook over medium-low heat until vegetables are tender. Meanwhile, chop up the beet greens. Add them to the pot and stir in. Cover and continue cooking until greens are tender. Toss in fresh parsley and cook 5 minutes longer.
* If you can’t find beets with greens, or if you like more greens, you can also add red Swiss chard in place of the beet greens.
Amaretto Pear Blintzes with Candied Almonds

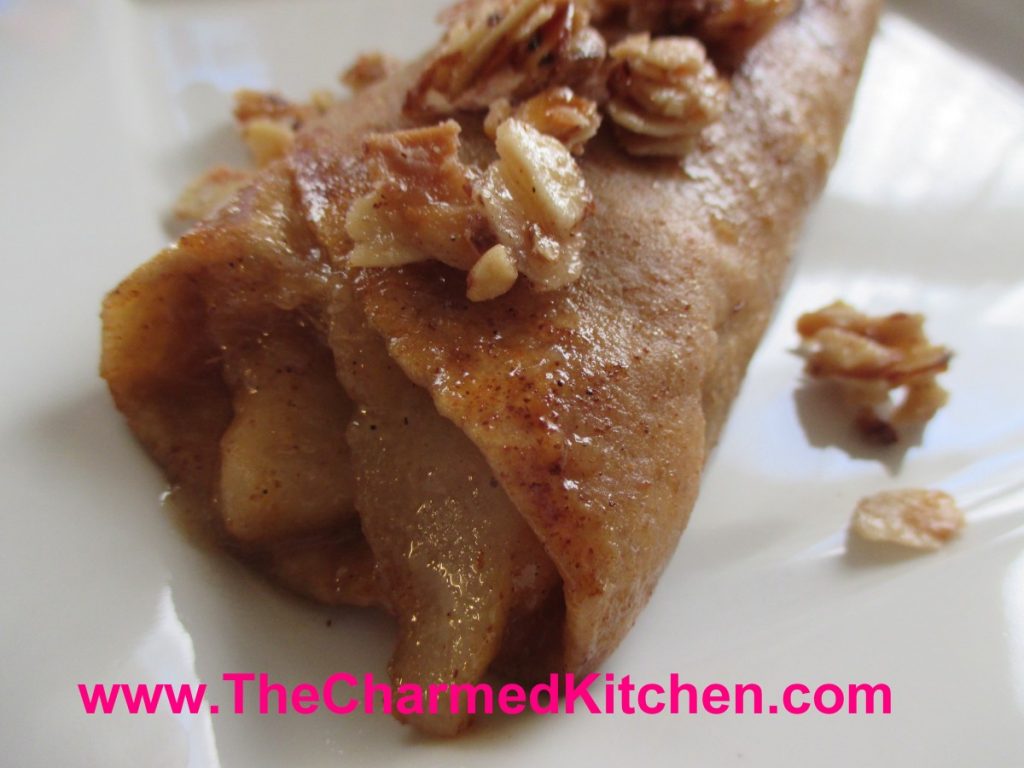
Sometimes you can start with the simplest ingredients and end up with something special. This recipe is a perfect example. I had fresh pears and flour tortillas. I wanted to make a brunch dish for a friend so I added a few more ingredients and ended up with these pear blintzes. I make fruit blintzes with tortillas pretty often. I wanted these to be different. I added Amaretto to the pears and made candied almonds as a topper.
They look like a lot more work than they are. They were simple to make.
My friend said they reminded her of apple pie. In fact, she didn’t believe me at first, when I said they were pears. If you like the taste of homemade fruit pie, but don’t have the time to bake, these are a nice option. Because they are barely cooked, the pears retain some shape. In a pie, pears tend to fall apart.
Since we had them for brunch, I left them plain, but these would make a great dessert topped with whipped cream or ice cream. Even a dusting of powdered sugar or a drizzle of caramel. Simple and quite flavorful.
Amaretto Pear Blintzes with Candied Almonds
Blintzes:
4 (8-inch) flour tortillas, I used whole wheat
2 oz. milk
2 T. butter
Filling:
4 pears, peeled, cored and sliced
½ c. brown sugar
2 T. butter
2 T. Amaretto
1 t. cinnamon
1 t. vanilla
Pinch of salt
Candied Almonds
¾ c. sliced almonds
½ c. sugar
¼ c. water
½ t. cinnamon
Place tortillas in shallow dish and drizzle the milk over them. Try to get some milk on each of the tortillas to soften them. While the tortillas are softening, prepare the filling. In medium skillet, combine pears with the rest of the filling ingredients and bring to a simmer. Cook on low heat for 3-4 minutes. Set aside. Combine almonds with the sugar, water and cinnamon in medium skillet. Bring mixture to a boil, stirring often. Cook until liquid is evaporated, about 5 minutes. Pour almonds onto a baking sheet lined with a silicone baking sheet or foil. Spread out and allow nuts to cool.
Place butter in skillet and start to heat up the pan. While pan is heating, divide pear filling among the 4 tortillas. Place filling along center of tortilla and fold up edges over, to cover the filling. Heat the tortillas, seam side down, in the pan until golden, turning to toast evenly on both sides. Remove from pan and place on serving plate. Top with some of the candied almonds. Serves 4.


